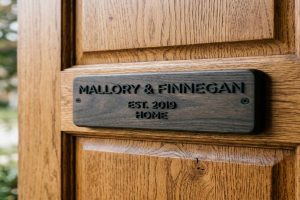
A wooden house sign can last 15 to 25 years outdoors. But only if it is protected correctly from the start. Without the right sealant, the right prep, and a basic yearly care routine, even wooden house name plates can start cracking, peeling, or rotting within two to three seasons.
This guide covers everything. From understanding exactly how weather damages wood, to choosing the right finish, applying it correctly, mounting the sign safely, and keeping it protected all year round.
📥 Free Resource: Download our Seasonal Wooden Sign Weatherproofing Checklist to protect your sign through every season.
At a Glance: The 4 Weather Enemies and How They Damage Wood
| Weather Enemy | How It Attacks | Result | Primary Defense |
| UV radiation (sunlight) | Breaks down lignin in wood surface fibers | Graying, surface cracking, fiber loss | UV-inhibited spar urethane or marine varnish |
| Moisture (rain, dew, humidity) | Wood absorbs water, swells, then contracts as it dries | Warping, cracking, finish delamination | 6-surface sealing plus air gap behind sign |
| Freeze-thaw cycling | Water in cracks freezes, expands 9%, splits wood | Structural cracking and finish rupture | Pre-sealing to stop water entry plus a flexible finish |
| Abrasion (wind, debris, cleaning) | Surface erosion strips finish layer over time | Raw wood exposure and faster moisture uptake | Periodic re-sealing on schedule |
Use this table first. It tells you which of the four enemies is most likely to attack your sign based on where you live and where the sign is mounted.
What Actually Causes Weather Damage in a Wooden House Sign?
Weather damage in a wooden sign is not random. It follows a clear, predictable sequence. It starts with a small gap in the protective finish and ends with visible cracking, rot, or structural failure if left unchecked.
The main driver is moisture cycling. Wood absorbs water from rain and air, then releases it when conditions dry. Each cycle makes the wood swell and then shrink. Because wood swells more across the grain than along it, this puts uneven stress on the finish sitting above it. Over enough cycles, that finish cracks and peels at the edges and corners. This opens a path for water to reach the raw wood below.
Next comes UV radiation. Sunlight breaks down lignin, which is the natural material that holds wood fibers together. Once lignin is degraded, the wood surface softens, turns gray, and develops tiny cracks. These cracks allow moisture to enter even a sign that was perfectly sealed the previous year.
Expert Note: Measuring the UV-driven lignin degradation rate on an outdoor cedar sign uses a UV fluorescence spectrometer operating at excitation wavelength 300nm and emission wavelength 350nm, following ASTM E275, which is the Standard Practice for Describing and Measuring Performance of Ultraviolet and Visible Spectrophotometers. A decrease in peak fluorescence intensity at 350nm of more than 20 percent across a 3-month outdoor exposure cycle confirms active lignin photodegradation. This means a UV-inhibited topcoat reapplication is needed on the Western red cedar substrate meeting AWPA UC3A, which is the outdoor above-ground use category for coated wood. Coating UV absorbance is cross-checked at 340nm per ASTM G154, which covers Standard Practice for Operating Fluorescent Ultraviolet Lamp Apparatus for Exposure of Nonmetallic Materials, to confirm adequate UV inhibitor concentration in the spar urethane film.
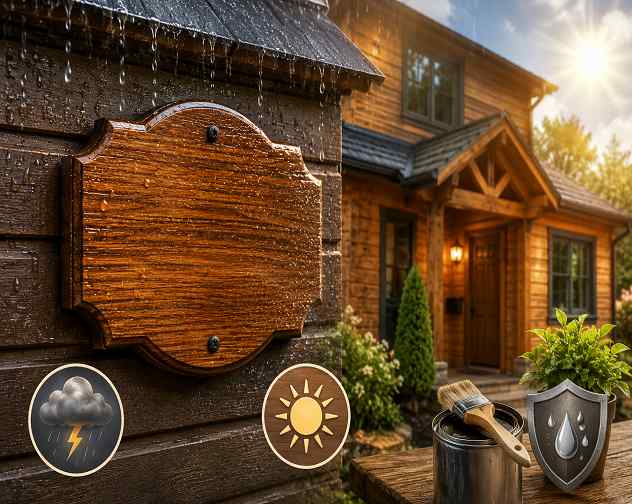
What Is the Right Wood Species for Weather Resistance?
The wood species you start with determines how much protection the finish needs to provide. Also, it determines how long the sign survives if the finish starts to wear thin. A naturally decay-resistant species gives the sign a backup line of defense.
Here is how common species compare for outdoor weather performance:
| Species | Natural Decay Resistance | UV Weathering Tolerance | Dimensional Stability | Best Finish | Outdoor Lifespan (Sealed) |
| Western red cedar | Excellent (thujaplicins) | Moderate (grays quickly) | Good | Spar urethane or oil | 15 to 25 years |
| Teak | Excellent (natural oils) | Very good | Excellent | Teak oil or spar urethane | 20 to 30 years |
| White oak | Very good (tyloses) | Good | Good | Marine varnish or spar urethane | 15 to 20 years |
| Redwood | Excellent (tannins) | Good | Excellent | Spar urethane or penetrating oil | 15 to 25 years |
| Iroko | Good | Good | Good | Spar urethane | 12 to 20 years |
| Pine (treated) | Moderate (treated only) | Poor | Low | Exterior paint plus primer | 8 to 15 years |
| Marine-grade plywood | Good (if edge-sealed) | Moderate | Good | Exterior latex paint plus sealer | 10 to 18 years |
For maximum weather resistance with minimal maintenance, teak or redwood is the best starting point. Cedar performs nearly as well at lower cost. It is also the preferred species for sandblasted rustic signs because its soft grain gives the best blast texture.
Expert Note: Confirming the dimensional stability of a wooden sign blank before outdoor finishing uses a dial caliper with 0.01mm resolution to measure the width of the sign panel at three points across the grain. Readings are taken at 30 percent relative humidity and at 80 percent relative humidity. The dimensional change coefficient is calculated per ASTM D1037, which covers Standard Test Methods for Evaluating Properties of Wood-Base Fiber and Particle Panel Materials. A dimensional change of more than 2 percent across the grain between the two humidity conditions identifies a high-movement blank. This means the sign needs either a more stable species, an edge-grain orientation, or a penetrating oil finish rather than a film-forming spar urethane to reduce finish stress during moisture cycling.
Which Finish Provides the Best Weather Protection for a Wooden Sign?
The finish is the primary barrier between the wood and all four weather enemies. Choosing the wrong finish type causes most of the premature failures seen in outdoor wooden signs. Getting the right product and applying it correctly makes the biggest single difference to how long your sign lasts.
Here is how the main finish types compare across every key weather protection factor:
| Finish Type | Flexibility | UV Resistance | Water Barrier | Freeze-Thaw Tolerance | Recoat Interval | Appearance |
| Spar urethane (marine grade) | High | Good with UV inhibitor | Excellent | Good | 1 to 2 years | Clear, natural wood visible |
| Marine varnish | High | Excellent | Excellent | Good | 1 to 2 years | Slightly amber, glossy |
| Penetrating exterior oil | Excellent (no film to crack) | Fair | Fair | Excellent | 6 to 12 months | Natural, matte |
| Epoxy resin | Low to medium | Poor (yellows under UV) | Excellent | Poor (rigid, cracks in frost) | 5 plus years if UV-topcoated | Very glossy, glass-like |
| Exterior latex paint | High | Excellent | Good | Good | 3 to 5 years | Opaque, colored |
| Shellac plus exterior topcoat | Medium | Fair | Good | Moderate | 1 to 2 years | Warm amber base, any topcoat |
Spar urethane is the most widely recommended choice for clear-finish wooden house signs. Its additional oil content keeps it flexible through temperature swings. Also, a rigid finish on wood that moves with humidity is a structural failure waiting to happen. It cracks at the first severe freeze-thaw cycle, and each crack becomes a moisture entry point.
Epoxy resin is often marketed as the most protective option. But it is a poor choice for outdoor wood without a UV-resistant topcoat. Epoxy has no UV inhibitors and yellows visibly within one to two outdoor seasons. Also, epoxy is rigid at low temperatures and cracks under the expansion pressure of frozen water in the wood substrate.
Expert Note: Testing the flexibility of a cured spar urethane film on a cedar sign blank uses a mandrel bend test with a 1-inch diameter cylindrical mandrel per ASTM D522, which is the Standard Test Methods for Mandrel Bend Test of Attached Organic Coatings. A 150mm by 50mm cedar strip with the cured spar urethane film is bent around the mandrel at 0 degrees Celsius to simulate freeze conditions. A compliant outdoor-grade spar urethane film at 75 to 100 microns dry film thickness must not crack, craze, or lose adhesion when bent to 90 degrees at this temperature. A film that cracks at this temperature is too rigid for outdoor wooden sign applications in freeze-thaw climates and must be replaced with a more flexible formulation before the sign is installed.
How Do You Prepare a Wooden Sign for Weather Protection?
Preparation determines how well and how long the finish works. Even the best spar urethane fails within two seasons on a sign that was not correctly prepared before the first coat. This step is where most people skip corners and pay for it later.
Here is the full preparation sequence in the correct order:
| Step | Action | Tool or Product | Standard |
| 1 | Check moisture content | Pinless moisture meter | Target 9 to 14% MC per ASTM D4442 |
| 2 | Sand face and back | 120-grit then 220-grit sanding block | Smooth, dust-free surface |
| 3 | Round all edges | 80-grit sandpaper or router with 2mm roundover bit | Minimum 2mm radius on all edges |
| 4 | Remove all sanding dust | Tack cloth or compressed air | Zero dust before sealing |
| 5 | Apply knot sealer (if pine or cedar with resin pockets) | Dewaxed shellac or shellac-based primer | Seal resin pockets before topcoat |
| 6 | Apply thin first coat | Brush or foam applicator | Thin flood coat, allow full cure |
| 7 | Light sand between coats | 320-grit | Scuff only, do not cut through coat |
| 8 | Apply second and third coats | Brush or foam applicator | Full cure between each coat |
The edge rounding step is the most overlooked part of the whole process. Finish coats do not build up properly on sharp 90-degree edges. The surface tension of the liquid finish pulls it back from the corner, leaving a thin spot that cures to half the thickness of the rest of the surface. This thin spot is always the first place the finish lifts, cracks, or peels outdoors.
Also, always check moisture content before applying any finish. A sign blank above 14 percent MC traps water vapor under the finish coat. As the wood dries after sealing, that trapped vapor pushes the finish off the wood surface, creating bubbles and blisters within the first outdoor season.
Expert Note: Verifying sanding compliance and surface dust removal before applying spar urethane uses a reflected-light surface profilometer with 0.01 micron Ra resolution calibrated to ISO 4288, which covers Geometrical Product Specifications: Rules and Procedures for Assessment of Surface Texture. The target Ra for a cedar surface ready for spar urethane application is 2.5 to 5.0 microns. This provides an adequate mechanical key for the first coat without leaving scratches deep enough to show through the finished clear coat per ASTM D7091, which is the Standard Practice for Nondestructive Measurement of Dry Film Thickness of Nonmagnetic Coatings. After tack cloth wipe-down, the surface is tested with a white glove and must show zero visible particulate before the first spar urethane coat is applied.
How Do You Apply Spar Urethane Correctly for Maximum Weather Protection?
Application method is where many well-chosen products fail. Spar urethane applied too thickly, in the wrong temperature, or with the wrong tool produces a finish that bubbles, sags, or cures with poor adhesion. All of this reduces the outdoor lifespan significantly.
Here is the correct application window and method for every variable:
| Variable | Correct Range | Common Mistake | Effect of Mistake |
| Air temperature during application | 10 to 30 degrees Celsius | Applying below 7 degrees Celsius | Slow cure, milky finish, poor adhesion |
| Relative humidity during application | Below 70% | Applying in rain or high humidity | Cloudy finish, adhesion failure |
| Coat thickness per pass | 75 to 100 microns wet film | One thick coat | Runs, sags, trapped solvent bubbles |
| Number of coats | Minimum 3 coats (4 for severe weather) | One or two coats | Under-build, insufficient barrier thickness |
| Inter-coat sanding | 320-grit between coats | Skipping sanding | Poor inter-coat adhesion, delamination |
| Brush type | Natural bristle or high-quality synthetic | Foam roller on clear coat | Air bubbles and orange peel in clear coat |
| Application direction | Along the wood grain | Across grain | Visible brush marks in cured film |
Apply the first coat thin, almost a wash coat. This first coat penetrates the wood fibers and creates the mechanical bond between the wood and the finish system. Thick first coats sit on top of the surface rather than bonding into it. This is the most common cause of early peeling.
Also apply the second and third coats only after the previous coat has cured fully. Applying too soon traps uncured solvent between coats. This causes inter-coat delamination when the wood expands in its first summer heat cycle.
Expert Note: Measuring dry film thickness (DFT) of the spar urethane build on a cedar sign after the third coat uses a dry film thickness gauge with 1 micron resolution calibrated to ASTM D7091. Three readings are taken at the face center, edge midpoint, and corner of the Western red cedar substrate meeting AWPA UC3A above-ground outdoor use category. The minimum acceptable DFT for a 3-coat spar urethane system on an outdoor wooden sign is 150 microns total across all coats per ASTM D4060, which is the Standard Test Method for Abrasion Resistance of Organic Coatings by the Taber Abraser. This models the abrasive wear from wind-borne particulate. A DFT below 150 microns at any measurement point requires a fourth coat before the sign is cleared for outdoor installation.
How Does Freeze-Thaw Cycling Damage a Wooden Sign and How Do You Stop It?
Freeze-thaw cycling is the most destructive weather mechanism for wooden signs in cold climates. Each freeze-thaw event is a silent structural attack on both the wood and the finish. Understanding the sequence tells you exactly where to focus your protection.
Here is how the damage unfolds step by step:
- Rain, dew, or condensation deposits water on or in the sign
- Water wicks into any unsealed surface, including the back face, edge grain, or any crack in the finish
- The temperature drops below 0 degrees Celsius and the water freezes
- Water expands 9 percent by volume as it turns from liquid to ice
- The expanding ice puts pressure on the surrounding wood fiber, up to 200 MPa in fully confined pockets
- Wood fibers and finish film rupture at the point of greatest stress, typically at the edge or corner
- The temperature rises, the ice melts, and the crack stays open and larger than before
- The next rain event fills the larger crack with more water and the cycle repeats
The only way to stop this cycle is to prevent water from entering the wood in the first place. This is done with complete 6-surface sealing, correct moisture content before sealing, and a flexible finish that absorbs the 9 percent volume expansion of ice without cracking.
Expert Note: Evaluating the freeze-thaw resistance of a cured spar urethane coating on an outdoor cedar sign blank uses a programmable environmental chamber set to cycle between plus 20 and minus 20 degrees Celsius at a rate of 4 cycles per 24 hours per ASTM D6944, which is the Standard Test Method for Resistance of Cured Coatings to Thermal Cycling. At 50-cycle intervals, the sign face is inspected under a 10x magnification loupe for micro-cracking and adhesion loss tested per ASTM D3359 Method B, which is the Cross-Hatch Adhesion Tape Test, and blistering per ASTM D714, which is the Standard Test Method for Evaluating Degree of Blistering of Paints. A compliant outdoor spar urethane coating must show no adhesion loss greater than GT-1 and no blister formation at or above a Moderate No. 8 size at 200 freeze-thaw cycles to be approved for outdoor wooden sign use in cold climates.
How Should You Mount a Wooden Sign to Prevent Weather Damage?
Mounting method contributes directly to weather damage in wooden signs. Most guides skip this step entirely. The wrong mounting creates a permanent moisture trap that defeats even the best sealing and finishing work.
Here is the right mounting approach for each situation:
| Mounting Method | Air Gap | Weather Risk | Recommended Use |
| Floating standoff (10 to 20mm gap) | Yes | Low, air circulates behind sign | Best for all climates, especially wet |
| Direct screw mount with neoprene washer | Minimal gap | Moderate, fastener penetrates finish | Inland and dry climates, use stainless screws |
| Flush direct bond (adhesive to wall) | No | High, no ventilation behind sign | Avoid in wet climates |
| Hanging chain or rope (eave mount) | Yes, full air circulation | Low to very low | Best for sheltered and decorative locations |
| Post mount (ground spike) | Yes | Low to medium | Check that post base does not pool water |
The air gap behind the sign is the most important mounting variable. Mounting a wooden sign flush against a wall with no gap creates a sealed moisture zone behind the sign back face. This zone stays wet long after rain stops. Over time, it causes back-face rot even on a fully sealed sign.
Use standoff posts or spacer washers to create a minimum 10mm gap between the sign back and the wall. Also, placing the sign under a soffit, eave, or canopy reduces direct rain and UV exposure. This can extend the finish lifespan by two to four years between re-sealing cycles.
Expert Note: Confirming that a standoff-mounted wooden sign maintains adequate ventilation at the back face uses a capacitance-based digital hygrometer with 0 to 100 percent RH range and plus or minus 2 percent accuracy calibrated to ASTM E337, which covers Standard Test Method for Measuring Humidity with a Psychrometer. The hygrometer is placed against the back face of the sign in a 12mm standoff gap at 24 hours after a rain event. The gap RH must return to within 10 percent of ambient outdoor RH within 24 hours of the rain event ending. A gap-RH reading more than 20 percent above ambient at 24 hours confirms inadequate ventilation and requires the standoff reveal to be increased to a minimum of 20mm to allow adequate air movement at the back face of the Western red cedar sign panel meeting AWPA UC3A classification.
How Do You Clean and Maintain a Wooden House Sign Through the Seasons?
Cleaning frequency and seasonal timing directly control how long the finish holds up. Most finish failures could be prevented by a simple biannual clean and an annual inspection. The damage is almost always visible before it becomes serious, if the sign is actually checked on schedule.
Here is the full seasonal maintenance plan:
| Season | Task | Products | Time Required |
| Spring | Full inspection for cracks, mold, and lifting finish | Visual check and fingernail test at edges | 10 minutes |
| Spring | Clean with mild soap and soft brush | pH-neutral dish soap diluted 1:20 in water | 20 to 30 minutes |
| Spring | Re-seal if finish is lifting, thin, or dull | 320-grit scuff, then one coat spar urethane | 2 to 4 hours including cure time |
| Summer | Spot-clean pollen and bird droppings promptly | Warm water, soft cloth | 5 to 10 minutes as needed |
| Fall | Full clean before first frost | Mild soap and soft brush | 20 to 30 minutes |
| Fall | Check fastener torque and air gap | Screwdriver or torque driver | 10 minutes |
| Winter | Inspect after ice events for new cracks | Visual check at edges and back face | 5 to 10 minutes |
| Every 1 to 2 years | Light sand and full re-seal coat | 220-grit plus spar urethane by brush | 2 to 4 hours |
| Every 7 to 10 years | Full strip and re-finish or replace | Palm sander, 80-grit, full refinish | Full day |
The fall clean is the single most important maintenance event of the year. A sign that goes into winter with pollen residue, mildew, or any compromise in the finish will suffer much more freeze-thaw damage than a clean, fully sealed sign. Removing contamination before the first frost prevents it from being driven deeper into the wood by the expansion of freezing water.
Expert Note: Testing coating adhesion on a wooden sign after a winter season uses ASTM D3359 Method B, which is the Cross-Hatch Adhesion Tape Test. A cross-hatch pattern of 6 by 6 cuts at 2mm spacing is made through the spar urethane film at the sign edge corner using a cross-hatch cutter with 1.5mm cutting edge spacing per ISO 2409, which covers the Cross-Cut Test. A 3M 250 high-tack tape is applied to the grid and removed at 180 degrees in one fast, smooth motion. The adhesion is rated on the GT-0 to GT-5 scale per ASTM D3359. A rating of GT-2 or worse, which means more than 15 percent area loss, on the Western red cedar sign panel meeting AWPA UC3A at the edge location confirms adhesion failure. This means a full strip-and-refinish cycle is needed before the next winter season.
What Are the Most Common Wooden Sign Weather Protection Mistakes?
These seven mistakes cause most of the outdoor wooden sign failures seen in practice, regardless of the wood species or finish product used:
- Mistake 1: Sealing only the front face. Back-face and edge moisture wicking lifts the front coat from underneath within one to two outdoor seasons.
- Mistake 2: Applying spar urethane in cold or humid weather. Below 10 degrees Celsius or above 70 percent RH, the finish cures milky, slow, and with poor adhesion.
- Mistake 3: Applying one thick coat instead of three thin coats. Thick coats trap solvent, sag at edges, and cure with internal stresses that cause early delamination.
- Mistake 4: Skipping edge rounding before sealing. Finish builds to half-thickness or less on a sharp 90-degree edge, and this thin spot always fails first.
- Mistake 5: Sealing above 14 percent moisture content. Water vapor trapped under the finish coat escapes as the wood dries and creates blisters and bubbles in the first warm season.
- Mistake 6: Mounting the sign flush against the wall. No air gap behind the sign means the back face stays wet for days or weeks after each rain event.
- Mistake 7: Using interior polyurethane instead of spar urethane. Standard polyurethane has no flexibility reserve for outdoor wood movement and cracks within one to two freeze-thaw cycles.
Expert Note: Diagnosing the root cause of blister formation in a spar urethane finish on a wooden sign uses a digital psychrometer recording the dew point and substrate temperature at the time of application per ASTM E337. If the wood surface temperature at time of application was within 3 degrees Celsius of the dew point, condensation was forming on the substrate during application. This is the primary cause of blistering and adhesion failure in film-forming finishes on outdoor wood per ASTM D1006, which is the Standard Practice for Conducting Exterior Exposure Tests of Paints on Wood. The fix is to apply only when the substrate temperature is at least 5 degrees Celsius above the dew point and the relative humidity is below 70 percent throughout the full cure window of the spar urethane being used on the cedar or redwood sign substrate meeting AWPA UC3A above-ground outdoor use classification.
Frequently Asked Questions
Re-seal every one to two years regardless of how the sign looks. The finish starts thinning long before it looks visibly worn. Waiting until the finish is peeling or the wood is visibly gray means the wood has already absorbed moisture and internal damage has begun. A light sand and one fresh spar urethane coat takes less than four hours and adds two to three years to the total finish lifespan.
Spar urethane in marine grade is the most consistently recommended sealant for outdoor wooden signs. It stays flexible through temperature swings, includes UV inhibitors, and provides an excellent water barrier. Standard interior polyurethane is not flexible enough for outdoor use and will crack in the first freeze-thaw cycle.
Yes, if it is made from a naturally decay-resistant species and correctly sealed. Cedar, redwood, and teak handle freeze-thaw cycles well when fully sealed. The most important step is the fall cleaning and inspection before the first frost. A sign with any compromised finish going into winter suffers far more freeze-thaw damage than a fully sealed sign.
Graying is caused by UV radiation breaking down the lignin on the wood surface. It happens when the UV-inhibiting finish coat has worn through and the raw wood is exposed directly to sunlight. If caught early, lightly sand the gray surface and apply a fresh coat of UV-inhibited spar urethane to stop further progression. If the graying is deep, a full strip and refinish is needed.
Peeling almost always starts at an edge or corner where the finish film is thinnest. Three preventive steps work: round all edges to a 2mm radius before applying any finish, apply at least three thin coats rather than one or two thick coats, and seal all six surfaces including the back face and all four edges. If peeling has already started, strip the affected area to bare wood, apply two fresh coats to that area, then apply a fresh maintenance coat across the full sign face.
For clear spar urethane over naturally oily woods like teak or cedar, priming is not usually necessary. For painted signs, an exterior-grade oil-based primer adds significant adhesion and moisture-barrier performance. For pine or cedar with resin pockets, always seal resin spots with dewaxed shellac before any topcoat. Uncovered resin migrates through paint and spar urethane alike and causes permanent adhesion failure above the resin pocket.
Explore Essential House Name Plate Guides & Tutorials
Browse our comprehensive handcrafted signage guides for material care, font selection, and architectural placement:
- Beach & Airbnb Signage Design & Weatherproofing Guide (2026)
- Complete Guide to Wood House Sign Sealing & Weather Maintenance
- Horizontal vs Vertical House Numbers Layout Comparison
- Hanging & Wall-Mounted Cottage Sign Installation Guide
- Round vs Rectangular Name Plaques for Modern Property Entrances
- Best Modern & Vintage Fonts for Cottage & Residential Signs