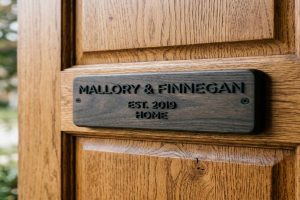
A wooden house name sign does two things at once. It tells visitors where you live. And it adds a warm, personal touch to the front of your home that no metal or acrylic sign can match.
The rustic style is the most popular choice for wooden house name plates. It combines natural wood grain, hand-carved or sandblasted lettering, and a weather-worn finish that looks like it has always been part of the building. Getting that look right and keeping it that way takes a few smart decisions at the start.
This guide covers everything. From choosing the right wood species to sealing, mounting, cleaning, and scheduling your annual care routine.
📥 Free Resource: Download our Wooden Sign Annual Care Checklist to keep your sign looking great year after year.
At a Glance: Wood Species Comparison
| Wood Species | Decay Resistance | Carving Ease | Weight | Best Climate | Relative Cost |
| Western red cedar | Excellent (natural thujaplicins) | Excellent (soft grain) | Light | All, especially humid | Low to medium |
| Redwood | Excellent (natural tannins) | Excellent (soft, stable) | Light to medium | All, very stable | Medium |
| Teak | Excellent (high natural oil) | Good (dense grain) | Heavy | All, especially coastal | High |
| White oak | Very good (tyloses block moisture) | Moderate (dense) | Heavy | Inland, dry to moderate | Medium |
| Pine | Poor untreated | Excellent (very soft) | Light | Best if fully sealed and sheltered | Low |
| Marine-grade plywood | Good if edge-sealed | N/A (painted surface) | Medium | All, if edges fully sealed | Low |
Start with this table. Find the climate you live in and the budget you have. Then pick the wood species that fits both.
What Makes a Wooden House Name Sign Look Rustic?
Rustic style comes from three specific design choices: the surface texture, the lettering method, and the finish on the wood. Each one works together to create the natural, handcrafted look that sets wooden signs apart.
Surface texture is what people notice first. A sandblasted cedar sign reveals the natural grain of the wood by blasting away the softer fibers and leaving the denser wood standing in relief. This gives the background a three-dimensional, organic texture that no painted surface can copy.
Next comes the lettering. V-groove routed letters create clean, defined channels that cast natural shadows when light hits them from the side. Combined with a hand-distressed background, this gives the sign an aged quality that looks intentional and well-crafted.
Expert Note: Achieving consistent V-groove letter depth on a rustic cedar sign requires a CNC router fitted with a 90-degree V-groove carbide-tipped bit at 1/2-inch shank diameter, meeting ANSI B94.19-rated cutting geometry. The router plunges to a depth of 6.35mm, which is 0.25 inches, per pass on a Western Red Cedar substrate. The cedar meets AWPA UC2 Use Category with a minimum specific gravity of 0.32 per ASTM D143, which covers Standard Test Methods for Small Clear Specimens of Timber. The router speed is set to 18,000 RPM for clean fiber separation without tear-out. The resulting groove depth must be uniform to within 0.5mm across the full letter run for the rustic effect to read consistently from street distance.
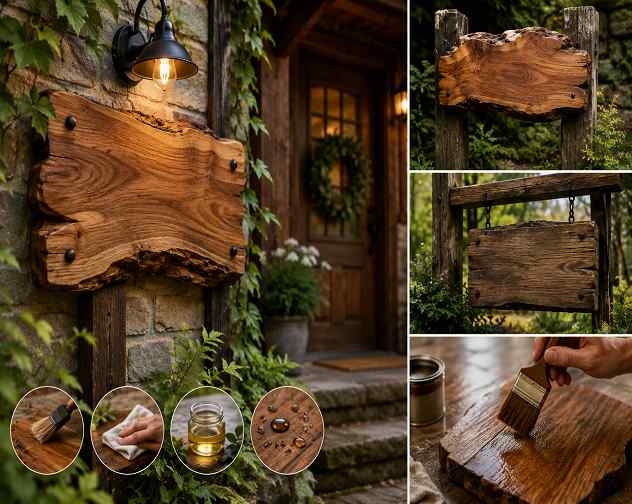
Which Wood Species Is Best for an Outdoor Rustic Sign?
The wood species you choose determines how long your sign lasts outdoors without major repairs. The wrong wood in a wet climate can show visible decay within three years. The right wood with basic maintenance can look great for over two decades.
Here is the full comparison with outdoor lifespan data:
| Wood Species | Natural Decay Agent | Outdoor Lifespan (Sealed) | Warp Risk | Best for Carving | Best for Sandblasting |
| Western red cedar | Thujaplicins (natural fungicide) | 15 to 25 years | Low | Excellent | Best choice |
| Redwood | Tannins (natural preservative) | 15 to 25 years | Very low | Excellent | Excellent |
| Teak | High natural oil and resin | 20 to 30 years | Very low | Good | Good |
| White oak | Tyloses (block moisture channels) | 15 to 20 years | Low to medium | Moderate | Moderate |
| Douglas fir | Low natural resistance | 5 to 10 years (sealed only) | Medium | Good | Good |
| Pine (untreated) | None | 3 to 7 years (sealed only) | High | Excellent | Moderate |
For most buyers, Western red cedar is the best overall choice. It carves cleanly, accepts sandblasting beautifully, stays stable through wet and dry cycles, and costs much less than teak. Also, it performs nearly as well as teak outdoors when properly sealed.
Teak is the premium choice for coastal or tropical climates. Salt air and constant moisture degrade most other wood species within five to eight years. Teak’s natural oil content makes it the most self-protective option available.
Expert Note: Confirming the decay resistance of a wood species before using it in an outdoor sign uses gas chromatography per ASTM D1103, which is the Standard Test Method for Alpha-Cellulose in Wood. This test measures the natural thujaplicin content in Western red cedar at a minimum 0.1 percent extractive concentration by dry weight. The result is cross-checked against ASTM D2395, which covers density and specific gravity of wood and wood-based materials, and confirms the species’ Class 2 natural durability rating under EN 350:2016. This is the European classification standard for untreated wood used in outdoor environments.
How Should You Seal and Finish a Rustic Wooden House Sign?
Sealing is the most important step in making a wooden sign last outdoors. An unsealed sign starts absorbing moisture from the back and edges within the first rainfall. This leads to warping, cracking, and finish failure from the inside out.
Here is how the most common finish types compare:
| Finish Type | Flexibility | UV Resistance | Water Resistance | Reapplication Interval | Rustic Look |
| Spar urethane (marine grade) | High (expands with wood) | Good with UV inhibitor | Excellent | Every 1 to 2 years | Clear, shows natural wood |
| Standard interior polyurethane | Low (cracks in temp changes) | Poor | Good | Every 6 to 12 months | Not recommended outdoors |
| Exterior oil (Osmo or teak oil) | Excellent (penetrating) | Fair | Good | Every 12 months | Natural, matte rustic finish |
| Exterior latex paint and sealer | Not applicable (opaque) | Excellent | Excellent | Every 3 to 5 years | Painted, not wood-tone |
| Yacht varnish | High | Excellent | Excellent | Every 1 to 2 years | Glossy, high-end finish |
| Beeswax and linseed oil (natural) | Excellent | Poor | Fair | Every 6 months | Deeply natural, matte |
Spar urethane is the most widely recommended product for outdoor wooden signs. Unlike standard polyurethane, spar urethane stays flexible as the wood expands and contracts with temperature and humidity changes. A rigid finish on a flexible material cracks and peels within one to two seasons outdoors.
Apply at least three thin coats. Sand lightly with 220-grit sandpaper between each coat. Also follow the three-side sealing rule: seal the front face, the back face, and all four edges. Missing the back face or any edge allows moisture to wick into the end grain and push the front finish off from underneath.
Expert Note: Verifying the UV inhibitor concentration in a spar urethane finish before applying it to an outdoor cedar sign uses a UV spectrophotometer with an absorbance measurement range of 280 to 400nm, following ASTM G173, which covers Standard Tables for Reference Solar Spectral Irradiances. A spar urethane product that does not show a measurable absorbance peak at 340nm lacks adequate UV blocker concentration. This means it will allow UV radiation to penetrate the clear film and degrade the Western red cedar substrate’s lignin per ASTM D1102, causing the wood surface to gray and check within the first outdoor season.
What Is the Correct Moisture Content for a Wooden Sign Before Sealing?
Moisture content, or MC, is the percentage of water in the wood compared to its dry weight. If a sign blank has too much moisture when sealed, the trapped water pushes the finish off as the wood dries out. If it is too dry, it will absorb moisture rapidly after sealing and swell unevenly.
The correct moisture content window for outdoor wooden signs before sealing is 9 to 14 percent.
| MC Range | Wood State | Risk | Action |
| Below 7% | Kiln-dried, too dry | Rapid swelling and finish lift after sealing | Acclimate outdoors for 2 to 4 weeks before sealing |
| 7 to 9% | Below ideal range | Moderate swelling risk | Acclimate outdoors for 1 to 2 weeks before sealing |
| 9 to 14% | Ideal window | Low | Seal immediately |
| 14 to 19% | Above ideal range | Moderate bubble and peel risk | Allow to dry in shade with airflow for 2 to 4 weeks |
| Above 19% | Wet or green wood | High — finish will fail | Do not seal — dry fully before any finish application |
Always check moisture content with a moisture meter before the first sealing coat. Many wooden signs are shipped kiln-dry at 6 to 8 percent MC. This means they need outdoor acclimation time before sealing for the finish to bond correctly.
Expert Note: Measuring the moisture content of a cedar or redwood sign blank before sealing uses a pinless capacitance moisture meter with a measurement depth of 19mm and a calibration range of 5 to 35 percent MC, calibrated per ASTM D4442. This is the Standard Test Methods for Direct Moisture Content Measurement of Wood and Wood-Base Materials. The meter is pressed flat against the back face of the Western red cedar panel meeting AWPA UC2, specific gravity 0.32 per ASTM D2395. Three readings are taken at different locations on the panel to average out any local variation. An average reading outside the 9 to 14 percent window triggers a hold on sealing until the wood reaches the target range.
What Are the Two Main Methods for Carving Rustic Wooden House Signs?
Rustic house name signs, which are often chosen for mountain house names, are made using two main lettering methods: router carving and sandblasting. Each produces a different look, works best on different wood species, and suits different sign styles.
Here is how they compare side by side:
| Feature | Router and CNC Carving | Sandblasting |
| Lettering look | Clean, precise, sharp-edged channels | Raised letters on a deeply textured background |
| Background texture | Smooth or wire-brushed | Deeply eroded wood grain, very organic |
| Best wood | Cedar, redwood, pine, oak | Western red cedar (soft fibers erode best) |
| Cut depth | Controlled, typically 1/4 inch (6.35mm) | Depth increases with blast time |
| Detail level | High, complex fonts and fine detail | Lower, best for bold simple lettering |
| Finishing complexity | Moderate | Moderate (letters and background painted separately) |
Router carving suits multi-line signs with complex text, logos, or detailed border designs, which can be ideal for creative haunted house name ideas. Sandblasting suits large, bold house name text, including those derived from fairy house name ideas, where the deep-grain wood texture becomes part of the design.
Both methods produce genuinely rustic results. The choice comes down to whether you want a clean graphic look or a raw, weathered-grain look.
Expert Note: Setting up a sandblasting cabinet for consistent depth on a Western red cedar sign panel requires a pressure pot blasting unit operating at 90 PSI with a No. 4 ceramic nozzle orifice rated to 1.6mm inner diameter per SSPC-AB1, which is the Commodity Specification for Mineral and Slag Abrasives. The abrasive used is 20-30 mesh garnet with an ASTM B-25 to B-35 hardness range and a specific gravity of 4.0. The cabinet gun is held at 254mm, which is 10 inches, from the masked cedar face and swept in a consistent overlapping pattern. The unmasked cedar early-wood fibers erode at approximately 0.5mm per 10-second pass. A depth gauge with 0.01mm resolution is used to confirm consistent carve depth across the full sign face.
How Do You Mount a Rustic Wooden House Sign Outdoors?
Mounting is where many installations fail. A wooden sign mounted without an air gap absorbs moisture from behind, develops corrosion at the fastener points, and eventually splits or warps at the anchor locations.
Here is the right fastener for each wall surface:
| Wall Surface | Recommended Mount Method | Fastener Type | Key Consideration |
| Brick or stone | Sleeve anchor and standoff | Stainless-steel sleeve anchor, A4-316 grade | Use standoffs to create air gap behind sign |
| Wood siding or fascia | Direct screw with washer | Stainless-steel screw (316 alloy) with neoprene washer | Pre-drill to prevent splitting |
| Render or stucco | Resin anchor and standoff | Stainless-steel M8 bolt | Allow resin to cure 24 hours before loading |
| Timber post or gate | Coach screw | Stainless-steel coach screw, A2 or A4 grade | Pre-drill at 75 percent of screw diameter |
| Metal fence or railing | Stainless-steel cable with end crimp | A4-316 wire rope, 3mm diameter | Use barrel turnbuckle to adjust tension |
The air gap is the most important mounting detail. Mounting a wooden sign flat against a wall with no gap behind it traps moisture between the sign back and the wall surface. This creates a permanent wet zone that damages both the wall cladding and the sign back over time. Use standoff posts or spacer washers to leave at least a 10mm gap between the sign back and the wall.
Expert Note: Drilling anchor holes for stainless-steel standoff posts into a fired clay brick surface requires a rotary hammer fitted with a 5/32-inch SDS Plus tungsten carbide masonry bit rated to ISO 5468, which covers Rotary and Rotary Impact Masonry Drills Dimensions. Medium impact force is used to avoid fracturing the brick face. Each pilot hole is cleared of dust with a bulb blower before the 3/16-inch Tapcon A4-316 grade masonry anchor is driven to a minimum 25mm embedment depth. The standoff barrel is threaded onto the anchor stud and tightened to 4 Nm using a calibrated digital torque screwdriver with a 0.5 to 10 Nm range per ISO 6789, which governs Assembly Tools for Screws and Nuts. This creates a consistent 12mm air gap between the sign back and the brick wall surface.
How Do You Clean a Wooden House Sign Without Damaging It?
Cleaning method and frequency directly control how long the finish holds up. Harsh cleaning strips away the protective layer and immediately exposes the raw wood underneath to UV and moisture.
Here is the right cleaning method for each soiling type:
| Soiling Type | Recommended Method | Frequency | Products to Avoid |
| General dust and pollen | Soft cloth or sponge with clean water | Monthly | Abrasive pads, wire brushes |
| Light grime and organic residue | Mild dish soap diluted 1:20 in water, soft brush | Every 6 months | Bleach, ammonia-based cleaners |
| Mold or mildew spots | Diluted white vinegar (1 part to 4 parts water), soft brush | As needed | Power washers, undiluted bleach |
| Bird droppings | Wet warm cloth, soak 2 to 3 minutes, then wipe | As needed | Scraping tools, abrasive cloths |
| Lichen or moss | Commercial wood cleaner (oxalic acid-based), rinse thoroughly | Every 2 to 3 years | Pressure washing directly on sign |
| Salt crust (coastal areas) | Freshwater rinse with soft sponge | After each storm event | Wire brushes, abrasive cleaners |
Never use a pressure washer directly on a wooden sign. Even at the lowest setting, the impact force drives water into the wood grain, lifts the finish at the edges, and forces water into any small cracks in the sealant. A soft-bristled brush with mild soapy water handles 95 percent of cleaning needs safely.
Expert Note: Removing embedded lichen or algae from the carved grooves of an outdoor cedar sign without damaging the finish uses a 10 percent oxalic acid solution applied with a natural-bristle detail brush at 10mm width. The oxalic acid reacts with the organic lichen pigment to break the chromophore bonds within 5 to 10 minutes of contact time per ASTM D3273, which is the Standard Test Method for Resistance to Growth of Mold on the Surface of Interior Coatings in an Environmental Chamber. After the contact time, the sign face is rinsed with clean water and dried fully before the next maintenance coat of spar urethane is applied to reseal the cleaned surface.
What Are the Most Common Wooden Sign Care Mistakes?
These seven mistakes cause most premature wooden sign failures, regardless of the species or finish used:
- Mistake 1: Sealing only the front face. Moisture enters through the back and edges first. It lifts the front seal coat from underneath and peels the entire finish within one to two seasons.
- Mistake 2: Using interior polyurethane instead of spar urethane. Standard polyurethane does not flex with the wood. It cracks at the first temperature change and lets moisture into every crack line.
- Mistake 3: Sealing the sign while the wood is too wet or too dry. Above 14 percent MC, bubbles form in the finish. Below 9 percent MC, the wood swells after sealing and lifts the finish off.
- Mistake 4: Mounting the sign flat against the wall with no air gap. The moisture trapped behind the sign is the most common cause of back-face rot on outdoor wooden signs.
- Mistake 5: Cleaning with a pressure washer. Even on the lowest setting, the impact drives water under the finish and into the wood grain.
- Mistake 6: Waiting until the finish looks bad before re-sealing. Re-sealing should happen every one to two years regardless of how the sign looks. Waiting until peeling starts means the wood has already absorbed moisture and internal damage has begun.
- Mistake 7: Using bronze or brass screws in contact with cedar or redwood. The tannic acid in both species reacts with copper-based alloys and causes dark staining that bleeds through the finish. Use stainless-steel fasteners only.
Expert Note: Detecting galvanic corrosion between a copper-alloy fastener and a tannin-rich cedar sign blank uses a digital galvanic corrosion assessment kit with a 0.001A resolution milliammeter. This tool measures the current flow between the grade C26000 cartridge brass screw meeting ASTM B121, which is the Standard Specification for Leaded and Unleaded Brass Plate, Sheet, Strip, and Rolled Bar, and the wet cedar substrate in contact with it. A reading above 0.1mA at the fastener-substrate interface confirms active galvanic corrosion. This is the reaction that produces the dark iron-tannate staining visible on the cedar surface. The fix is to replace all copper-alloy fasteners with A4-316 stainless-steel screws meeting ASTM F593, which is the Standard Specification for Stainless Steel Bolts, Hex Cap Screws, and Studs.
How Do You Create a Long-Term Care Schedule for a Wooden House Sign?
A simple care schedule prevents small problems from turning into expensive repairs. Most wooden sign failures happen because no schedule exists and the sign only gets attention when something goes visibly wrong.
Here is the full annual care plan:
| Task | Frequency | Season | Time Required |
| Clean with mild soap and soft brush | Every 6 months | Spring and fall | 15 to 30 minutes |
| Inspect for cracks, peeling, or mold | Once a year | Spring | 10 minutes |
| Repair minor cracks with exterior wood filler | As needed | Spring, dry weather only | 30 to 60 minutes |
| Check fastener torque and air gap | Once a year | Spring | 10 minutes |
| Light sand (220-grit) and re-seal | Every 1 to 2 years | Spring or early summer | 2 to 4 hours including dry time |
| Check for pest entry holes at edges and back | Once a year | Spring | 5 minutes |
| Full strip, re-finish, or replace | Every 7 to 10 years | Summer | Full day or professional service |
The biannual wash is the single most time-efficient care action you can take. Removing pollen, grime, and salt residue before they break down the surface finish adds years to the re-sealing interval. It also keeps the carved lettering clean and sharp-looking all year.
Expert Note: Applying a maintenance re-coat of spar urethane to an existing outdoor cedar sign without stripping the full finish uses a 320-grit silicon carbide abrasive sanding disc meeting ANSI B74.18, which is the Specification for Grading of Certain Abrasive Grain on Coated Abrasive Products. This disc is used on a random-orbital palm sander at 10,000 OPM to scuff the existing cured spar urethane film on the Western red cedar sign face without cutting through to bare wood. The scuffed surface is wiped with a clean tack cloth before a fresh coat of UV-inhibited spar urethane meeting a minimum 1.0 MJ per square meter UV resistance per ASTM G154 is applied by brush in one thin, even coat. This maintenance coat extends the total finish lifespan by two to three years between full strip-and-recoat cycles.
Frequently Asked Questions
A properly sealed sign made from cedar, redwood, or teak can last 15 to 25 years outdoors with regular maintenance. The biggest factors in lifespan are the wood species chosen, whether all six surfaces were sealed before mounting, and whether re-sealing happens every one to two years on schedule.
Spar urethane in marine grade is the best widely available finish for outdoor wooden signs. It is more flexible than standard polyurethane, includes UV inhibitors, and handles moisture and temperature changes without cracking. Apply at least three thin coats and seal the front, back, and all four edges.
Yes, if the sign is made from a naturally decay-resistant species and properly sealed. Cedar, redwood, and teak handle full outdoor exposure well. A sign under a sheltered eave or canopy will last significantly longer than one in direct rain and sun because it dries faster after rain and experiences less UV damage.
Graying is caused by UV radiation breaking down the lignin in the wood surface. It does not mean the wood is damaged, but it does mean the finish has worn through. Apply a UV-inhibited spar urethane or exterior oil before the wood grays. Once graying has started, lightly sand the surface and apply a fresh seal coat to stop further progression.
This is not necessary for cedar, redwood, or teak. These species handle freeze-thaw cycles well when properly sealed. Remove the sign in winter only if it is made from a low-durability species like pine, or if the mounting location allows ice or snowmelt to sit on or behind the sign for long periods. Re-inspect and re-torque the mounting fasteners every spring after winter.
Use A4-316 grade stainless-steel screws only. Brass and bronze screws react with the tannins in cedar and redwood and create dark staining that bleeds through the finish and is very difficult to remove. Zinc-plated or galvanized screws can work but have a shorter lifespan than stainless steel in coastal or wet climates.
Explore Essential House Name Plate Guides & Tutorials
Browse our comprehensive handcrafted signage guides for material care, font selection, and architectural placement:
- Beach & Airbnb Signage Design & Weatherproofing Guide (2026)
- Complete Guide to Wood House Sign Sealing & Weather Maintenance
- Horizontal vs Vertical House Numbers Layout Comparison
- Hanging & Wall-Mounted Cottage Sign Installation Guide
- Round vs Rectangular Name Plaques for Modern Property Entrances
- Best Modern & Vintage Fonts for Cottage & Residential Signs