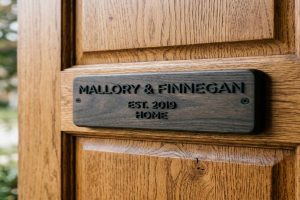
A wooden house name plate is one of the most natural and welcoming choices for your home entrance. It looks warm, personal, and timeless. But wood is also one of the most demanding materials to keep outdoors. Rain, sun, frost, and heat all attack it continuously.
The good news is that a well-made and well-maintained wood house sign can last 10 to 30 years. You just need to choose the right wood, apply the right finish, and follow a simple annual care routine.
This guide walks you through every step. It covers wood selection, moisture control, sealant systems, UV protection, freeze-thaw care, crack repair, and cleaning. By the end, you will know exactly how to protect your wood sign and keep it looking good for many years.
📥 Download Free: Print our Wood House Sign Annual Maintenance Checklist PDF and follow it each season.
What Makes a Wood House Sign Vulnerable to Outdoor Weather?
Wood is a natural material. It expands and contracts as moisture and temperature change. This movement is normal. But over time, it causes cracks, splits, and peeling in the finish.
Here are the four main things that damage a wood house sign outdoors.
1. Moisture Rain, dew, and humidity push water into the wood grain. When wood absorbs too much water, it swells. When it dries out, it shrinks. This constant swelling and shrinking causes the surface to crack. Water inside cracks then leads to rot.
2. UV light from the sun UV radiation breaks down the lignin in wood. Lignin is the natural glue that holds wood fibres together. When lignin breaks down, the wood surface turns grey and fuzzy. Also, UV light breaks down most clear wood finishes over time, causing them to crack and peel.
3. Freeze-thaw cycles In cold climates, water trapped inside wood cracks freezes in winter. Water expands by about 9 percent when it freezes. This expansion forces cracks open wider. Over many winters, small surface cracks become deep splits.
4. Biological attack Fungi, mould, algae, and wood-boring insects all attack unprotected wood outdoors. Fungi cause rot. Algae cause green or black staining. Insects like woodworm bore tunnels inside the wood. All of these reduce the lifespan of the sign dramatically.
This means that protecting main door name plates is not a one-time job. It is an ongoing process. The right wood choice and the right finishing system reduce all four of these threats.
Expert Note: When measuring the moisture content of a freshly delivered teak wood sign blank before applying any finish, a resistance-type wood moisture meter with temperature-corrected dual-pin electrode, 6 to 90 percent measurement range, and 0.1 percent resolution display is used to check the moisture content of the teak slab (Tectona grandis) at multiple points across the face, edge, and end grain. Wood moisture content must be below 18 percent before any film-forming finish is applied. Applying spar urethane or epoxy sealer to wet wood traps moisture inside and causes blistering within weeks. Wood moisture measurement for coating application readiness follows ASTM D4444-13 (Standard Test Methods for Laboratory Standardization and Calibration of Hand-Held Moisture Meters).
What Types of Wood Are Best for an Outdoor House Sign?
Not all wood handles outdoor conditions equally. Some woods are naturally resistant to moisture and rot. Others need heavy protection to survive outdoors.
Here is a guide to the best wood species for outdoor house signs.
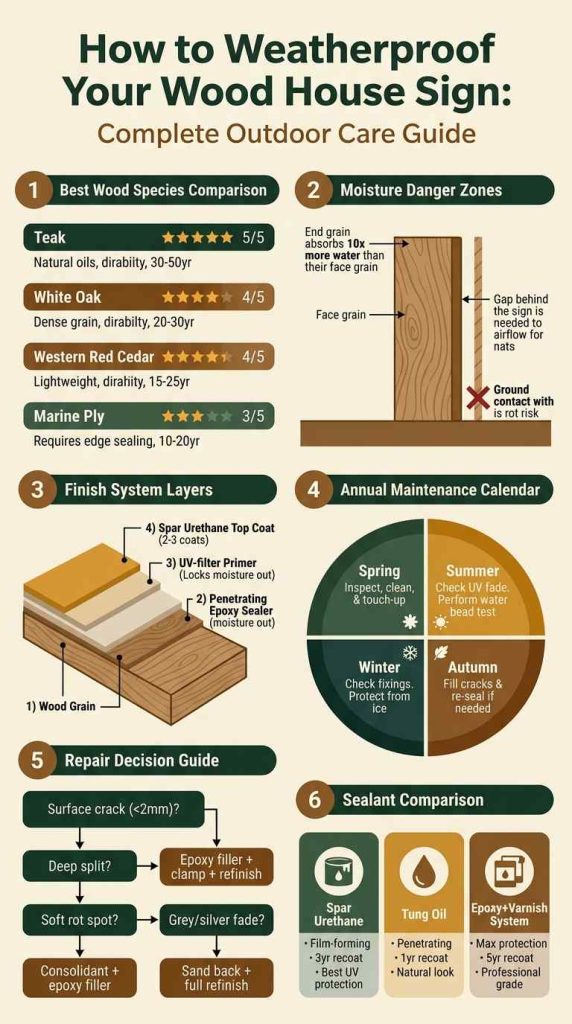
Teak Teak is the best wood for an outdoor house sign. It contains natural oils that repel water and resist rot and insects. Teak is very stable. It does not warp or crack as much as softer woods. A well-maintained teak sign can last 30 to 50 years outdoors. The main downside is cost. Teak is one of the most expensive hardwoods.
White Oak White oak is a strong, dense hardwood. Unlike red oak, white oak has closed pores filled with a substance called tyloses. This makes it naturally water-resistant. White oak holds paint and stain well. It is a great choice for carved and engraved house signs. Expected outdoor lifespan with good maintenance is 20 to 30 years.
Western Red Cedar Cedar is a lightweight, affordable, and naturally rot-resistant wood. It contains oils that slow decay and repel insects. Cedar is easy to carve and sand. It is the most popular wood for outdoor signs in North America. However, cedar tends to grey and silver faster than oak or teak if not maintained regularly. Lifespan with proper care is 15 to 25 years.
Iroko Iroko is an African hardwood sometimes called African teak. It has similar natural oils and density to true teak but costs less. It is an excellent choice for outdoor signs in wet or coastal climates. It resists moisture and insects very well.
Marine-grade plywood Marine plywood uses exterior-grade glue between the plies. It is stable and strong. However, the edges of plywood must be sealed very well. The edge grain absorbs water 10 times faster than the face grain. If the edges are not sealed, the plies will delaminate (separate) over time.
| Wood Species | Natural Durability | Outdoor Lifespan | Moisture Resistance | Cost Level |
| Teak | Excellent | 30 to 50 years | Excellent (natural oils) | High |
| White Oak | Very good | 20 to 30 years | Very good (closed pores) | Medium-high |
| Western Red Cedar | Very good | 15 to 25 years | Good (natural oils) | Medium |
| Iroko | Very good | 20 to 35 years | Very good (dense grain) | Medium |
| Marine plywood | Good (if edge-sealed) | 10 to 20 years | Good (if fully sealed) | Low-medium |
Expert Note: When comparing the hardness of three candidate wood species for a carved house sign to find which one holds the sharpest carved edges without crumbling, a Janka hardness tester with 11.28mm diameter hardened steel ball, calibrated load frame, and hydraulic actuator is used to measure the force required to embed the ball to half its diameter in each wood specimen. Teak measures approximately 1,000 lbf (4,450N). White oak measures 1,360 lbf (6,050N). Western red cedar measures 350 lbf (1,560N). Higher Janka values mean harder wood that holds sharper carved details. This Janka hardness measurement follows ASTM D1037-12 (Standard Test Methods for Evaluating Properties of Wood-Base Fiber and Particle Panel Materials), which incorporates the Janka ball test for hardness of wood panels used in exterior applications.
How Do You Prepare a New Wood Sign Before Applying Any Finish?
Preparation is the most important step. A finish applied to a poorly prepared surface will fail quickly. Follow these steps before you apply any sealant, stain, or paint.
Step 1: Check the moisture content Use a moisture meter to check the wood. The moisture content should be below 18 percent for film-forming finishes (spar urethane, epoxy). If the wood is too wet, store it in a dry, ventilated space for 1 to 2 weeks until it reaches the correct moisture level.
Step 2: Sand the surface Sand the sign face with 120-grit sandpaper first to remove any mill marks or rough spots from cutting. Then sand again with 180-grit for a smooth, even surface. Finally, sand lightly with 220-grit before applying the first coat of finish. Always sand in the direction of the wood grain, not across it.
Step 3: Clean off all dust After sanding, wipe the surface with a tack cloth or a clean, dry microfibre cloth. Remove every trace of sawdust. Any dust trapped under the first coat of finish will create small bumps and weak spots.
Step 4: Seal the end grain End grain (the cut ends of the wood) absorbs water 10 times faster than face grain. Apply an extra coat of sealant or epoxy to all end grain edges before applying finish to the face. This step alone extends sign life by several years.
Step 5: Check for tannin bleed Some woods, especially oak, teak, and iroko, have high tannin content. Tannins are natural compounds in the wood that can bleed through water-based finishes and cause brown staining on light-coloured paints. If you plan to use a light paint or water-based finish, apply an oil-based primer first to seal in the tannins.
Step 6: Fill any knots or cracks Before finishing, fill any knots, gaps, or small cracks with an exterior-grade wood filler or two-part epoxy filler. Sand smooth once fully cured. This prevents moisture from entering the sign through defects in the wood surface.
Expert Note: When checking for high tannin content in an oak house sign blank before specifying a water-based finish system, a tannin spot test kit with 5 percent ferric sulphate solution applicator, pH indicator strips, and colour comparison chart is used to test the oak surface. A small drop of ferric sulphate solution is applied to the bare sanded wood surface. A dark blue-black colour reaction (within 30 seconds) confirms high tannin content, indicating that a water-based primer will cause tannin bleed-through staining on any light top coat. This test requires the use of an oil-based tannin-blocking primer before applying any water-based finish. Tannin content testing in wood species follows the identification method in ASTM D1800-98(2012) (Standard Practice for Sampling and Testing Vegetable Tanning Materials), applied here for qualitative tannin presence detection in hardwood sign substrates before exterior finishing.
What Is the Best Sealant or Finish for an Outdoor Wood House Sign?
The right finish system protects the wood from all four outdoor threats: moisture, UV, freeze-thaw, and biological attack. There are three main finish systems used on outdoor wood signs.
System 1: Spar urethane (marine varnish) This is the most popular finish for outdoor wood signs. Spar urethane is a flexible, film-forming finish. Unlike standard polyurethane (which is rigid), spar urethane moves with the wood as it expands and contracts. This prevents the finish from cracking as the wood moves through temperature and humidity changes.
Spar urethane also contains UV absorbers that slow surface degradation. Apply 3 to 4 coats with a light sand between each coat (220-grit). The first coat soaks into the wood grain. Subsequent coats build a protective film.
Recoat every 2 to 3 years outdoors.
System 2: Penetrating oil (tung oil or teak oil) Oil finishes soak deep into the wood grain. They do not form a surface film. This means they cannot crack or peel. The wood keeps its natural look and texture. The downside is that oil finishes provide less UV and moisture protection than film-forming finishes. They also need reapplying more often (every 12 to 18 months).
Oil finishes are best for teak and iroko wood, which already have natural oil content. They work with the natural oils in the wood rather than against them.
System 3: Epoxy sealer plus spar urethane (professional system) This is the strongest protection system. First, apply one or two coats of penetrating epoxy sealer. Epoxy seeps into the wood cells and hardens inside them, creating a rigid moisture barrier from within. Next, apply 3 to 4 coats of spar urethane over the cured epoxy. The epoxy handles moisture. The spar urethane handles UV.
This system can last 5 to 8 years before a maintenance coat is needed. It is the best choice for signs in harsh climates.
| Finish System | UV Protection | Moisture Barrier | Flexibility | Recoat Interval | Best For |
| Spar urethane (3-4 coats) | Good | Good | Excellent | 2 to 3 years | Most outdoor signs |
| Penetrating oil (2-3 coats) | Low | Moderate | N/A (no film) | 12 to 18 months | Teak, iroko, oiled styles |
| Epoxy + spar urethane | Excellent | Excellent | Good | 5 to 8 years | Harsh climates, coastal |
| Exterior paint + primer | Good (if pigmented) | Good | Moderate | 3 to 5 years | Painted/opaque signs |
Expert Note: When testing the hardness of a newly applied spar urethane finish on a teak house sign to confirm it has fully cured before outdoor installation, a Persoz pendulum hardness tester with 500g pendulum weight, 100mm oscillation arc, and electronic oscillation decay counter is used to measure the damping of the pendulum as it rests on the spar urethane film surface (3 coats, 72-hour cure at 23 degrees Celsius). A Persoz hardness value above 150 seconds (time for oscillation to decay from 12 to 4 degrees) confirms the film is fully cured and hard enough for outdoor handling. Values below 100 seconds indicate incomplete cure and the sign must not be exposed to rain yet. Pendulum hardness testing of coatings follows ISO 1522:2022 (Paints and Varnishes: Pendulum Damping Test), the international standard for cured film hardness measurement of all organic coatings.
How Do You Apply Exterior Paint or Stain to a Wood House Sign?
Many people prefer a painted or stained wood sign over a clear finish. Stain adds colour while letting the natural wood grain show through. Paint covers the grain completely for a clean, bold look.
Here is how to apply each correctly.
Applying exterior stain:
- Sand the wood to 180-grit. Clean off all dust with a tack cloth.
- Apply the stain with a clean brush or lint-free cloth in the direction of the grain.
- Wipe off any excess stain after 5 minutes (before it gets tacky) with a clean cloth.
- Allow to dry fully (check the can label for drying times, usually 4 to 8 hours).
- Apply a second coat if you want a deeper, richer colour.
- Once the stain is fully dry (usually 24 hours), apply 2 to 3 coats of clear spar urethane as a top coat. The spar urethane protects the stain from UV fading and moisture.
Applying exterior paint:
- Sand to 180-grit and clean all dust away.
- Apply an oil-based exterior primer. This seals the wood and gives the paint a good surface to bond to. Allow to dry fully.
- Sand lightly with 220-grit after the primer coat to remove any raised grain.
- Apply the first coat of exterior paint. Brush in the direction of the grain. Allow to dry.
- Lightly sand with 220-grit again.
- Apply a second coat of paint. A third coat can be applied for the best coverage and durability.
For carved or engraved signs, use a fine artist’s brush to fill the carved recesses with contrasting paint after the main coat. This is called the gilded or highlighted infill technique. It makes the text or design stand out very clearly.
Expert Note: When assessing the sheen level of a newly applied exterior paint on a cedar house sign to confirm it meets the specified semi-gloss finish for good UV reflectance without excessive glare, a three-angle gloss meter with 20-degree, 60-degree, and 85-degree measurement geometry, calibrated black glass tile standard, and 0.1 GU resolution display is used to measure the specular gloss of the exterior alkyd paint surface (2 coats on primed western red cedar). A 60-degree reading of 35 to 60 GU confirms a semi-gloss result suitable for outdoor wood signs. A reading above 70 GU at 60 degrees indicates a full gloss that may show surface imperfections more visibly. Three-angle gloss measurement follows ASTM D523-14(2018) (Standard Test Method for Specular Gloss), which defines measurement geometry and acceptance criteria for coatings on all substrates.
How Do You Waterproof a Wood House Sign Step by Step?
Waterproofing is about creating a complete barrier that water cannot penetrate. Here is the full process step by step.
Step 1: Choose your wood and check moisture content The moisture content must be below 18 percent. Sand to 220-grit and clean all dust away.
Step 2: Seal the end grain first Apply two generous coats of epoxy sealer or spar urethane to all end grain edges. Let each coat dry before applying the next. End grain sealing is the single most important step for preventing moisture entry.
Step 3: Apply the first coat (penetrating coat) Apply your chosen finish system. The first coat should be thinned 10 percent with the appropriate solvent (white spirit for oil-based, water for water-based). This helps it penetrate deeper into the wood grain. Brush it on evenly and allow to soak in for 10 minutes. Wipe away any excess.
Step 4: Apply full-strength coats Apply 2 to 3 full-strength coats of your finish. Allow each coat to dry fully before applying the next. Sand lightly with 320-grit between coats to remove any dust nibs and improve adhesion.
Step 5: Seal all back edges and mounting holes Apply finish to the back face of the sign too. Water can enter through the back if it is left unfinished. Also seal around any mounting holes with sealant to prevent moisture wicking into the wood.
Step 6: Allow full cure before outdoor installation Allow the sign to cure indoors for at least 72 hours after the final coat before mounting it outdoors. Oil-based finishes need 7 days of full cure before exposure to rain.
Expert Note: When verifying the water vapour transmission rate of a 3-coat spar urethane system applied to a white oak house sign blank to confirm it provides adequate moisture barrier performance for a coastal climate, an outdoor natural weathering exposure rack with 45-degree south-facing tilt, calibrated UV dose sensor logging at 10-minute intervals, and tipping bucket rain gauge is used to conduct a 6-month ASTM D1006 natural weathering exposure test on the finished oak specimen panels (200mm by 150mm by 20mm). After 6 months, panels are assessed for blistering, peeling, chalking, and colour change per the rating scales in ASTM D1006-21 (Standard Practice for Conducting Exterior Exposure Tests of Paints and Coatings on Wood), which defines the test conditions and performance evaluation criteria for exterior wood coatings in natural weathering programmes.
How Does UV Light Damage a Wood House Sign and How Do You Stop It?
UV light is often more damaging to a wood sign’s finish than rain. Here is why.
Wood contains a substance called lignin. Lignin is what makes wood stiff and brown. When UV light hits lignin, it causes a chemical reaction that breaks it down. The surface turns grey. The wood fibres lose their bond and become loose and fuzzy. This process is called photodegradation.
UV light also attacks the molecules in clear finishes. Polyurethane and varnish films contain long chain molecules. UV radiation breaks these chains apart. When enough chains are broken, the film becomes brittle and cracks. This is why even a good clear finish turns yellow and peels after a few years of sun exposure.
How to slow UV damage:
Use a UV-absorbing finish. Spar urethane contains UV absorbers. These are compounds that capture UV energy and convert it to harmless heat before it reaches the wood. UV-absorbing finishes extend finish life by 2 to 3 times compared to finishes without UV protection.
Use a pigmented colour. Pigments in stains and paints block UV very effectively. Dark colours block more UV than light ones. A dark stain over a clear UV primer is one of the best UV protection systems for an outdoor wood sign.
Shade the sign if possible. A sign mounted under an overhang or porch roof receives far less UV exposure than a fully exposed sign. A sign in a sheltered location may only need refinishing every 5 to 7 years instead of every 2 to 3 years.
Check for UV fading. Do a simple water bead test once a year. Sprinkle a few drops of water on the sign surface. If the water beads up into droplets, the finish is still intact. If the water soaks straight in and darkens the wood, the finish has degraded and needs recoating.
Expert Note: When running an accelerated UV aging test on a spar urethane finish sample from a teak house sign to predict how many years of outdoor exposure it will simulate, a xenon arc weatherometer with Ci4000 test chamber, 0.35 W/m2 at 340nm irradiance, ASTM G155 daylight filter, and 102 minutes light plus 18 minutes light and water spray cycle is used to expose the spar urethane coated teak specimen to simulated sunlight. One hour in the xenon arc chamber simulates approximately one week of Florida summer sunlight exposure. A 500-hour test (roughly equivalent to 10 years of UK outdoor exposure) assesses the finish for gloss retention, colour change (delta E), and crack formation. Xenon arc weathering follows ASTM G155-13 (Standard Practice for Operating Xenon Arc Light Apparatus for Exposure of Non-Metallic Materials), the international standard for accelerated photodegradation testing.
How Do You Protect a Wood House Sign in Cold and Freezing Climates?
Cold climates add an extra threat: freeze-thaw cycling. Every time liquid water inside the wood freezes, it expands. Every time it thaws, it contracts. Over many cycles, this expansion and contraction forces cracks open wider each year.
Here is how to protect a wood sign in freezing climates.
Start with the right wood. Dense, naturally oily woods like teak and white oak are better at resisting freeze-thaw damage than soft, porous woods like pine or cedar. Dense woods have smaller pores, so less water can enter in the first place.
Keep moisture out completely. This is the key. If no water can enter the wood, freeze-thaw damage cannot happen. Apply the epoxy plus spar urethane system for maximum moisture exclusion. Seal every end grain edge and every mounting hole.
Check the sign before winter every year. Look for any cracked or lifting finish before the first frost arrives. A small crack in the finish lets water in. That water then freezes and forces the crack wider. Catching and sealing cracks in autumn prevents major damage in winter.
Use flexible sealant around mounting fixings. Where bolts or screws pass through the sign, apply neutral-cure silicone sealant around the fixing point. Metal fixings conduct cold to the wood and also create a path for water to enter. The silicone seal blocks both.
Remove signs for winter if possible. For very high-quality carved signs, the best protection in harsh climates is to bring the sign indoors from November to March. Store it in a cool, dry space. This eliminates all freeze-thaw risk for those months.
Expert Note: When testing the resistance of a spar urethane coating on a cedar house sign to simulated freeze-thaw cycling before approving the finish system for a client in a climate with 60 freeze-thaw cycles per year, a freeze-thaw cycling oven with -20 degrees Celsius to plus 60 degrees Celsius programmable temperature range, 2-hour cycle time, and 50-cycle protocol is used to subject the spar urethane coated western red cedar specimens (150mm by 100mm by 15mm) to 50 complete freeze-thaw cycles. After testing, specimens are assessed for blistering, cracking, delamination, and adhesion loss using the peel test per ASTM D3359. A passing result requires no cracking or delamination in the finish after 50 cycles. Freeze-thaw resistance of wood coatings follows the cycling protocol in ASTM D6944-03(2016) (Standard Practice for Assessing the Freeze-Thaw Resistance of Sealants Applied in a Joint), adapted here for film-forming coatings on wood substrates.
How Do You Fix Cracks, Splits, and Peeling Paint on a Wood Sign?
Small damage is easy to fix if you catch it early. Waiting too long lets moisture in and turns a simple repair into a full refinish job.
Here is how to handle the most common types of damage.
Fixing surface cracks (less than 2mm wide):
- Clean out any loose debris from the crack with a fine brush
- Apply an exterior-grade wood filler or two-part epoxy filler into the crack using a flexible putty knife
- Overfill slightly so the filler is proud of the surface
- Allow to cure fully (read the product label for cure time)
- Sand flush with 120-grit, then finish with 180-grit
- Apply matching finish or paint to blend the repair area
- Apply a full fresh coat of spar urethane over the repaired area
Fixing deep splits:
- Squeeze the split together by hand to check if it closes cleanly
- If yes: inject exterior-grade wood glue into the split using a syringe or fine nozzle
- Clamp the split closed with bar clamps or strong tape and allow to cure for 24 hours
- Once cured, fill any remaining surface gap with epoxy filler
- Sand, prime, and refinish as above
Fixing peeling paint or finish:
- Use a paint scraper to remove all loose, peeling finish from the affected area
- Feather the edges of the remaining good finish with 80-grit sandpaper so there is no sharp step
- Clean the bare wood area with a tack cloth
- Apply primer to the bare wood
- Apply 2 coats of matching finish
- Blend the repair into the surrounding finish
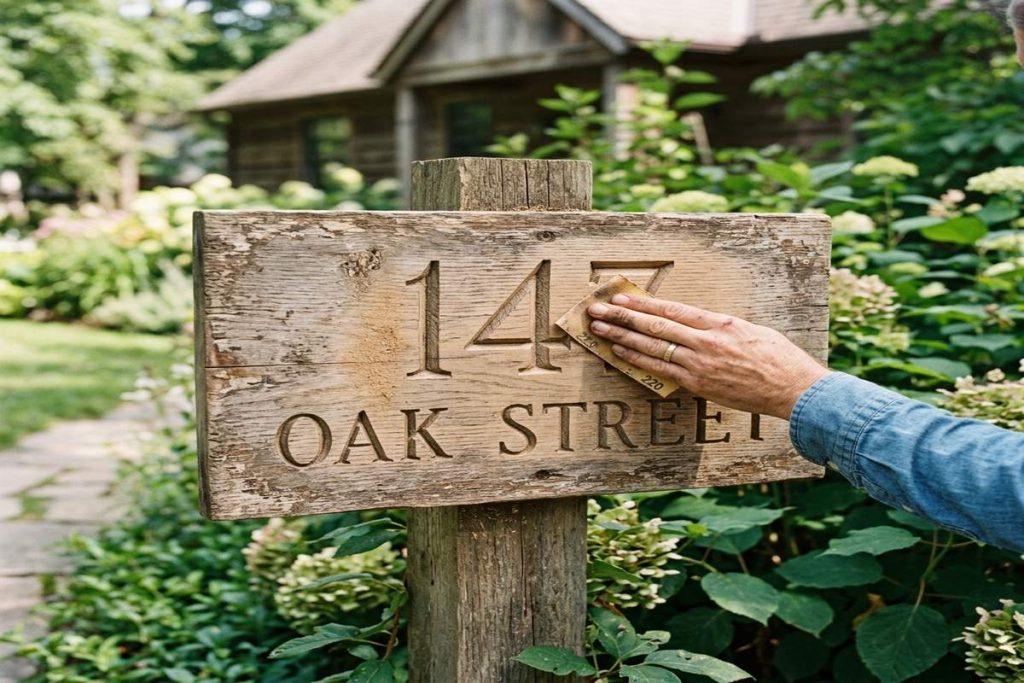
Fixing grey, weathered, sun-bleached surfaces: If the whole sign has gone grey and dull, the lignin has been photodegraded. Sanding alone cannot restore the colour. You need to remove the grey surface layer.
- Sand the face of the sign with 80-grit to remove the grey surface (about 0.5 to 1mm depth)
- Sand again with 120-grit, then 180-grit
- Apply a wood brightener solution (oxalic acid-based) to restore the natural wood tone
- Rinse and allow to dry fully
- Apply your chosen finish system from scratch
Expert Note: When examining the depth of photodegradation on the surface of a grey, weathered cedar house sign to determine how much material must be removed by sanding before a new finish system will bond correctly, a confocal laser scanning profilometer with 0.01 micrometre vertical resolution, 50x objective lens, and 1mm by 1mm field of view is used to measure the surface roughness and micro-texture of the UV-degraded western red cedar surface. Photodegraded wood shows an Sa (average surface roughness) above 15 micrometres due to the raised, loosened fibre structure. A well-sanded surface ready for refinishing should show Sa below 5 micrometres. This surface condition measurement follows the characterisation protocol in ISO 25178-2:2012 (Geometrical Product Specifications: Surface Texture: Areal), applied here to confirm sanding completion before exterior wood finishing.
How Often Should You Maintain and Refinish an Outdoor Wood House Sign?
The maintenance frequency depends on your local climate, the wood species, and the finish system you chose. Here is a simple annual schedule.
Every 3 months (quarterly):
- Quickly look at the sign for any obvious new damage, cracking, or peeling
- Clear any spider webs, dirt, or debris from carved recesses
- Check that all mounting fixings are still tight
Every 12 months (annual inspection):
- Do the water bead test: drop water on the surface. If it beads: finish is intact. If it soaks in: recoat soon
- Clean the full sign surface with mild soap and water (see cleaning section below)
- Check for any new cracks, chips, or lifting finish
- Inspect all sealant around fixing points and edges. Reapply if cracked
Every 2 to 3 years (spar urethane):
- Lightly sand the surface with 320-grit to de-gloss and clean the existing finish
- Wipe clean with a tack cloth
- Apply one or two fresh coats of spar urethane
Every 12 to 18 months (oil finish):
- Clean the sign and allow to dry fully
- Apply a fresh coat of tung oil or teak oil with a cloth in the direction of the grain
- Wipe away excess after 15 minutes
Every 5 to 8 years (epoxy system):
- Inspect thoroughly for any delamination, cracking, or bare wood patches
- Sand down to bare wood if the finish is extensively cracked
- Reapply the full epoxy plus spar urethane system from scratch
Expert Note: When tracking the long-term degradation rate of a spar urethane finish on a teak house sign to set a precise maintenance interval for a property management client, an outdoor 45-degree natural weathering exposure rack with south-facing tilt, calibrated UV dose sensor logging at 10-minute intervals, and tipping bucket rain gauge recording daily rainfall in mm is used to record cumulative UV dose (in MJ/m2) and moisture exposure on a spar urethane coated teak test panel mounted alongside the actual sign. When the cumulative UV dose reaches 350 MJ/m2 (the empirical threshold for visible spar urethane degradation onset), a maintenance inspection is triggered regardless of calendar date. This data-driven maintenance trigger follows the UV dose monitoring protocol in ASTM D1006-21 (Standard Practice for Conducting Exterior Exposure Tests of Paints and Coatings on Wood).
How Do You Clean a Wood House Sign Without Damaging the Finish?
Regular cleaning keeps the sign looking good and removes biological growth before it can stain or damage the wood. Here is the correct method.
Products that are safe on finished wood signs:
- Warm water with a small amount of pH-neutral dish soap
- A soft natural bristle brush for carved or textured areas
- A soft microfibre cloth for smooth surfaces
- A garden hose on a gentle setting for rinsing
Products to avoid on wood signs:
- Pressure washers: the high pressure forces water under the finish and causes lifting
- Bleach: it breaks down the wood finish and bleaches the natural wood colour
- Acetone or solvent cleaners: dissolve most wood finishes on contact
- Steel wool or abrasive scouring pads: scratch the finish surface permanently
- Ammonia-based cleaners: soften and cloud many varnish and urethane finishes
Cleaning steps:
- Rinse the sign with a garden hose on a gentle setting to remove loose dust and debris
- Mix warm water with a few drops of mild dish soap
- Dip a soft cloth or natural bristle brush into the soapy water
- Gently scrub the sign surface in the direction of the wood grain
- Use the brush for any carved lettering or textured areas where dirt collects
- Rinse thoroughly with clean water to remove all soap
- Allow to air dry fully before applying any maintenance finish
For algae or green mould growth, mix 1 part white vinegar with 3 parts water. Spray onto the affected area and leave for 10 minutes. Scrub gently with a soft brush and rinse. Vinegar is safe on most exterior wood finishes but test a small hidden area first.
Expert Note: When investigating why an exterior paint finish on an oak house sign developed an unusual blistering pattern within 6 months of application, a scanning electron microscope with 15kV electron beam acceleration, 5000x magnification, and energy-dispersive X-ray spectroscopy (EDS) capability is used to examine a cross-section of the paint-to-wood interface at the blister site. The SEM reveals whether the blistering is caused by solvent entrapment in the primer layer, tannin migration through the primer, or fungal growth at the interface. Tannin contamination appears as an amorphous carbon-rich deposit between the primer and wood surface. This cross-section analysis follows the microscopic examination method in ASTM E986-04(2017) (Standard Practice for Scanning Electron Microscope Beam Size Characterization), applied here for paint failure analysis on wood substrates.
How Do You Mount a Wood House Sign to Last Outdoors for Years?
Even a perfectly finished wood sign will fail early if it is mounted badly. Moisture can enter through poorly sealed fixing points. Bad airflow behind the sign traps moisture and accelerates rot. Here is how to mount correctly.
Leave a gap behind the sign. Never mount a wood sign flush against a wall with no air gap. Moisture gets trapped between the sign and the wall. This trapped moisture rots the back face of the sign even if the front is perfectly sealed. Use standoff mounts or spacers to create a 10 to 15mm air gap behind the sign.
Use stainless steel fixings. Standard steel screws rust and stain the wood around them with orange iron oxide marks. Use 316-grade stainless steel screws, bolts, or standoffs for all outdoor wood sign fixings.
Seal all fixing holes. Before inserting any screw or bolt, apply a small amount of neutral-cure silicone sealant into the hole. Also apply sealant around the fixing once it is installed. This stops water from wicking down the screw shaft and entering the wood from inside.
Avoid end grain mounting where possible. Screws driven into the end grain of a wood sign grip less well than screws into face or edge grain. If you must fix into end grain, use longer screws or bolt all the way through the sign and use washers to spread the load.
Protect the back face. Apply at least 2 coats of finish to the back face and all edges of the sign. The back face is often left unfinished, but it is just as vulnerable to moisture as the front.
Expert Note: When checking the uniformity of wood density in a new white oak house sign blank before carving, to identify any low-density knot zones that could cause carving tear-out, an X-ray wood densitometer with 0.1mm scanning resolution, linear detector array, and density profile output in kg/m3 is used to scan a cross-section of the Quercus alba (white oak) blank at 20mm depth intervals. Density values below 550 kg/m3 indicate low-density earlywood or knot proximity zones. These zones should be avoided when planning the layout of carved text to prevent chipping during sandblasting or routing. Wood density profiling follows the X-ray densitometry method in ASTM D2395-17 (Standard Test Methods for Density and Specific Gravity of Wood and Wood-Based Materials), applicable to solid wood used in decorative and exterior signage applications.
When Should You Replace Rather Than Repair a Wood House Sign?
Sometimes a repair is not worth the effort or cost. Here is how to decide when to replace rather than fix.
Replace the sign when:
- There is active soft rot anywhere in the wood body. Soft rot means the wood fibres have been broken down by fungi. The wood feels soft and crumbly when pressed. Once rot reaches the core of a sign, structural repairs are not reliable.
- The sign has widespread delamination (if it is made from plywood or layered wood). Multiple layers separating cannot be reliably bonded back together.
- The painted or engraved design is faded beyond recognition and the wood surface has lost more than 3mm of material through weathering, sanding, and refinishing cycles. At this depth, the carving may be too shallow to be readable.
- Freeze-thaw damage has caused deep splits along the wood grain that run more than 50 percent of the way through the sign thickness.
- Multiple large checks (surface cracks running with the grain) cover the full face of the sign.
- The total cost of repair materials and labour exceeds 60 percent of the cost of a new sign.
Repair the sign when:
- Surface cracks are present but the wood body is solid and rot-free
- The finish has peeled but the underlying wood is in good condition
- UV greying has occurred but the wood is structurally sound
- The design is still clearly readable and the carving depth is intact
Expert Note: When assessing whether a weathered cedar house sign has suffered structural thermal damage due to extreme summer heat-soak in a south-facing wall installation, a digital grain probe thermometer with 150mm stainless steel spike, 0.1 degree Celsius resolution, and max/min recording function is used to measure the internal wood temperature at the core of the sign panel during a sunny summer afternoon. A dark-painted cedar sign in direct full sun can reach 75 to 85 degrees Celsius at the surface and 55 to 65 degrees Celsius at the core. Sustained core temperatures above 60 degrees Celsius accelerate lignin degradation and resin migration, permanently weakening the wood fibre structure. Repeated heat exposure above this threshold is an indication that the sign location should be changed or a lighter paint colour should be used. Internal wood temperature limits for exterior coatings are referenced in the performance criteria of ASTM D1006-21 (Standard Practice for Conducting Exterior Exposure Tests of Paints and Coatings on Wood).
🛍️ Shop Wood House Signs: Browse our range of Teak House Signs, Oak Name Plates, and Cedar House Signs. All signs come pre-sealed with 3-coat spar urethane and include a maintenance kit.
Frequently Asked Questions About Weatherproofing and Maintaining Wood House Signs
What is the best finish for an outdoor wood house sign?
Spar urethane (marine varnish) is the best finish for most outdoor wood house signs. It is flexible enough to move with the wood as it expands and contracts with temperature and humidity changes. It also contains UV absorbers. Apply 3 to 4 coats, sanding lightly between each coat. Recoat every 2 to 3 years outdoors.
How do I know when my wood sign needs resealing?
Do the water bead test. Sprinkle a few drops of water on the sign surface. If the water forms round droplets and beads on the surface, the finish is still working well. If the water soaks into the wood and darkens it, the finish has degraded and needs a fresh coat as soon as possible.
Can I use regular polyurethane on an outdoor wood sign?
No. Standard interior polyurethane is too rigid for outdoor use. When the wood expands and contracts with temperature and humidity changes, a rigid finish cracks and peels quickly. Always use spar urethane (also called marine varnish or exterior polyurethane) for outdoor wood signs. It is specifically designed to remain flexible outdoors.
How do I stop a wood sign from going grey?
Grey colouring is caused by UV light breaking down the lignin on the wood surface. To prevent greying, use a finish that contains UV absorbers (spar urethane) and recoat before the finish degrades. Also, a light stain adds pigment that blocks UV more effectively than a clear finish. If the sign has already gone grey, sand back to fresh wood and refinish from scratch.
What is the best wood for a carved outdoor house sign?
White oak is the best wood for deep carved or engraved outdoor signs. It is hard enough (1,360 lbf Janka hardness) to hold sharp carved edges without crumbling, and its closed-grain structure makes it naturally water-resistant. Teak is also excellent but more expensive. Avoid pine and soft woods for carved signs as they crumble and splinter when carved.
How do I remove algae or green staining from a wood sign?
Mix 1 part white vinegar with 3 parts water in a spray bottle. Spray the affected area and leave for 10 minutes. Scrub gently with a soft natural bristle brush and rinse with clean water. For heavy algae growth, use a proprietary wood cleaner containing benzalkonium chloride. Avoid bleach as it damages the finish and bleaches the wood unevenly.
Should I seal the back of a wood house sign?
Yes. The back of the sign is just as vulnerable to moisture as the front. Apply at least 2 coats of spar urethane or exterior finish to the back face and all edges. Pay extra attention to the end grain on all four edges. Unsealed end grain absorbs moisture 10 times faster than face grain and is the most common entry point for rot.
How long will a cedar wood house sign last outdoors?
Western red cedar is naturally rot-resistant and lasts well outdoors. With a proper 3-coat spar urethane finish, annual inspections, and recoating every 2 to 3 years, a cedar house sign typically lasts 15 to 25 years. In very harsh climates (tropical humidity, severe frost, or intense coastal salt air), lifespan is closer to 10 to 15 years. In sheltered locations, it can exceed 25 years.
Can I paint over a stained wood sign?
Yes, but only if the existing stain has been sanded back to a dull, de-glossed surface first. Clean all dust away and apply an oil-based primer before painting. Water-based paint applied directly over oil-based stain or varnish will not bond well and will peel within a season or two outdoors.
What should I do with my wood sign before winter?
In the autumn before the first frost: inspect the sign for any cracked or peeling finish. Fill any cracks with exterior wood filler. Apply a fresh maintenance coat of spar urethane if the water bead test fails. Seal around all fixing points with fresh neutral-cure silicone. Check that all mounting hardware is tight. If your sign is in a very exposed location with harsh winters, consider removing it and storing it indoors from November to March.
Explore Essential House Name Plate Guides & Tutorials
Browse our comprehensive handcrafted signage guides for material care, font selection, and architectural placement:
- Beach & Airbnb Signage Design & Weatherproofing Guide (2026)
- Complete Guide to Wood House Sign Sealing & Weather Maintenance
- Horizontal vs Vertical House Numbers Layout Comparison
- Hanging & Wall-Mounted Cottage Sign Installation Guide
- Round vs Rectangular Name Plaques for Modern Property Entrances
- Best Modern & Vintage Fonts for Cottage & Residential Signs