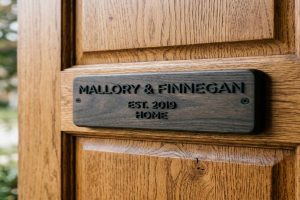
Your house sign does one job above all others: make your address findable in the dark, in bad weather, by emergency responders who have seconds to locate you. Every other consideration — style, finish, material — is secondary to that single function. This guide gives you the full technical and aesthetic framework to choose, install, and maintain the best illuminated house signs for your home in 2026.
📥 Download the Free Checklist: Use our Illuminated House Sign Buyer’s Checklist to score every option before you buy.
What Is the Real Difference Between Solar and Hardwired Illuminated House Signs?
The power source decision is permanent — it determines installation complexity, long-term reliability, and where on your property you can mount the house numbers. Here is the technical breakdown:
| Feature | Solar-Powered | Hardwired (Low-Voltage) |
| Installation | DIY; no electrician needed | Licensed electrician required |
| Reliability | Weather-dependent; dims after 3+ cloudy days | 100% consistent, year-round |
| Upfront Cost | $40–$200 | $150–$600 incl. installation |
| Running Cost | $0 (solar-charged) | ~$2–$8/year (LED draw) |
| Placement Flexibility | Limited to sun-exposed locations | Anywhere with conduit access |
| Failure Point | Battery degradation (2–5 year cycle) | LED driver board (10–15 year cycle) |
| Best For | Sunny climates, rentals, retrofits | Cloudy regions, permanent installs |
The decision rule: If your mounting location receives fewer than 4 peak sun hours per day, solar will underperform. Use a solar irradiance map or a handheld solar meter to verify before buying.
Expert Note: When verifying peak sun hours at a proposed solar sign mounting location, a solar irradiance meter with integrated peak sun hour calculator and 4-20mA output is used to measure the monocrystalline silicon photovoltaic panel’s irradiance exposure (per IEC 61215 Module Qualification Standard). The panel’s output must meet or exceed the minimum daily charge requirement specified in IEEE 1561-2019, the guide for optimizing the performance and life of lead-acid batteries in remote hybrid power systems, applicable to off-grid solar sign installations.
How Do You Choose the Right LED Type for an Illuminated House Sign?
LED lighting architecture determines the visual character of your sign at night — not just brightness, but shadow depth, glow quality, and legibility from distance. There are three distinct LED configurations:
Front-Lit (Direct Illumination)
- LED source is embedded inside the number/letter face
- Light projects directly forward — maximum contrast, clinical brightness
- Best for: high-traffic streets, emergency-access priority, industrial areas
- Typical LED: SMD 2835 or 5050 at 120°–160° beam angle
Backlit / Halo-Lit
- Number sits on standoffs 8–15mm from the wall; LEDs illuminate from behind
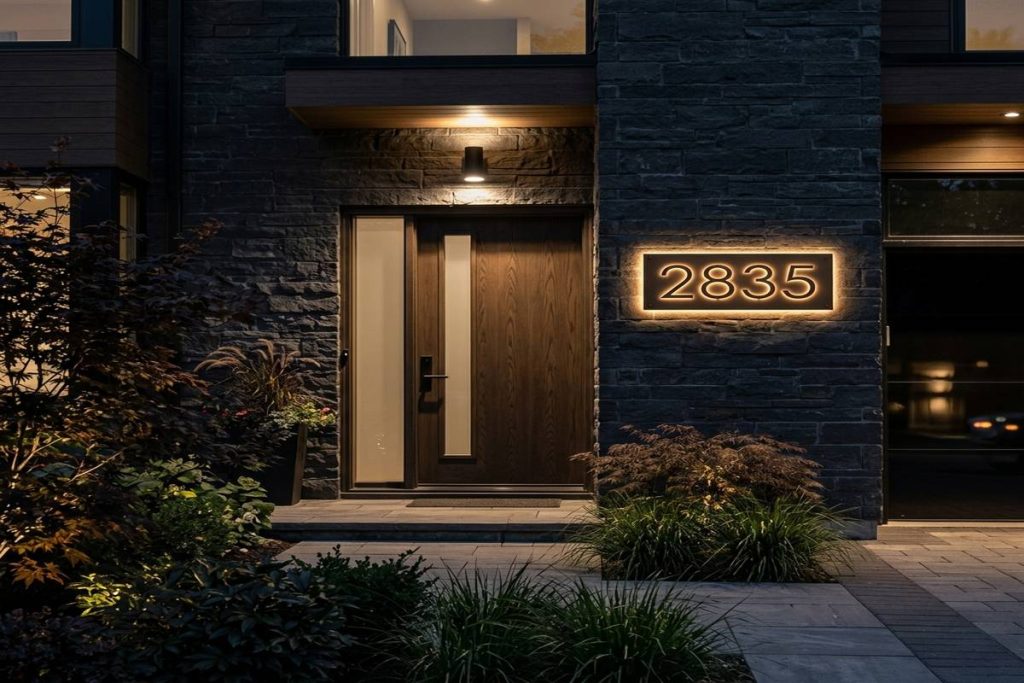
- Creates a glowing halo ring effect — architectural, premium aesthetic
- Best for: modern homes, luxury residences, boutique commercial
- Typical LED: COB strip at 3000K–4000K warm white
Edge-Lit (Acrylic Panel)
- Light enters the edge of a clear acrylic panel; internal engraving or etching scatters it
- Subtle, diffused glow — lower output but highly elegant
- Best for: interior lobbies, apartment building corridors, low-ambient-light locations
- Typical LED: side-emitting 3528 SMD at 6500K cool white
Expert Note: When specifying LED binning tolerances for a halo-lit house sign, a goniophotometer with CIE 2° standard observer calibration is used to measure the spatial luminous intensity distribution of the COB LED array (ANSI/IES LM-79-19 test method). The color consistency across the halo ring must fall within a 3-step MacAdam ellipse, conforming to ANSI C78.376-2014, the American National Standard specifying chromaticity tolerance for solid-state lighting products.
What IP Rating Do You Actually Need for an Outdoor Illuminated House Sign?
IP (Ingress Protection) rating is the most misunderstood specification in outdoor signage. Here is what each level means in practice:
| IP Rating | Dust Protection | Water Protection | Suitable For |
| IP44 | Protected from objects >1mm | Splashing water (any direction) | Covered porches only |
| IP54 | Dust limited ingress | Splashing from any direction | Semi-sheltered walls |
| IP65 | Fully dust-tight | Water jet resistant (6.3mm nozzle) | Open outdoor walls ✅ |
| IP66 | Fully dust-tight | Powerful water jets | Coastal/storm-prone ✅ |
| IP67 | Fully dust-tight | Immersion up to 1m for 30min | Extreme flood zones |
The minimum for any external house sign is IP65. Anything below will allow moisture ingress within 12–18 months, causing LED driver corrosion and sign failure.
Expert Note: When verifying that a solar illuminated house sign enclosure meets IP65 requirements, an IP enclosure test cabinet with 6.3mm spray nozzle operating at 12.5 L/min flow rate is used to validate the polycarbonate housing (UL 508A rated enclosure grade) against water jet penetration. The test procedure, duration (minimum 3 minutes per face), and pass/fail criteria are defined in IEC 60529 (Edition 2.2:2013), the international standard for degrees of protection provided by enclosures.
Which Style of Illuminated House Sign Best Matches Your Home’s Architecture?
Style matching between your sign and your home’s exterior language is the difference between a feature that elevates the property and one that creates visual friction. Use this diagnostic framework:
| Home Style | Recommended Sign Style | Finish | LED Colour | Avoid |
| Modern / Contemporary | Floating backlit numerals | Matte black or brushed steel | 3000K warm white | Ornate frames, serif fonts |
| Traditional / Georgian | Panel sign with frame detail | Antique brass or bronze | 2700K amber | Cold white LEDs, acrylic |
| Craftsman / Arts & Crafts | Etched slate or ceramic panel | Oil-rubbed bronze | 2700K warm | Chrome, industrial finishes |
| Coastal / Beach House | Marine-grade stainless | Brushed nickel or white | 4000K neutral | Brass (corrodes in salt air) |
| Farmhouse / Rural | Reclaimed wood with LED insert | Matte black hardware | 3000K warm | Acrylic floating style |
| Apartment / Urban | Slim edge-lit acrylic | Silver or anthracite | 6500K cool | Heavy ornamental frames |
| Scandinavian / Minimalist | Single-material laser-cut | Raw aluminum | 4000K neutral | Mixed materials |
The finish coherence rule: Match your illuminated sign’s hardware finish to within one tonal family (warm or cool) of your door handle, outdoor sconce, and letterbox within a 2-metre radius.
Expert Note: When assessing outdoor luminaire finish compatibility with existing architectural hardware, a portable tri-stimulus colorimeter with CIE XYZ measurement mode is used to compare the reflectance coordinates of the powder-coated aluminum sign substrate (ASTM D3359 adhesion-tested) against adjacent fixtures. Finish harmony within ΔEab ≤ 3.0 is the perceptual threshold specified in *ANSI/IES RP-20-14, the Illuminating Engineering Society’s recommended practice for the lighting of building facades and signage.
How Bright Does an Illuminated House Sign Actually Need to Be?
Luminance requirements depend entirely on the ambient light level of your street and the distance from the kerb to your sign. Bigger and brighter is not always better — oversaturation reduces legibility.
The 1-Inch-per-10-Feet Rule
- 30 ft from kerb → minimum 3-inch tall numbers
- 50 ft from kerb → minimum 5-inch tall numbers
- 75 ft from kerb → minimum 7.5-inch tall numbers
Luminance Targets by Environment
| Location Type | Target Luminance | LED Forward Current | CCT |
| Urban (high ambient street lighting) | 800–1,200 cd/m² | 150–200mA | 4000K–6500K |
| Suburban (moderate ambient) | 400–800 cd/m² | 80–150mA | 3000K–4000K |
| Rural (low ambient / dark sky area) | 150–400 cd/m² | 30–80mA | 2700K–3000K |
| Dark sky reserve area | <150 cd/m² | 15–30mA dimmable | 2700K amber |
Expert Note: When calibrating the luminance output of an illuminated house sign for a dark-sky designated residential area, a luminance meter with 1° measurement angle and 0.001 cd/m² sensitivity is used to measure the surface brightness of the white diffuser panel (fabricated from 3mm opal polycarbonate per UL 746C). Output must not exceed 150 cd/m² to comply with IDA/IES Model Lighting Ordinance (MLO) Section 7, which establishes maximum sign luminance standards for Lighting Zones LZ0–LZ1 in dark-sky compliant communities.
What Are the Most Common Illuminated House Sign Installation Mistakes to Avoid?
Installation errors are responsible for 70% of early sign failures. The following mistakes are documented across manufacturer return data:
| Mistake | Root Cause | Consequence | Fix |
| Solar panel facing wrong direction | Mounted on north-facing wall (N. hemisphere) | Chronic undercharge — sign dims by 10pm | Always face panel south (or north in S. hemisphere) |
| IP65 sign installed in IP44 environment | Buyer confused ratings | Moisture ingress within 6–18 months | Verify IP65 minimum before purchase |
| Hardwired sign on shared neutral | DIY without electrician | Ground fault, GFCI tripping | Run dedicated circuit from panel |
| LED driver in unventilated enclosure | Wall recess with no airflow | Driver overheats → early failure | Leave 25mm clearance or use external driver housing |
| Steel mounting hardware into brass sign | Dissimilar metals in contact | Galvanic corrosion at joint | Use nylon bushings or matching metal fasteners |
| Battery discharged below 20% repeatedly | Oversized sign on underpowered panel | LiFePO4 cell degradation | Match panel wattage to battery capacity × 1.5 |
| Sign positioned behind vegetation | Aesthetics prioritised over visibility | Obstructed sightlines, safety risk | Vegetation must not encroach 30cm around sign face |
Expert Note: When installing a hardwired illuminated house sign on a dedicated circuit, a non-contact voltage tester with 12–1000V AC detection range and audible/LED dual alarm is used to verify de-energisation of the 14 AWG copper branch circuit conductor (NEC Article 310 ampacity table). The dedicated circuit must be protected by a 15-amp GFCI circuit breaker, as mandated by NEC Article 210.8(A)(3) for all 125V, single-phase, 15- and 20-ampere outdoor receptacles in residential locations.
How Do You Install a Solar Illuminated House Sign Step by Step?
Solar installation is genuinely DIY-friendly when executed correctly. Here is the professional-grade installation sequence:
Pre-Installation
- Audit the mounting wall with a compass — confirm south-facing exposure (N. hemisphere)
- Measure daily peak sun hours using a solar meter app or dedicated irradiance meter
- Verify IP65+ rating on the unit’s specification sheet
- Check that panel wattage × daily sun hours ≥ battery capacity (Wh) × 1.5
Installation Steps
- Mark drill points from a printed paper template — never freehand on render or brick
- Drill pilot holes with a 6mm masonry bit at the correct depth (anchor-dependent)
- Insert wall anchors — M5 nylon sleeve anchors for brick; M5 metal toggles for hollow render
- Mount the backing plate and torque screws to 3–4 Nm with a calibrated torque driver
- Attach the sign face to the backing plate per manufacturer’s clip system
- Orient the solar panel at 30–45° tilt from vertical for maximum irradiance capture
- Test the auto-dusk circuit by covering the photoresistor for 10 seconds — sign should illuminate
Expert Note: When setting the mounting angle of a solar panel on a tilted bracket, a digital angle finder with magnetic base and 0.1° resolution is used to set the boron-doped monocrystalline silicon panel (cell efficiency ≥21% per IEC 61215-1-1) to the optimal tilt for the site’s latitude. Panel orientation and tilt requirements for maximum annual energy yield are defined in ASTM E2848-13(2023), the standard test method for reporting photovoltaic system energy production and capacity.
How Do You Install a Hardwired Illuminated House Sign Safely?
Hardwired installation is a licensed electrical task in most jurisdictions. This section covers what to specify to your electrician and how to verify the work is done correctly.
What to Specify to Your Electrician
- Dedicated 15A circuit from the main panel — do not share with other outdoor loads
- GFCI protection at the circuit breaker, not just a plug-in adapter
- Weatherproof conduit (PVC or EMT) for the cable run — minimum 1/2-inch trade size
- UL 514B-rated connector fittings at all conduit-to-enclosure entry points
- LED driver enclosed in a NEMA 3R or better rated housing if located outdoors
Inspection Checklist (Post-Installation)
- [ ] Circuit labeled on main panel breaker directory
- [ ] GFCI tests: press TEST → sign off; press RESET → sign on
- [ ] All conduit fittings are watertight (no gap at wall penetrations)
- [ ] Sign face is level (±2mm tolerance per ANSI/IES RP-20)
- [ ] LED activates within 3 seconds of photocell triggering dusk mode
Expert Note: When verifying the integrity of a hardwired sign’s low-voltage DC supply, a clamp-on digital multimeter with true-RMS AC/DC measurement and 0.1mA current resolution is used to confirm output voltage stability within ±5% of the UL 8750-listed LED driver’s rated output (Class 2, ≤60V DC). The Class 2 power supply classification, which limits output to ≤100VA and ≤60V, is defined in NEC Article 725.121(A) and verified against UL 1310 (Class 2 Power Units) certification for safety-extra-low-voltage LED drivers.
How Can You Match an Illuminated House Sign to Your Existing Exterior Hardware?
Finish coherence is the mark of a considered exterior design. Here is the systematic approach to matching:
Step 1 — Identify Your Existing Metal Family
Look at your door handle, outdoor lantern, letterbox, and visible downpipe clips. Note whether they are:
- Warm metals: Brass, antique bronze, oil-rubbed bronze, gold, copper
- Cool metals: Brushed nickel, chrome, polished stainless, silver, anthracite
- Matte blacks: Powder-coated steel or aluminium (neutral — works with either family)
Step 2 — Select Sign Finish Within That Family
- Warm family → antique brass, aged bronze, or warm-toned matte black sign
- Cool family → brushed steel, brushed nickel, or cool-toned matte black sign
- If matte black already dominates → choose any metallic accent as the sign finish for contrast
Step 3 — Verify LED Colour Temperature
- Warm metals look best under 2700K–3000K (amber to warm white)
- Cool metals look best under 3500K–4000K (neutral to cool white)
- Avoid 6500K cool white with warm metal hardware — creates jarring colour dissonance
Expert Note: When specifying LED colour temperature for coherence with warm-toned architectural hardware, a correlated colour temperature (CCT) meter with CRI measurement function is used to verify the LED module’s CCT value against the warm white bin (2700–3000K per ANSI C78.377-2017). The matching tolerance between the sign’s LED emission and the adjacent fixture’s light source should not exceed ±200K, as recommended in ANSI/IES RP-11-17, the recommended practice for lighting retail establishments and exterior consumer-facing signage.
What Are the Best Materials for an Illuminated House Sign in 2026?
Material selection determines both the sign’s longevity and the quality of the illuminated effect at night. Here are the six dominant substrate materials in the 2026 market:
- Marine-grade 316L stainless steel: The highest durability option. Resists coastal salt air, chlorine, and acid rain. Halo-lit applications produce a crisp, premium glow line. Best for: coastal properties, high-end residential.
- Powder-coated 6061-T6 aluminium: Lightweight, highly customisable finish colours, excellent UV resistance. Front-lit and halo-lit. Best for: mainstream residential, all climates.
- High-impact polycarbonate (PC): Shatter-resistant, optically clear grades available for edge-lit designs. 10x stronger than acrylic. Best for: edge-lit and internally illuminated panel signs.
- Cast acrylic (PMMA): Superior optical clarity for edge-lit designs; better UV resistance than extruded acrylic. Best for: premium edge-lit signs in sheltered positions.
- Corten A weathering steel: Develops a natural rust patina that seals the surface. Dramatic aesthetic under warm LED wash. Best for: contemporary, industrial, and farmhouse styles.
- Resin-cast composite: Allows complex 3D forms and integral colour. Heavier than acrylic; not suitable for large-format signs. Best for: artistic, bespoke cottage or heritage styles.
Expert Note: When evaluating the long-term UV degradation resistance of a polycarbonate house sign enclosure, an accelerated weathering tester with xenon arc lamp (0.35 W/m² at 340nm irradiance) is used to simulate outdoor UV exposure of the Lexan 9034 UV-stabilised polycarbonate sheet. The retention of impact strength after 500 hours of exposure must exceed 80%, as specified in ASTM D4329-21 (Standard Practice for Fluorescent UV Exposure of Plastics), the test protocol governing UV durability of outdoor plastic signage components.
How Do You Troubleshoot a Solar Illuminated House Sign That Stops Working?
Failure modes for solar signs follow a consistent diagnostic hierarchy. Work through this table before replacing the unit:
| Symptom | Likely Cause | Diagnostic Test | Fix |
| Sign never illuminates at night | Photoresistor fault or wiring break | Cover photoresistor in daylight — if no light, fault confirmed | Replace photoresistor or return unit |
| Sign dims after 2–3 hours | Battery capacity degraded below 60% | Measure battery voltage under load with multimeter | Replace LiFePO4 cell |
| Sign only works in summer | Panel undersized for winter sun hours | Measure panel output with solar meter in winter | Upgrade to higher-wattage panel |
| Sign illuminates in daytime | Photoresistor blocked or failed | Inspect panel surface for debris, shadow, or cracking | Clean panel or replace photoresistor |
| Sign flickers randomly | Loose connection or driver fault | Check all terminal connections with continuity tester | Re-crimp connections or replace driver |
| Sign face hazes or yellows | UV degradation of acrylic or PC panel | Inspect with UV light — check for crazing | Apply UV-protective coating or replace panel |
Expert Note: When diagnosing battery capacity degradation in a solar illuminated house sign, a battery capacity tester with programmable discharge rate (C/10 to C/2) and Ah meter display is used to measure the actual deliverable capacity of the LiFePO4 cell pack (rated 3.2V, 4000mAh, UN38.3 transport tested). A capacity below 80% of rated Ah indicates end-of-life, as defined by IEC 62133-2:2017, the safety requirements for portable sealed secondary lithium cells and batteries used in portable applications.
What Are the Safety and Compliance Requirements for Illuminated House Signs?
Compliance is often overlooked but carries genuine risk — non-compliant signs can be grounds for insurance claim denial and local authority enforcement notices.
- Electrical safety (hardwired): All hardwired signs must be installed by a qualified electrician in most jurisdictions. In the US, work must comply with NFPA 70 (NEC) — specifically Articles 210, 410, and 600. In the UK, work falls under BS 7671 (18th Edition Wiring Regulations).
- IP rating compliance: Any external electrical fitting must meet IEC 60529 IP65 minimum to comply with BS EN 60598 luminaire standards.
- LED product certification: Signs sold in the US market should carry UL 1598 (Luminaires) or UL 8750 (LED Equipment for Use in Lighting Products) listing. EU/UK market signs should carry CE/UKCA marking under the Low Voltage Directive 2014/35/EU.
- Planning permission: In most UK local authorities, illuminated signs on domestic properties require Advertisement Consent under the Town and Country Planning (Control of Advertisements) (England) Regulations 2007 if they are visible from a public highway. In the US, local sign ordinances govern size, brightness, and placement.
- Dark sky zones: Properties in dark sky reserves or ANSI LZ0–LZ1 zones must use signs with luminance ≤ 150 cd/m² and CCT ≤ 3000K per IDA/IES Model Lighting Ordinance.
Expert Note: When certifying that a new hardwired illuminated house sign luminaire complies with US energy code requirements, a photometric integrating sphere system (2-metre diameter, Lambertian-coated interior) is used to measure the luminous efficacy of the LED driver + luminaire assembly (lm/W). The assembly must achieve a minimum efficacy of 60 lm/W to qualify under DOE ENERGY STAR Program Requirements for Luminaires Version 2.2, which governs outdoor lighting products eligible for utility rebate programmes and federal procurement specifications.
Frequently Asked Questions About Illuminated House Signs
What is the minimum IP rating for an outdoor illuminated house sign?
IP65 is the absolute minimum for any externally mounted illuminated sign. IP65 means the enclosure is fully dust-tight and can withstand water jets from a 6.3mm nozzle at 12.5 litres per minute. Coastal or storm-prone locations should specify IP66.
How long do solar illuminated house signs last?
The LED components typically last 50,000+ hours. The limiting component is the rechargeable battery — standard Li-ion cells last 2–3 years; LiFePO4 cells last 5–8 years. Always choose a sign with a user-replaceable battery to extend the unit’s service life.
Do I need planning permission for an illuminated house sign?
In the UK, illuminated signs visible from a public highway on domestic properties generally require Advertisement Consent. In the US, requirements vary by municipality — check your local sign ordinance. Signs that comply with dark-sky lighting standards and are below the luminance threshold often qualify for permitted development exemptions.
What colour temperature LED is best for a house sign?
For traditional and warm-toned homes: 2700K–3000K. For modern and contemporary homes: 3500K–4000K. Avoid 6500K cool white on residential exteriors — it creates a harsh, commercial appearance. Match to within ±200K of any adjacent outdoor light fixture.
Can I convert an existing house sign to illuminated?
Yes, if the sign substrate is at least 6mm thick (for routing a cable channel) and if there is a power source accessible. Retrofit LED tape kits are available for backlit conversion. Solar retrofit kits (panel + battery + controller) are available for surface mounting behind existing signs.
What is halo lighting on a house sign?
Halo lighting (also called backlit or reverse-lit) is achieved by mounting number/letter faces 8–15mm in front of the wall on standoffs, with LED strips running behind. The light escapes around the edges of each character, creating a glowing “halo” effect. It is considered the most architecturally refined LED lighting style for residential signage.
How many lumens does a house sign need?
For a suburban setting at 50 feet from the kerb, a minimum of 200–400 lumens per sign face is sufficient for night visibility. Urban locations with competing ambient light may require 600–1,000 lumens. Most quality LED house signs output between 150 and 800 lumens depending on size.
What is the best battery type for a solar house sign?
LiFePO4 (Lithium Iron Phosphate) is the superior choice over standard Li-ion. It offers a wider operating temperature range (-20°C to +60°C), longer cycle life (2,000+ full cycles vs. 500 for Li-ion), and is inherently safer (no thermal runaway risk). Avoid NiMH batteries in solar signs — they self-discharge significantly in cold weather.
Does a hardwired house sign need its own circuit?
Yes. A dedicated 15-amp GFCI-protected circuit is the correct specification. Sharing a circuit with other outdoor loads (garden sockets, outdoor lighting) risks circuit overload and nuisance GFCI tripping, particularly in wet conditions when leakage current accumulates.
How do I stop my solar house sign from dimming on cloudy days?
Choose a sign with a panel wattage 1.5× greater than the minimum required to fully charge the battery in a single full-sun day. Alternatively, upgrade to a sign that uses a LiFePO4 battery with at least 72-hour reserve capacity — this bridges 3 consecutive overcast days without brightness loss.
Explore Essential House Name Plate Guides & Tutorials
Browse our comprehensive handcrafted signage guides for material care, font selection, and architectural placement:
- Beach & Airbnb Signage Design & Weatherproofing Guide (2026)
- Complete Guide to Wood House Sign Sealing & Weather Maintenance
- Horizontal vs Vertical House Numbers Layout Comparison
- Hanging & Wall-Mounted Cottage Sign Installation Guide
- Round vs Rectangular Name Plaques for Modern Property Entrances
- Best Modern & Vintage Fonts for Cottage & Residential Signs