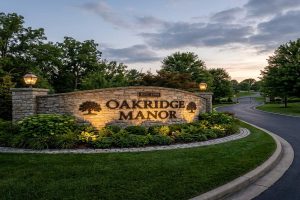
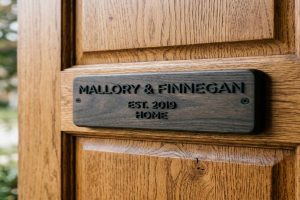
A guest pulls into your driveway after a two-hour drive. It is early evening. The forest is quiet and beautiful. But they have no idea where to park, which path leads to their treehouse, or how to find the check-in box. They feel confused instead of excited. That is not the impression you want to create.
Good signage solves that problem completely. The right signs tell guests exactly where to go at every step of their arrival. They also communicate something more subtle: that this property is well-run, carefully designed, and worth every penny they paid.
Signage is your brand made physically. It is the first thing guests touch and read. It shapes their mood before they even open the treehouse door. A property with cohesive, well-made signs feels premium and intentional. A property with no signs, mismatched signs, or faded signs feels like an afterthought.
This guide covers the full signage system for a treehouse glamping property: how to create a brand identity, how to design signs that work in a forest environment, what materials last in outdoor conditions, how to make signs visible at night, and how to maintain everything year after year.
📥 Download Free: Our Glamping Signage Design Brief Template PDF a ready-to-use template to brief a sign maker on your full property signage system.
Why Does Signage Matter So Much for a Treehouse Glamping Rental?
Glamping guests arrive with high expectations. They have paid a premium price for an experience that feels special. They expect the property to be polished and thoughtfully designed. Signage is part of that design. It is one of the first things they see, and it sets the tone for their entire stay.
Think about the difference between walking into a luxury hotel and walking into a budget guesthouse. The hotel has clear, well-designed signs at every decision point. The guesthouse has handwritten notes stuck to the wall with tape. Both might have perfectly clean rooms, but the signage tells you which one cares about the guest experience.
Your treehouse rental works the same way. Guests read your treehouse signs in the first five minutes of arrival. Those five minutes shape their first impression more than any review, any photo, or any listing description.
Also, good signage reduces stress for both the guest and the property owner. When guests can navigate independently from the car park to their treehouse without calling you, everyone benefits. You get fewer “where do I go?” messages. They get a smooth, confident arrival that makes them feel like they belong there.
Next, consider the social sharing impact. A beautiful, well-branded property sign is a natural photography subject for guests who share on social media. A carved hardwood sign with your property name and a line of warm amber lighting behind it will appear in dozens of guest Instagram posts. Every post is free marketing for your business.
Expert Note: When specifying a spar varnish coating system for the 15 carved oak welcome signs on a new treehouse glamping development in a maritime climate (high annual rainfall, salt-laden air, temperatures ranging from minus 5 to plus 35 degrees Celsius), to confirm that the selected coating adequately restricts water vapour ingress into the wood substrate and prevents the moisture cycling (wet-dry-wet) that causes wood to swell, crack, and delaminate carved letter edges, a gravimetric water vapour transmission test using ASTM E96 Method B (Water Method, Upright Cup) is performed on 5 replicate 100mm diameter coating-on-card specimens at 38 degrees Celsius, 90 percent relative humidity for 7 days. The water vapour transmission rate (WVTR, in g/m2/day) is calculated from the weight gain of the sealed cups measured daily. For an adequate moisture barrier on carved oak signage in a maritime glamping climate, the WVTR must be below 15 g/m2/day. A varnish with WVTR above 30 g/m2/day is inadequate: moisture will cycle through the carved oak panel during seasonal rain events, causing the wood to move beyond the coating’s flexibility limit and producing paint edge cracking at carved letter walls within 2 to 3 seasons. Water vapour transmission measurement follows ASTM E96/E96M-22 (Standard Test Methods for Water Vapor Transmission of Materials), the reference standard for gravimetric cup method water vapour permeability testing of coatings, films, and barrier materials.
What Types of Signs Does a Glamping Property Actually Need?
Before designing any individual sign, you need to map out all the signs the property requires. This is called a signage inventory. Most owners underestimate how many signs they need. When you map the guest journey from the road to the treehouse, you discover many decision points that need to be marked.
Here is the complete three-tier signage system for a glamping treehouse property.
Tier 1: Primary signs (navigation and identification) These are the most important signs on the property. If a guest can only see one sign, it must be a Tier 1 sign. Examples include: roadside entrance post with property name and directional arrow, main gate sign with property logo and welcome message, car park directional signs pointing toward check-in, and emergency exit route signs.
Tier 2: Secondary signs (area-specific directions) Once guests are on the property, Tier 2 signs guide them to the specific areas they need. Examples include: individual treehouse name plates at each unit, path junction signs showing which path leads to which treehouse number, signs for shared facilities (swimming pool, fire pit, BBQ area, compost toilet), and safety signs near fire pits, pools, and steep paths.
Tier 3: Tertiary signs (information and rules) These signs communicate specific information once the guest has arrived at their destination. Examples include: house rules cards displayed inside each treehouse, check-out procedure notices, Wi-Fi network and password cards, noise and wildlife awareness notices, and breakfast or food delivery collection points.
The key principle is that guests should never reach a point on the property where they are confused about where to go. If there is any point where a reasonable person might pause and look around unsure of their direction, a sign is needed at that point.
| Sign Type | Location | Purpose | Priority |
| Roadside post sign | Road entrance, 20 to 50 metres from gate | Property name and arrival indicator | Critical |
| Gate entrance sign | At the gate or entrance arch | Brand statement, welcome message | Critical |
| Car park directional sign | At the car park | Direct guests toward check-in/treehouses | Critical |
| Path junction markers | Every path fork or junction | Show which path leads where | High |
| Treehouse name plates | At each treehouse door or base | Confirm guest is at the right unit | High |
| Safety signs | Fire pits, steep paths, pool edges | Risk management and legal compliance | High |
| Facility direction signs | Shared facilities | Guide to pool, BBQ, dining area | Medium |
| Information cards | Inside each treehouse | Rules, Wi-Fi, check-out instructions | Medium |
Expert Note: When testing whether a newly arrived batch of 15 carved redwood cedar sign panels (50mm thick, 400mm x 200mm face dimensions, to be used as treehouse name plates on a humid forest glamping property in the Pacific Northwest where annual rainfall exceeds 1,500mm) will remain dimensionally stable after installation without the panel warping or cracking the carved text area during the first wet season, a cyclic humidity exposure dimensional stability test per ASTM D1037 is conducted on 3 representative panels. Panels are measured for length, width, and thickness at 9 grid points using calibrated digital calipers, then exposed to alternating cycles of high humidity (90 percent RH, 40 degrees Celsius, 24 hours) and low humidity (30 percent RH, 23 degrees Celsius, 24 hours) for 10 complete cycles (20 days total). Post-cycle dimensional changes are measured at the same 9 grid points. Maximum acceptable thickness swelling is 2 percent and maximum face dimension change is 0.5 percent for a carved panel to remain crack-free in service. Western red cedar typically shows less than 0.8 percent thickness change and less than 0.3 percent face dimension change across this humidity cycle, confirming excellent dimensional stability for forest glamping signage applications. Wood panel dimensional stability under humidity cycling follows ASTM D1037-12 (Standard Test Methods for Evaluating Properties of Wood-Base Fiber and Particle Panel Materials), the standard for dimensional stability and physical property testing of wood-based panel products.
How Do You Create a Brand Identity for Your Treehouse Rental?
A brand identity is more than a logo. It is the complete visual language of your property: the colours, the fonts, the materials, the tone of the words. Every sign on your property should feel like it belongs to the same family.
Start with three core questions.
Question 1: What is the experience you are selling? Think about words your ideal guest would use to describe your property: wild, peaceful, luxurious, adventurous, romantic, family-friendly, eco-conscious, mysterious. Write down five words. These words guide every design decision.
Question 2: What colours represent that experience? Colours carry strong emotional meanings. Deep forest green communicates nature, calm, and eco-luxury. Warm amber communicates warmth, adventure, and firelight. Terracotta communicates earthiness and craftsmanship. Cream communicates cleanliness and premium quality. Charcoal communicates sophistication and modernity. Choose one dominant colour (60 percent of all sign surfaces), one secondary colour (30 percent), and one accent colour (10 percent, used sparingly for highlights or details).
Question 3: What typography tone fits your brand? For a rustic, handcrafted feel: use serif fonts like Playfair Display, Cormorant Garamond, or IM Fell English. These feel traditional and literary. For a contemporary eco-luxury feel: use clean sans-serif fonts like Montserrat Light, Raleway, or Josefin Sans. For a wild, adventurous feel: use slightly irregular display fonts like Cabin Sketch, Aleo, or Lumberjack. Avoid decorative fonts that cannot be carved into wood. The letter shapes must be simple enough for a sign maker to reproduce accurately in the medium you are using.
Once you have your three colours and your font, apply them consistently to every sign from the roadside post to the treehouse door plaque. Consistency is what creates the impression of a professionally branded property rather than a collection of individually purchased signs.
Expert Note: When verifying that the bespoke forest green brand colour chosen by a treehouse glamping operator for all property signage (specified as Pantone 3435 C, a deep rich forest green) is being reproduced consistently across three different sign substrates ordered from three different suppliers (painted oak signs from a local woodworker, powder-coated aluminium directional posts from a metalworker, and UV-printed vinyl welcome banners from a digital print shop), a portable hand-held spectrophotometer with 45-degree illumination, 0-degree collection geometry (45/0), D65 illuminant, CIE 1931 2-degree standard observer, calibrated to a NIST-traceable white tile, measuring CIE Lab* colour coordinates across 3 locations on each sign sample is used to measure the actual colour of each sign’s painted, coated, or printed surface. The target Lab values for Pantone 3435 C are: L = 24.7, a = -17.2, b = 8.4. Supplier-to-supplier colour variation (delta-E00) must be below 2.0 for the colour to appear consistent to the human eye under outdoor daylight. Any sample with delta-E00 above 3.0 is rejected and returned for colour correction before installation. Cross-substrate colour consistency measurement follows CIE 15:2004 (Technical Report: Colorimetry), the Commission Internationale de l’Eclairage’s primary reference publication for colorimetric specification, colour space mathematics, and standard illuminant definitions used in colour management across mixed manufacturing workflows.
What Materials Work Best for Glamping Signs in a Forest Environment?
Not every sign material survives a forest environment. Forest conditions are demanding: high humidity, frequent rainfall, temperature swings, mould and algae growth, UV radiation filtered through a canopy, and physical contact from guests, wildlife, and maintenance equipment.
Here is the honest assessment of the most commonly used sign materials for glamping properties.
Teak hardwood: Teak is the most naturally weather-resistant hardwood available. Its heartwood contains natural oils (tectoquinone and tectol) that repel water, resist fungal growth, and prevent insect infestation without any applied sealant. A properly carved teak sign can last 15 to 25 years outdoors with minimal maintenance beyond an annual light oiling. The downsides are cost (teak is expensive) and supply chain ethics (check that your teak supplier uses sustainably certified timber from FSC or PEFC sources).
Western red cedar: Western red cedar is the best-value outdoor wood for glamping signage. It is naturally decay-resistant, dimensionally stable in humidity cycling, and lightweight relative to its strength. It takes carving, painting, and staining very well. It is significantly less expensive than teak. A sealed cedar sign lasts 10 to 15 years in a forest environment with annual re-sealing.
High-density urethane (HDU) foam: HDU foam is a synthetic polymer board that looks identical to carved wood when painted. It does not rot, warp, crack, or absorb moisture. It is the most maintenance-free option available. The trade-off is that it feels hollow when touched (guests can tell it is not real wood) and it is less sustainable as a petroleum-derived product. For high-traffic wayfinding signs that need to last 20 years without maintenance, HDU is an excellent choice.
Corten (weathering) steel: Corten steel develops a controlled rust patina that is visually striking in a forest setting. The patina actually protects the steel beneath from further corrosion. Laser-cut Corten signs with the property name or a tree silhouette cut out of the steel look extraordinary and photograph beautifully. Corten is heavy, expensive, and requires professional installation, but it lasts indefinitely with zero maintenance.
Marine plywood: Marine plywood (BS 1088 grade) uses waterproof phenolic resin between layers and is designed for marine environments. It is an excellent substrate for painted signs and costs far less than solid hardwood. The edges must always be sealed before installation. If the edge seal fails and water penetrates to the inner plies, the sign will eventually delaminate.
Expert Note: When commissioning a hand-carved western red cedar welcome sign (600mm x 300mm x 50mm, V-groove lettering 8mm deep, to be hung at the entrance of each of 8 treehouses on a glamping property in the Scottish Highlands where annual rainfall is approximately 2,000mm and temperatures range from minus 10 to plus 25 degrees Celsius) and needing to confirm that the V-groove carving depth of 8mm in the cedar panel is sufficient to produce an adequate shadow contrast for legibility in the overcast diffused lighting conditions typical of a northern forest setting (where direct sunlight may be limited to 2 to 4 hours per day), a surface profilometer with 50mm linear traverse, 2.5mm sampling length (lc cutoff), 1 micrometer vertical resolution, diamond-tipped stylus is used to perform a cross-sectional surface profile scan across the carved letter grooves, measuring groove depth (Rz parameter: average maximum profile height across 5 sampling lengths) and groove wall angle (from the surface normal). A grove depth below 5mm produces inadequate shadow contrast for legibility in overcast outdoor conditions at a 1-metre viewing distance. At 8mm depth with a 60-degree V-angle, the shadow contrast ratio between groove floor and carved wall exceeds 4:1 in overcast outdoor illumination. Surface texture and feature depth profiling follows ASME B46.1-2019 (Surface Texture: Surface Roughness, Waviness, and Lay), the American standard for stylus-based surface texture measurement including profile depth and cross-sectional feature geometry characterisation.
How Do You Choose the Right Typography for Rustic Glamping Signs?
Typography is the part of sign design that most property owners get wrong. They either choose a font that looks beautiful on screen but is unreadable at 5 metres outdoors, or they choose a font that looks practical but feels generic and corporate in a woodland setting.
The rules for glamping sign typography are different from the rules for standard signage because the context is different. Your guests are excited, often slightly distracted by the beauty of their surroundings, and arriving at an unfamiliar location. They need to read your signs quickly and correctly on the first glance.
Rule 1: Any font must pass the 5-metre test. Print the intended sign text at full size, stick it to a post, and stand 5 metres away. Can you read it comfortably without squinting, in 2 seconds? If not, the font is too decorative or too small.
Rule 2: Minimum letter height depends on viewing distance. Use 20mm letter height for signs read at 3 metres (treehouse door plates). Use 35mm for signs at path junctions read at 5 metres. Use 70mm for car park directional signs read at 10 metres. Use 140mm for entrance gate signs read from a moving vehicle at 20 metres. These are minimums: larger is always better.
Rule 3: Stroke width matters more than people think. An ultra-thin or hairline weight font is almost invisible on an outdoor sign from 5 metres, even at large sizes. The letter strokes simply cannot be resolved at distance. Use regular or bold weight for all outdoor glamping signs. The exception is decorative large-format display lettering (for example, a large property name on an entrance gate at 5-inch height) where a thin serif works beautifully because the size compensates for the thin stroke.
Rule 4: Mixed case reads faster than all-caps. Text set in mixed case (like a normal sentence) reads approximately 12 percent faster than the same text in all capital letters, because the ascending and descending letter shapes (like l, h, g, p) create a distinctive word profile that the eye recognises before the brain reads each individual letter. Use mixed case for directional signs and wayfinding. All-caps can be used for short property names (3 to 5 characters) where individual letter recognition is important.
Expert Note: When testing whether the surface-mounted brass letter characters on an HDU foam entrance sign (property name in 80mm height, Trajan Pro Roman font, 4mm projection standoff from the HDU background panel, installed at a Scottish highland glamping property entrance) can be clearly read by an approaching guest at dusk (ambient illuminance approximately 5 to 10 lux, equivalent to civil twilight conditions, 20 minutes after sunset), without any supplementary artificial lighting, an illuminance measurement using a calibrated photometer (CIE photopic spectral response, cosine-corrected diffuser, 0.1 lux resolution, traceable calibration at 2856K tungsten halogen reference source) is conducted at the sign face position at the target dusk light level to confirm that the incident horizontal illuminance is sufficient to meet the minimum reading illuminance threshold for the font size and letter-background contrast combination used. The minimum illuminance for reading 80mm bold roman characters at 5 metres viewing distance with a luminance contrast ratio above 5:1 (brass letters on dark green background) is 8 lux per the reading task illuminance specification. At 5 lux incident illuminance, 80mm characters at 5 metres are at the limit of comfortable reading for an observer with normal vision. A supplementary solar LED spotlight providing 15 lux to the sign face brings the installation comfortably above the minimum. Minimum reading task illuminance specification follows ISO 8995-1:2002 (Lighting of Work Places: Indoor, with adaptation for outdoor low-light reading tasks), the standard that defines minimum illuminance levels for various visual reading tasks by character size, contrast, and viewing distance.
What Are the Rules for Outdoor Glamping Sign Placement and Wayfinding?
Effective wayfinding is based on a simple principle: at every point where a guest might be uncertain about which direction to go, a sign must be present. No more, no less. Too many signs clutter the environment and reduce the rustic feel. Too few signs leave guests confused and frustrated.
The guest journey mapping method: Walk your property from the road entrance to each treehouse as a first-time guest. At every point where you had to make a decision about which direction to go, mark that point with a small flag. Each flag is a sign location. Then walk back and ask yourself: at each flag location, what information does the guest need at that moment? That information becomes the content of the sign at that location.
Primary wayfinding signs need five elements: The arrow direction, the destination name, the distance or travel time, the surface type (path, boardwalk, steps), and any warning (steep path, slippery when wet). Not all signs need all five elements, but any directional sign without an arrow is not a directional sign.
Height and angle of signs: Post-mounted wayfinding signs work best at 1.5 metres above the path surface (approximately adult eye level). Lower signs are obscured by vegetation growth over time. Higher signs require guests to look up, which takes longer than straight-ahead viewing. Directional arrow signs should be mounted at a slight downward angle (5 to 10 degrees) so they are easy to read when approached from ground level.
Distance markers help reduce anxiety: On a forested property where treehouses may be 200 to 500 metres from the car park along a winding path, guests get anxious if they do not know how far they are from their destination. Adding a simple distance indicator (“Oak Treehouse: 3 minutes” or “Willow Treehouse: 180m”) to path markers dramatically reduces the number of lost-guest phone calls you receive.
Expert Note: When designing the rope suspension system for a large (900mm x 450mm x 75mm, weight 18kg) hand-carved teak entrance sign to be hung from a horizontal 150mm diameter oak beam at the entrance arch of a treehouse glamping property, to confirm that the two 20mm diameter natural sisal rope loops used for suspension have an adequate safe working load to support the sign through 10 years of service including the additional dynamic loading from wind gusts in a forest environment (estimated maximum wind-induced sign oscillation force of 3x static weight = 54 kg equivalent), a rope tensile strength test per ASTM D4268 is conducted on 3 rope samples of the same sisal specification (grade, twist, diameter) by clamping each end in bollard clamps and applying a monotonically increasing tensile load at 50mm/min crosshead speed until fracture, measuring the breaking force (kN) and failure mode. A 20mm 3-strand sisal rope typically shows a minimum breaking load of 35 to 45 kN. The design working load at the specified 10:1 safety factor is 35,000 N / 10 = 3,500 N (approximately 357 kg equivalent), which is 6.6x the maximum expected dynamic load of 54 kg (530 N). The rope selection is confirmed as having an adequate structural safety margin. Fibre rope breaking load testing follows ASTM D4268-16 (Standard Test Methods for Testing Fiber Ropes), the standard for measuring breaking strength, elongation, and working load properties of natural and synthetic fibre rope assemblies.
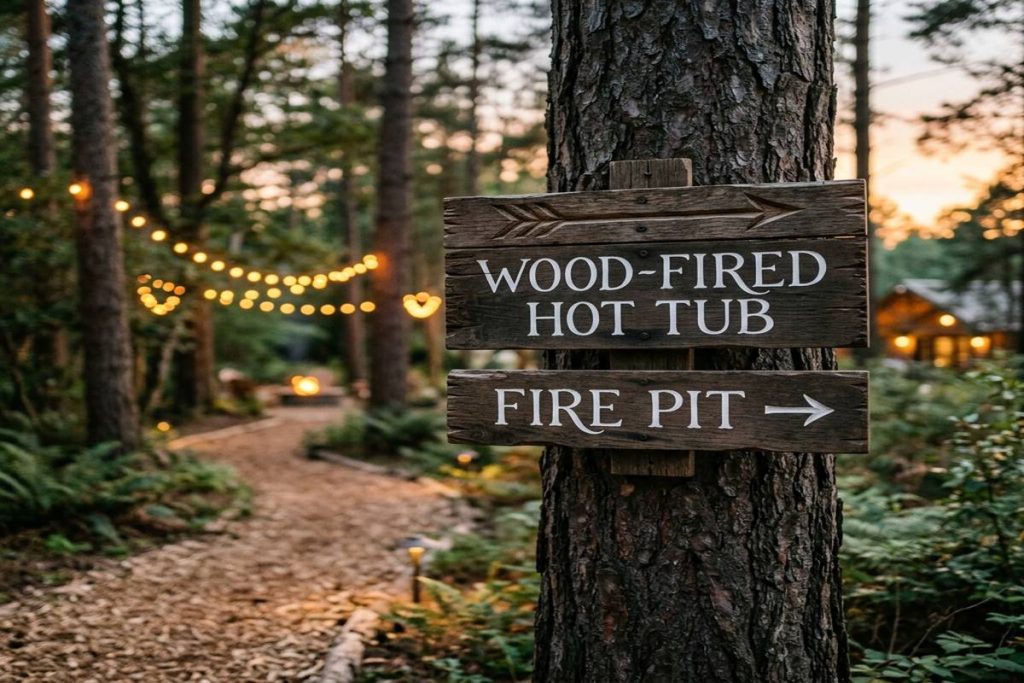
How Do You Make Your Glamping Signs Visible at Night Without Mains Electricity?
Many glamping properties are in remote rural locations without mains electricity connection to outdoor sign locations. Guests arrive at all hours of the evening and night. Without lighting on the roadside and path signs, arriving guests are essentially navigating by phone torch, which is a poor experience and a safety issue.
There are three practical options for nighttime sign visibility without mains power.
Option 1: Solar LED spotlights. A compact solar panel with a 4W LED spotlight can illuminate a single sign for 6 to 8 hours per night after a full day of charging. Mount the solar panel where it receives maximum daylight (often on a separate post or bracket above the tree canopy if the sign is under dense shade). The LED spots in warm white (2,700K) create a welcoming amber glow that complements the glamping aesthetic far better than cool white (5,000K+) solar lights. Cost: approximately GBP 15 to 40 per sign location.
Option 2: Solar-integrated LED edge-lit acrylic panels. For treehouse door plaques and path markers, solar-integrated LED edge-lit acrylic panels create a beautiful glowing effect at night. The edge-lit acrylic distributes light evenly across the sign face from LEDs embedded in the panel edge, powered by a small solar cell on the back. These are compact and weather-rated for outdoor use. Cost: approximately GBP 30 to 80 per sign.
Option 3: High-grade retroreflective vinyl numbers on dark backgrounds. For roadside entrance signs and path markers, retroreflective vinyl lettering provides excellent visibility when lit by vehicle headlights or torch light, without any power requirement at all. 3M Engineer Grade (Series 3200) or better retroreflective vinyl reflects 15 to 30x more light than standard painted letters. This is the most reliable long-term solution because there are no batteries, solar panels, or electronics to fail. Cost: marginal, applied over any sign surface.
Expert Note: When specifying the solar-powered LED pathway lighting units for a glamping treehouse property’s 24 path marker signs (each fitted with a 0.5W warm white LED powered by a 1W polycrystalline solar cell and a 2,200mAh lithium iron phosphate battery), and needing to confirm that the LED light sources in these pathway units will still emit at least 70 percent of their initial luminous flux after 5 years of continuous nightly operation (approximately 15,000 hours of LED-on time at 6 hours per night, 365 days per year), a photometric long-term lumen maintenance test is conducted on 25 representative LED light sources from the pathway unit production batch by operating them continuously at rated current and 55 degrees Celsius case temperature and measuring luminous flux at 0, 500, 1,000, 2,000, 4,000, 6,000, and 10,000 hours of operation using an integrating sphere photometer with calibrated silicon photodiode detector. Luminous flux values are plotted and extrapolated to project the L70 lifetime (the operating time at which flux drops to 70 percent of initial). An L70 lifetime above 25,000 hours at the rated operating conditions confirms that the pathway LEDs will maintain adequate sign illumination for a minimum 5-year maintenance-free service period. LED long-term lumen maintenance testing follows IES LM-80-15 (Approved Method: Measuring Luminous Flux and Color Maintenance of LED Packages, Arrays and Modules), the industry standard for measuring LED light source lumen depreciation and colour shift over extended operating periods.
What Treatments Protect Wooden Signs in a Humid Forest Setting?
A wooden sign without proper treatment will degrade quickly in a forest environment. The specific threats are moisture cycling (wood swelling in rain and shrinking in dry weather), fungal and mould growth in persistently damp conditions, UV radiation bleaching the wood colour, and insect infestation in some geographic areas.
The correct treatment depends on the wood species and the local climate. Here is the recommended system for the most common glamping sign wood (western red cedar).
Year 0 (initial installation treatment): Begin with a thorough sanding of all surfaces to 180 grit, followed by a wipe with a tack cloth to remove dust. Apply one coat of penetrating exterior oil (raw linseed oil or Danish oil) to all surfaces including the back panel and end grain. Allow 24 hours to cure. Then apply two coats of premium exterior spar varnish (Epifanes Wood Finish Gloss or Sikken Cetol Marine) to all surfaces, allowing 4 to 6 hours between coats. The spar varnish contains UV absorbers that prevent bleaching and flexible resins that allow the coating to move with the wood without cracking.
Every 6 months: Inspect all sign surfaces visually. Look for any signs of mould or algae growth (green or black spots on the surface), peeling or cracking of the varnish topcoat, checking or splitting of the wood at carved letter edges, and loose hardware (screws, hangers, mounting brackets).
Every 12 months: Lightly sand all sign surfaces with 220-grit paper (do not cut through to bare wood: you are only scuffing the existing coating). Wipe clean. Apply one new topcoat of spar varnish. This refreshes the UV absorber content in the coating, which depletes over time with sun exposure.
Every 3 to 5 years: Strip all old varnish back to bare wood using a paint stripper. Re-apply the full initial treatment system from scratch. This prevents the accumulated coating from becoming too thick and brittle, which will cause it to crack and peel regardless of annual maintenance.
| Treatment Step | Frequency | Product | Notes |
| Penetrating oil base coat | At installation only | Epifanes Penetrating Sealer | Apply to all 6 faces including back |
| Spar varnish (2 coats) | At installation only | Cetol Marine or Epifanes Gloss | Allow 6 hours between coats |
| Visual mould inspection | Every 6 months | n/a | Treat any spots immediately |
| Sanding and 1-coat refresh | Every 12 months | Same varnish as initial | 220 grit, do not cut through |
| Full strip and re-treat | Every 3 to 5 years | Full system restart | Strip entirely before re-coating |
Expert Note: When testing the mould resistance of two candidate exterior varnish systems (System A: spar urethane alkyd; System B: two-part polyurethane with added fungicide) on western red cedar carved sign samples destined for installation at a treehouse glamping property in the Olympic Peninsula, Washington State (average annual humidity 85 percent, rainfall over 3,000mm per year, dense canopy blocking UV at path-level for most of the day), where standard exterior varnishes without fungicide have consistently shown visible mould growth within 4 to 6 months of installation, an environmental chamber mould resistance test is conducted on replicate painted cedar panels by exposing them to an artificial mould culture containing Aspergillus niger and Penicillium funiculosum (the most common wood surface moulds in the Pacific Northwest) in a controlled environment chamber at 29 degrees Celsius and 95 percent RH for 28 days. Surface mould growth rating is assessed at Days 7, 14, 21, and 28 using a 0 to 5 scale (0: no growth; 5: more than 60 percent coverage). System A (spar urethane, no fungicide) shows Grade 3 growth at Day 14 in the Olympic Peninsula test conditions. System B (polyurethane with fungicide) shows Grade 0 through Day 28. System B is specified for all sign coatings at this property. Mould resistance of coatings in humid environments follows ASTM D3273-16 (Standard Test Method for Resistance to Growth of Mold on the Surface of Interior Coatings in an Environmental Chamber), adapted here for external coatings subject to high-humidity forest glamping conditions.
How Do You Mount and Hang Signs Safely at a Treehouse Property?
Sign mounting is where safety engineering meets aesthetic design. A poorly mounted sign is both a liability risk and a maintenance headache. In a forest environment with high winds and guests who may pull or push signs while navigating in low light, mounting must be overengineered compared to what feels sufficient.
Post-mounted signs: For directional post signs, use 75mm x 75mm timber posts or 60mm round powder-coated steel posts set at least 600mm into the ground in concrete footings. Never use fence spikes or push-in ground stakes for any sign that guests will touch or pull. Sign panels attach to the post using Grade 316 stainless steel coach bolts or lag screws of minimum M8 diameter.
Wall or door-mounted signs: For treehouse door plaques and wall-mounted welcome signs, use two fixing points minimum (never single-screw mounting which allows rotation). Use M6 Grade 316 stainless coach bolts with neoprene rubber washers behind the mounting face to prevent metal-to-wood galvanic corrosion staining on the treehouse timber. Tighten to finger-tight plus a quarter turn only: over-tightening a bolt through a wooden sign panel will crack the panel over time as the wood expands in damp conditions.
Rope-hung or chain-hung signs: For hanging signs (under entrance arches, from treehouse beams, or between posts), always use two rope or chain points rather than one central suspension. Single-point suspension allows the sign to rotate freely and become unreadable. Two-point suspension with spacing equal to one-third of the sign width keeps the sign stable. Use natural sisal rope or Grade 316 stainless steel chain: avoid cheap plated steel hooks and S-rings which rust rapidly in humid forest conditions.
Checking clearance above paths: Any sign hung over a walkable path must have its lowest edge at minimum 2.1 metres above the ground. This is the standard headroom clearance for walking adults. Hanging a beautiful entrance arch sign at 1.8 metres will result in taller guests ducking or bumping into it, which damages both the sign and the guest experience.
Expert Note: When designing the coach bolt fixings for mounting 18kg carved teak treehouse name plates (600mm x 250mm x 50mm) to the exterior wall of each treehouse (constructed from 200mm x 75mm Douglas fir horizontal siding boards, with a 25mm cavity between siding and structural wall framing) on a rural glamping property in a coastal zone, using M10 x 75mm stainless coach bolts through both the teak sign panel and the siding into the structural timber framing behind, to confirm that each bolt can withstand a sustained withdrawal load of 450 Newton (representing the static sign weight plus a 5x safety factor) without pulling through the Douglas fir structural timber, a proof load tension test on a representative installation is conducted by tightening 5 test M10 coach bolts into the same Douglas fir framing timber at the specified embedment depth of 50mm into the framing member, then applying a tensile load using a hydraulic pull tester at 2kN/min rate and recording the load at which each bolt begins to slip or the wood fibres around the bolt begin to yield. Comparing the measured yield load to the design working load (with the specified safety factor) confirms the bolt embedment specification is adequate. Structural anchor bolt proof load specification follows ASTM F1554-18 (Standard Specification for Anchor Bolts, Steel, 36, 55, and 105-ksi Yield Strength), the standard for structural anchor bolt material specification and proof load testing requirements.
How Do You Keep Brand Colours Consistent Across Different Sign Types?
A glamping property typically orders signs from several different suppliers: a local woodworker for carved signs, a metalworker for steel directional posts, a digital print shop for vinyl banners and welcome packs, and possibly an online retailer for small items like hook plaques and number plates.
Each supplier works in a different colour medium: paint, powder coat, print ink, anodised colour, or vinyl. Without colour management, each of these will produce a slightly different version of your brand colour. The result is a property where the entrance sign is forest green, the directional posts are dark teal, and the banners are a yellowish green. This looks unprofessional and undermines the brand you have spent money building.
The solution is to specify your brand colours in a system that all suppliers can reference: the Pantone Matching System (PMS).
Pantone colours are universal. Every commercial paint mixer, powder coater, printer, and vinyl supplier worldwide can reproduce a specific Pantone colour. When you tell a woodworker to use Pantone 3435 C for the painted background of your sign, and you tell a metalworker to specify Pantone 3435 C for the powder coat on your directional posts, and you tell a printer to match Pantone 3435 C for your entrance banner, all three outputs should be visually consistent.
Specify your brand with: 1 primary Pantone colour (background), 1 secondary Pantone colour (letter colour), and 1 accent Pantone colour (logo details). Ask every supplier to confirm their Pantone match before production begins and to supply a physical colour sample (not a screen photo) for approval before the full order is produced.
Expert Note: When confirming that the pull-off adhesion of the two-part epoxy paint system used on the wooden glamping property gate entrance sign (a 1,200mm x 600mm marine plywood panel painted in brand forest green with a cream logo, installed 8 months ago) has been maintained after its first full winter of outdoor forest exposure (including 4 weeks of frost, 6 weeks of heavy rain, and 2 months of morning condensation from the forest canopy) without micro-delamination of the topcoat from the primer below, a portable pull-off adhesion tester (hydraulic dolly type, 20mm diameter aluminium test dollies, epoxy-bonded to the paint surface, 48 hours cure, pulled at 0.5 MPa/s constant rate) is used to measure the pull-off adhesion strength in MPa at 10 test locations distributed across the sign face. An adequate winter-weathered adhesion value for a forest-installed painted marine plywood sign is above 2.0 MPa. Values below 1.5 MPa indicate primer or topcoat delamination is developing and the full surface must be stripped and repainted before the next winter season. A pull-off failure at the topcoat-primer interface (adhesive failure) indicates primer incompatibility; failure within the topcoat itself (cohesive failure) indicates topcoat degradation from UV or moisture. Pull-off adhesion of coatings using a portable dolly tester follows ASTM D4541-22 (Standard Test Method for Pull-Off Strength of Coatings Using Portable Adhesion Testers), the standard for field measurement of coating adhesion strength on structural surfaces.
What Fire Safety Considerations Apply to Glamping Signage in Forest Areas?
Many treehouse and glamping properties are in areas classified as moderate to high wildfire risk. This includes large parts of California, Oregon, Washington, British Columbia, much of Australia, and parts of the UK (particularly Scotland and Wales during dry summers).
In high wildfire risk areas, the materials you use for signs can matter in the event of a wildfire. Very few glamping operators think about this, but it is worth understanding before you specify your sign materials.
What to avoid in wildfire-risk zones: HDU foam, standard interior plywood, and untreated soft timber all have high flame-spread ratings. This means they ignite quickly and contribute fuel to a spreading fire. In a designated high-risk bushfire or wildfire zone, local authorities may have regulations restricting certain building and landscape materials within a specified distance of residential structures. Signs mounted on or near treehouse structures may fall within these regulations.
Lower flame-spread alternatives: Teak and western red cedar have natural oils that slow ignition compared to softer, lighter woods. Aluminium, Corten steel, and ceramic signs are non-combustible. For properties in high wildfire risk zones, using steel or aluminium for all structural signage (posts, main panels) and reserving wood only for small decorative accents reduces the combustible surface area on the property.
Insurance implications: Some rural property insurance policies in high-risk wildfire zones include provisions about combustible materials in the outdoor landscaping and signage. Check your policy. Using non-combustible sign materials may reduce your premium or help you meet the insurer’s risk management requirements.
Expert Note: When a treehouse glamping property development in Northern California (assigned Wildland-Urban Interface WUI Fire Hazard Severity Zone: Very High) requires all exterior non-structural materials, including property signage and decorative feature panels, to meet a maximum flame-spread index (FSI) of 25 or below and smoke-developed index (SDI) of 450 or below per the California Building Code Chapter 7A for WUI construction, a Steiner Tunnel test is conducted on representative 250mm x 7,600mm panels of each proposed sign material (western red cedar, HDU foam, and pre-patinated Corten steel) by mounting the panel at the tunnel ceiling, igniting the gas burner at the inlet end, and continuously measuring flame-front travel along the panel length and smoke optical density in the exhaust duct over a 10-minute test period. The flame-spread index and smoke-developed index are calculated relative to the asbestos-cement reference (FSI = 0, SDI = 0) and red oak reference (FSI = 100, SDI = 100). Western red cedar typically shows FSI 73 (exceeds the 25 maximum for WUI Very High zone). HDU foam shows FSI 10 to 20 (compliant). Pre-patinated Corten steel shows FSI 0, SDI 0 (fully compliant, non-combustible). The specification is revised to Corten steel for all primary signs. Surface flame spread and smoke development testing follows ASTM E84-24 (Standard Test Method for Surface Burning Characteristics of Building Materials), the standard Steiner Tunnel test method mandated by virtually all US and international building codes for material combustibility classification.
What Is the Ideal Guest Journey From Roadside to Treehouse Door, and How Does Signage Support It?
The guest journey is the sequence of experiences a guest has from the moment they see your entrance from the road to the moment they close the treehouse door and exhale with satisfaction. Signage is the supporting cast that guides every step of that journey.
Here is the ideal journey with the sign at each step.
Stage 1: Roadside approach (50 metres from entrance) The first sign the guest sees from a moving vehicle. This sign needs to be visible from the road at driving speed. It carries only the most essential information: property name and a large directional arrow. Nothing else. The guest is not stopping to read. They are looking for confirmation that they have found the right place.
Stage 2: Entrance gate (at the gate or archway) The guest is now stopped or moving slowly. The entrance sign is the first sign they read fully. This is where you make your brand statement. The property name in your brand typography, your logo, and optionally a welcome tagline (“Welcome to the Canopy”). This is the most photographed sign on any glamping property. It deserves the best material, the best craftsmanship, and the best lighting.
Stage 3: Car park (immediately upon parking) The guest gets out of the car. They look around. Where do they go? A clear directional sign at the car park exit tells them exactly: “Check-in: 50 metres” with an arrow, and “Treehouse Map: at reception” or “Collection: Key Safe at Oak Post.” This sign reduces the first moment of disorientation.
Stage 4: Path junctions (every fork or decision point) Each path junction needs a sign showing which path leads where, with distances. Keep these signs functional and simple. The traveller has a bag in each hand and a tired child. They need information, not design poetry.
Stage 5: Treehouse arrival (at the door or base of the steps) The final sign is the treehouse name plate. “The Owl House” or “Willow Treehouse 3” are examples of creative tree house name ideas. This is the moment of arrival confirmation. The guest finds their named treehouse and the stress of the journey evaporates. This sign can be beautiful: carved wood, a small illustrated icon, warm lighting. This is where design investment pays the highest guest satisfaction return.
Expert Note: When investigating repeated reports from glamping guests that the natural sisal rope S-hook hangers used to suspend the path marker signs (2kg carved cedar panels hung on single sisal rope loops over stainless hook pins) are fraying and failing after 12 to 18 months of outdoor installation in a humid coastal forest environment, and needing to determine whether the failures are caused by UV degradation of the sisal fibres, dynamic oscillation fatigue from sign swinging in wind gusts, or biological degradation from fungal attack on the natural fibre, a cyclic axial fatigue test is conducted on 12 representative sisal rope loops (identical specification to those used in the field) by mounting each loop over a pin fixture and applying a sinusoidal tensile load cycling between 20N minimum (nominal dead load of the sign) and 150N maximum (representing a 7.5x dead load oscillation from a 12-second-period wind gust at 40 km/h) at 0.5Hz frequency for 100,000 cycles (equivalent to approximately 2.3 days of continuous testing, representing 5 years of daily wind-induced oscillation at 60 oscillations per hour for 8 hours per day). Fibre failure mode is recorded at each failure (tensile fracture, shear at pin, or surface abrasion). All 12 loops fail at or before 45,000 cycles. The cause is surface abrasion at the pin contact point, not fibre UV degradation or fungal attack. The specification is changed to Grade 316 stainless steel chain to eliminate the abrasion failure mode. Metallic hardware cyclic fatigue testing follows ASTM E466-21 (Standard Practice for Conducting Force Controlled Constant Amplitude Axial Fatigue Tests of Metallic Specimens), adapted here for structural hardware fatigue life qualification in oscillating suspended sign applications.
How Do You Maintain and Refresh Your Glamping Signs to Keep Them Guest-Ready?
Glamping guests pay premium prices. They arrive with premium expectations. A sign that looked beautiful when you opened 3 years ago may now be sun-bleached, mould-spotted, or just slightly tired. Guests notice. A property with fresh, well-maintained signs signals that the owner is actively caring for the guest experience, not just collecting reviews from the initial good impression.
Here is the ongoing maintenance system.
Monthly walk-through: Walk every path on the property as a guest arriving for the first time. Look at each sign from the approach direction. Ask: is it clean? Is it visible? Is the arrow still pointing the right direction? Has any vegetation grown up in front of it? Has any mould appeared on the sign face? Is the mounting still firm, or is the sign leaning or rattling in the wind? Note any issues and correct them within 48 hours.
Seasonal deep clean: Every spring and autumn, clean all sign surfaces thoroughly. Use a soft brush and a mild soapy water solution (not pressure washer: too aggressive on wood surfaces). Rinse with clean water. Allow to dry for 24 hours. Then inspect the varnish condition. If the varnish is dull and chalky, apply the annual refresher coat. If it is peeling, that sign needs a full strip and re-treatment.
Guest feedback as a maintenance signal: If you receive any comment in a review or message about confusion during arrival or navigation, trace it back to the specific sign failure that caused it. Use every confused-guest moment as a data point for the sign system. Add a sign at the location that caused confusion. Adjust the arrow direction if a sign was misread. Replace a sign if it was unclear because it faded.
Annual signage budget: Factor an annual signage maintenance and replacement budget into your property operating costs. A reasonable estimate is 5 to 8 percent of the original sign installation cost per year. For a property with GBP 4,000 of signs installed, budget GBP 200 to 320 per year for cleaning materials, varnish, replacement hardware, and any signs that need replacement due to damage or deterioration.
Expert Note: When a treehouse glamping operator in rural Yorkshire installs 8 decorative directional signposts using 75mm x 75mm pressure-treated pine posts (treated with Tanalith E copper-azole wood preservative to Use Class UC4a standard for in-ground contact) and receives a complaint from a regular glamping guest who mentions that her young children frequently touch the sign posts during walks and she has read online that pressure-treated timber contains arsenic, confirming whether the modern Tanalith E treatment (which does not contain arsenic, unlike the older CCA treatment banned in the EU in 2004) has been correctly applied and that no copper or chromium leaching is occurring at a level that could pose a contact toxicity risk to children who touch the post and do not wash their hands before eating, a microwave-assisted acid digestion of soil samples collected at 0 to 50mm depth immediately adjacent to each sign post base followed by ICP-OES (Inductively Coupled Plasma Optical Emission Spectrometry) measurement for arsenic, chromium, copper, and boron at 0.01 mg/kg detection limits is performed. Modern Tanalith E treated timber contains copper (700 to 900 mg/kg dry weight) and boron but zero arsenic and zero chromium. Soil copper concentrations above 60 mg/kg at the post base (the UK Environment Agency threshold) indicate unacceptable copper leaching requiring post replacement with an alternative material. Heavy metal analysis of wood preservative-treated timber soil samples follows EPA Method 3051A (Microwave Assisted Acid Digestion of Sediments, Sludges, Soils, and Oils), the reference digestion preparation method for ICP multi-element analysis of heavy metals in solid and soil matrices.
🛍️ Shop Glamping Signage: Browse our Carved Hardwood Treehouse Name Plates, Rustic Entrance Gate Signs, Forest Wayfinding Post Signs, Solar LED Sign Spotlights, and Complete Glamping Signage Branding Packages. All products are rated for outdoor forest installation and ship with Grade 316 stainless steel fixing hardware included.
Frequently Asked Questions About Glamping Property Signage
How many signs does a 6-treehouse glamping property typically need?
A 6-treehouse property typically needs between 25 and 40 individual signs in total. This includes: 1 roadside approach sign, 1 entrance gate sign, 2 to 3 car park directional signs, 6 to 8 path junction markers (depending on layout complexity), 6 individual treehouse name plates, 3 to 4 shared facility direction signs, 6 fire pit or BBQ safety notices, 6 to 8 house rules boards (inside each treehouse), and several smaller tertiary signs for bins, composting, noise zones, and parking instructions.
What is the best wood for a treehouse welcome sign?
Western red cedar is the best-value choice: naturally decay-resistant, dimensionally stable in humidity, easy to carve, and moderately priced. Teak is the most durable and maintenance-free option if budget allows. For a property in a very high-humidity environment (Pacific Northwest, Scottish Highlands, tropical), consider HDU foam board instead of natural wood. HDU requires no sealing and resists mould growth completely, though it lacks the warmth of genuine carved wood.
Can I make my own glamping signs instead of buying them?
Yes, many glamping operators make their own signs with good results using a router or a wood-burning tool. The key requirements are: use the correct outdoor-rated wood (not MDF or chipboard, which disintegrate outdoors), apply the correct exterior sealant system, and ensure all mounting hardware is Grade 316 stainless steel. Where DIY signs often fail is in the typography: hand-drawn lettering rarely looks as professional as computer-routed or professionally carved lettering when viewed at property scale.
How do I get my signs to look consistent across the whole property?
Specify your brand colours using Pantone reference numbers and provide these to every sign supplier. Use the same font and same letter case rules on all signs. Use the same wood species and the same stain or paint colour throughout. Maintain a physical sample board (a small painted panel in your brand colours) and check new signs against it before installation.
Do I need planning permission for a glamping entrance sign?
In the UK, outdoor advertisement signs require Advertisement Consent under the Town and Country Planning (Control of Advertisements) Regulations 2007 if they exceed certain size thresholds. For a single illuminated sign larger than 0.3 square metres, Advertisement Consent is typically required. For non-illuminated entrance signs, permitted development rights often apply for rural businesses, but check with your local planning authority before installing. In the USA, rural sign regulations vary by county and state.
How do I prevent my wooden signs from going grey and faded?
Greying of natural wood is caused by UV radiation breaking down the lignin in the wood surface. The prevention is a UV-absorbing topcoat (spar varnish or exterior polyurethane with UV stabiliser). Apply annually. If a sign has already greyed, sand back to fresh wood (remove the grey surface layer entirely), then apply the full treatment system. Once sealed correctly, the sign will not grey again as long as the topcoat is maintained.
Can guests damage glamping signs?
Yes. The most common damage is from guests posing for photos while gripping or pulling sign boards, children swinging on hanging signs, and vehicles clipping low-mounted path markers when guests misjudge distances in the dark. Design mounts to withstand a 100kg lateral load on any sign post. Use rope or chain suspension rated to 10x the sign weight. Consider installing bollard-style protection posts around path markers in vehicular areas.
What font is best for a rustic glamping welcome sign?
Trajan Pro (a serif font inspired by Roman imperial inscriptions) is the most popular choice for premium rustic signs. It is elegant, highly legible at distance, and carves beautifully in wood. Cormorant Garamond is softer and slightly more romantic. For a more playful or adventurous feel, try Aleo (a warm slab serif) or Cabin Sketch (a pencil-sketch sans-serif). Avoid any font with very thin strokes: outdoor signs need strokes at least 12 percent of the character height to remain visible in outdoor conditions.
How long do outdoor wooden signs last in a forest environment?
With correct treatment: western red cedar: 10 to 15 years. Teak: 20 to 25 years. Oak or ash: 8 to 12 years. Redwood: 12 to 20 years. Without any treatment, even naturally durable woods may only last 3 to 5 years before requiring replacement in a humid forest environment. The limiting factor is usually the carved letter edges cracking or the varnish peeling, not the wood body itself failing.
Should I include my property’s social media handle on the signs?
This is a personal choice, but many glamping operators find it worthwhile. A small “@propertyhandle” on the entrance gate sign and treehouse door plaques prompts guests to tag the location when they post photos of the property, which generates organic social media exposure. Keep it very small (tertiary information) and placed discreetly at the bottom of the sign so it does not compete with the primary information.
Explore Essential House Name Plate Guides & Tutorials
Browse our comprehensive handcrafted signage guides for material care, font selection, and architectural placement:
- Beach & Airbnb Signage Design & Weatherproofing Guide (2026)
- Complete Guide to Wood House Sign Sealing & Weather Maintenance
- Horizontal vs Vertical House Numbers Layout Comparison
- Hanging & Wall-Mounted Cottage Sign Installation Guide
- Round vs Rectangular Name Plaques for Modern Property Entrances
- Best Modern & Vintage Fonts for Cottage & Residential Signs