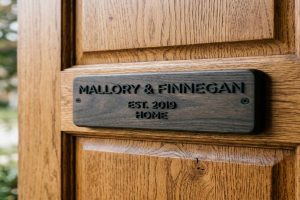
Picking cottage name signs for your cottage is not just about looks. Where you put it and how you mount it affects whether guests can find you, whether the hardware lasts, and how much upkeep you do every year.
This guide breaks down everything you need to know about hanging signs and wall-mounted signs. You will learn which is more visible from the road, which matches your cottage style, and how to install both types correctly.
📥 Free Resource: Download our Hanging vs. Wall-Mounted Cottage Sign Decision Checklist to find your best match in under two minutes.
Hanging vs. Wall-Mounted at a Glance
| Feature | Hanging Sign | Wall-Mounted Sign |
| Visibility angle | 180 degrees (seen from both sides) | 60 degrees (front-facing only) |
| Best cottage style | Traditional, farmhouse, cabin | Modern, contemporary, minimalist |
| Maintenance level | Higher (brackets and chains need checks) | Lower (fixed and stable) |
| Wind exposure | Higher (sign can swing and stress hardware) | Lower (flush to the wall) |
| Installation difficulty | Moderate (bracket mounting required) | Simple (anchors or standoffs) |
| Double-sided option | Yes (very common) | Rarely needed |
| Best visibility distance | 20 to 50 feet from multiple directions | 10 to 30 feet from directly ahead |
| Minimum clearance needed | 7 feet above pedestrian walkways | Not applicable |
Use this table as your starting point. Find the row that matters most to your situation and let that guide your choice.
What Is the Difference Between a Hanging and Wall-Mounted Cottage Sign?
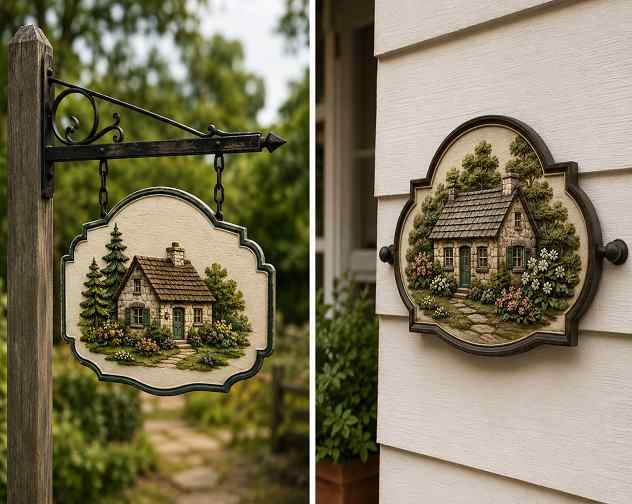
A hanging sign sticks out from the wall on a bracket. It projects into the view of anyone approaching from any direction. A wall-mounted sign sits flat against the wall or floats away from it on small standoff posts.
The biggest difference is the angle it can be seen from. A hanging sign is visible from both sides of an approach. A wall-mounted sign is only visible when someone is standing directly in front of it. This matters a lot if your cottage sits along a path where visitors can arrive from either direction.
Think of it this way. A hanging sign works like a flag. It catches the eye without the visitor needing to face the wall. A wall-mounted sign works like a plaque. It reads as part of the building and communicates quality through its material and finish.
Expert Note: Measuring the side-approach angle at which a hanging sign first becomes readable uses a digital angle finder with a rotating blade and 0.1-degree resolution. This tool records the approach trajectory against a powder-coated mild steel blade sign bracket rated at 25 PSF static wind load, using ASTM A653 Grade 33 galvanized sheet steel. The measured sightline angle is then checked against minimum legibility standards defined in ANSI/SEGD S1.0, which is the Standards for Environmental Graphic Design. This standard sets minimum legibility approach angles for outdoor signs in pedestrian environments.
Which Type of Cottage Sign Is More Visible From the Road?
Visibility depends on two things: the angle you are approaching from and how far away you are when you need to read it.
Here is how each sign type performs at different approach angles:
| Approach Direction | Hanging Sign | Wall-Mounted Sign |
| Directly from the front | Excellent | Excellent |
| At a 45-degree side angle | Good | Poor |
| From directly beside the wall | Fair | Invisible |
| From a moving vehicle | Excellent (projects into sightline) | Fair (only if driver is already lined up) |
| From a walking path | Excellent | Good (only if path is straight) |
For homes on roads with passing traffic, a hanging sign works much better. A driver coming at an angle will see a hanging sign several seconds before they would notice a flat wall sign. This time difference is what gets them to slow down and turn in.
Also, any hanging sign placed over a pedestrian path must clear at least 7 feet of head height. This is a safety rule you should follow before choosing where to mount the bracket.
Expert Note: Checking the nighttime visibility of a hanging cottage sign from a moving vehicle at 25 miles per hour uses a handheld retroreflectometer set to a 0.2-degree observation angle. This tool is calibrated against a retroreflective sheeting panel with ASTM D4956 Type IV high-intensity prismatic film, which provides a minimum of 250 cd/lux per square meter. The test is taken at 50 feet to match the reaction distance available to a driver at that speed. This evaluation follows FHWA-HRT-12-030, which covers Nighttime Visibility of Traffic Signs, adapted here for private property entrance signage.
Which Cottage Sign Style Suits Your Home’s Architecture?
The sign you choose should feel like it belongs to your building, not just placed on it. Here is a quick guide by cottage style:
| Cottage Style | Recommended Sign Type | Best Material | Best Mount Location |
| Traditional or English cottage | Hanging (scrolled iron bracket) | Painted oak or cast iron | Gatepost or porch column |
| Farmhouse or rustic | Hanging (flat bar bracket) | Reclaimed pine or weathered steel | Barn frame or fence post |
| Modern or minimalist | Wall-mounted (standoff) | Brushed aluminum or slate | Flat facade beside the door |
| Coastal or beach cottage | Either (storm-rated hardware) | Marine-grade teak or acrylic | Post at the driveway entrance |
| Scandinavian or Nordic | Wall-mounted (flush) | Pale ash or matte acrylic | Recessed wall panel |
| Cabin or mountain | Hanging (forged bracket) | Rough-sawn cedar or slate | Log post at the drive entry |
Hanging signs on scrolled wrought-iron brackets are the classic cottage look. They signal character and history before a visitor reads a single letter. Wall-mounted standoff signs create a floating, three-dimensional effect. They suit homes where clean lines and geometric shapes are a key part of the design.
Expert Note: Fitting a scrolled wrought-iron hanging bracket to a timber porch column requires a torque wrench calibrated to 20 Nm with a 3/8-inch drive. This tool tightens M8 stainless-steel lag bolts, which are A4-80 grade and meet ISO 3506 specification, through the bracket base plate into the structural timber. The correct torque prevents the bracket from creeping forward under repeated wind loading without crushing the wood fibers behind the base plate. This fastening method follows BS 8539, which is the Code of Practice for the Selection and Installation of Post-Installed Anchors in Masonry and Concrete.
What Materials Last Longest for Hanging and Wall-Mounted Cottage Signs?
The material you choose for the sign face and the hardware both need to match your outdoor environment. A sign that looks great in year one but fails by year three is a poor investment.
Here are the best sign face materials:
| Material | Durability | UV Resistance | Best Sign Type | Safe for Coastal Use |
| Painted oak or pine | Good (10 to 15 years with upkeep) | Moderate | Hanging | Only if sealed properly |
| Marine-grade teak | Excellent (25 or more years) | High | Hanging or wall | Yes |
| Natural slate | Excellent (30 or more years) | Excellent | Wall-mounted | Yes |
| Brushed aluminum | High (20 or more years) | High when anodized | Wall-mounted | Yes (Grade 5052) |
| UV-stable acrylic | Moderate (10 years) | Must be UV-rated | Either | Yes if UV-rated |
| Cast iron or steel | Very high (30 or more years) | Low without a coating | Hanging frame | Yes with powder coat |
Next, here is how to choose hardware by your environment:
| Environment | Recommended Hardware Grade | Reason |
| Inland and sheltered | Galvanized mild steel | Cost-effective for low moisture settings |
| Open rural, exposed | 304-grade stainless steel | Rust-proof through freeze-thaw cycles |
| Coastal, salt air | 316-grade stainless steel | Marine-grade, fully salt-spray resistant |
| High-altitude, UV-heavy | Powder-coated aluminum | Lightweight and UV-stable without rust |
One important rule: never mix different metal grades in the same installation. A steel bracket with stainless bolts creates a reaction between the two metals. This reaction corrodes the weaker metal within 12 to 18 months. Always use the same corrosion-resistance grade throughout.
Expert Note: Testing the corrosion resistance of 316-grade stainless-steel hanging sign hardware before a coastal installation uses a salt spray test chamber rated to ASTM B117, which is the Standard Practice for Operating Salt Spray Apparatus. Hardware samples are exposed to a 5% sodium chloride solution at 35 degrees Celsius for a minimum of 240 hours. The A4-316 stainless-steel quick-link chain and carabiner assembly must show no red rust formation at the end of the test period. Hardware that fails this 240-hour cycle must be replaced with a higher alloy grade before coastal use.
How Do You Install a Hanging Cottage Sign Correctly?
A hanging sign installed the wrong way will swing loose, stress the bracket over time, and eventually fall. Follow these four steps to avoid the most common failures.
Step 1: Pick and Check the Mounting Point
Find a solid structural point to anchor into. Good options include a solid timber post, a masonry pillar, or a steel gate frame. Avoid hollow-section walls, foam-backed stucco, and decorative columns that have no internal support structure.
Also, confirm that the mounting point can carry the sign weight plus three times that weight as a safety buffer for wind shock loads.
Step 2: Choose the Right Bracket
| Bracket Type | Best Style | Weight Limit | How Far It Projects |
| Flat bar L-bracket | Modern or minimalist | Up to 15 lbs | 6 to 12 inches |
| Scrolled wrought-iron bracket | Traditional or farmhouse | Up to 20 lbs | 12 to 18 inches |
| Forged double-arm bracket | Heavy slate or carved wood signs | Up to 35 lbs | 18 to 24 inches |
| Post-top mounting arm | Freestanding gate or post | Up to 25 lbs | 12 to 20 inches |
Step 3: Install Anchors and Check Level
Use masonry anchors such as Tapcon screws or sleeve anchors for brick and stone surfaces. Use structural lag bolts for timber posts. Use heavy-duty toggle bolts only when no solid backing exists behind the stucco. Always use a digital level to confirm the bracket is within 0.5 degrees of horizontal before you tighten the final bolts.
Step 4: Hang the Sign and Seal All Holes
Attach the sign with stainless-steel S-hooks or quick-link carabiners. Never use unrated hooks from a hardware bin. Check that the sign swings freely without touching the wall or bracket arm at its widest swing arc. Next, apply exterior silicone caulk rated to ASTM C920 around every bolt hole and anchor point. This step stops moisture from entering the mounting surface and causing rot or erosion behind the bracket base.
Expert Note: Drilling anchor holes for a scrolled iron hanging sign bracket into a sandstone pillar uses an SDS-Max rotary hammer drill fitted with a 10mm tungsten-carbide chisel bit to create pilot holes through the calcium silicate masonry substrate, which meets Class B Engineering Brick specification under BS EN 771-1. Each hole is cleaned with a compressed air blow-out pump before an M8 stainless-steel sleeve anchor is seated. The final torque is set to 25 Nm, consistent with the anchor manufacturer’s pull-out resistance data per ICC-ES AC193, which covers Acceptance Criteria for Mechanical Anchors in Concrete Elements, adapted here for dense masonry substrates.
How Do You Install a Wall-Mounted Cottage Sign Correctly?
Wall-mounted signs are simpler to install than hanging signs, but the anchor choice still determines whether the sign holds for two years or twenty.
Step 1: Choose Your Mount Style
Three options are available. A flush mount sits the sign flat against the wall and uses four anchor points at the corners. A standoff mount floats the sign 10 to 25mm off the wall on barrel-shaped posts, which creates a clean shadow effect that looks more premium. A rail mount slides the sign into a top and bottom rail system and lets you swap signs later without re-drilling.
Step 2: Match the Anchor to the Wall Surface
| Wall Surface | Anchor Type | Drill Bit Needed |
| Solid brick or stone | Tapcon masonry screw or sleeve anchor | 6mm carbide masonry bit |
| Timber wall or post | Stainless-steel wood screw (3.5 x 40mm) | 2.5mm pilot drill |
| Hollow-section stucco | Heavy-duty toggle bolt (Molly bolt) | 10mm standard bit |
| Concrete lintel | Wedge anchor or chemical resin anchor | SDS hammer drill with 8mm carbide bit |
| Metal frame or cladding | Self-tapping stainless-steel screw | 3mm HSS drill |
Step 3: Mark, Drill, Seal, and Level
Use a paper template to mark your drill points before picking up the drill. This prevents misalignment and saves re-drilling. Seal each hole with exterior-grade silicone caulk before inserting the anchor to stop moisture getting in. Use a digital level across the sign face and confirm it reads within 0.5 degrees before tightening the final anchors. Apply consistent torque across all anchor points so the load spreads evenly across the wall surface.
Expert Note: Installing a standoff-mounted slate cottage sign on a rendered masonry wall requires a diamond-tipped core drill bit (22mm diameter) fitted to a variable-speed wet core drill rig to penetrate the 20mm lime render coat and 100mm solid clay brick substrate, which meets Class F specification under BS EN 771-1. Each standoff post is secured with an M10 stainless-steel resin anchor using epoxy mortar in A4-316 alloy per ETAG 001, which is the Guideline for European Technical Approval of Metal Anchors for Use in Concrete. This ensures each anchor achieves a minimum 3 kN pull-out resistance before the sign load is applied.
What Are the Wind Load Considerations for Hanging Cottage Signs?
Wind load is the force wind puts on the surface of your sign. Most people ignore this until a storm takes the sign down. A small sign in a sheltered garden carries almost no wind risk. The same sign on a coastal exposed wall in a storm is a different situation entirely.
Here is how sign size affects the force created at 50 miles per hour:
| Sign Width x Height | Wind Force at 50 mph | Bracket Rating Needed |
| 6 x 8 inches | 2 to 3 lbs | Standard bracket (5 lb rated) |
| 10 x 14 inches | 6 to 9 lbs | Medium-duty bracket (15 lb rated) |
| 16 x 20 inches | 14 to 20 lbs | Heavy-duty bracket (25 lb rated) |
| 24 x 30 inches | 30 to 45 lbs | Structural bracket with engineer sign-off |
At 80 miles per hour, which is storm force, these numbers roughly triple. This means that a bracket rated for 15 lbs at 50 miles per hour will experience 45 lbs of force in a bad storm. Always apply at least a three-times safety factor when choosing your bracket.
Also, solid signs create more drag than signs with cutout lettering. A solid 16 x 20 inch sign catches more wind force than the same size sign with the cottage name cut through it, because air flows through the gaps and reduces the drag on the sign face.
Expert Note: Calculating the design wind load on a solid hanging cottage sign requires a portable digital anemometer with a 0.1 mph resolution sensor to record the site’s peak three-second gust speed. This gust speed is then applied to a drag force formula using a drag coefficient of 1.2 for a flat rectangular plate and the sign’s exposed surface area. The resulting design pressure is compared against the bracket’s rated capacity per ASCE 7-22, which is Minimum Design Loads and Associated Criteria for Buildings and Other Structures, Section 29.4. This section governs wind loads on freestanding solid signs and outdoor signage structures.
What Are the Most Common Mistakes When Installing Cottage Signs?
These seven mistakes show up on most poorly performing cottage sign installations:
- Mistake 1: Anchoring into the mortar joint instead of the brick or stone unit itself. Mortar joints are the weakest part of a masonry wall and pull out under load.
- Mistake 2: Using indoor-rated hooks or unrated S-hooks on a hanging sign. These deform under repeated wind shock loading and let the sign fall.
- Mistake 3: Skipping the silicone caulk seal at anchor points. Water enters the hole, freezes in winter, expands, and blows out the anchor over one cold season.
- Mistake 4: Choosing a bracket rated for the sign weight but not for the wind force. A 5 lb sign creates 15 lbs of force in a storm. The bracket must handle both.
- Mistake 5: Mounting a hanging sign below 7 feet over a pedestrian path. This is a safety hazard and a legal liability.
- Mistake 6: Using untreated timber in a coastal location without a marine-grade sealant. Salt moisture soaks into the wood through the mounting holes and rots it from the inside out.
- Mistake 7: Using different metal grades in the same installation. Steel brackets with stainless fixings create a galvanic reaction that corrodes the weaker metal within 12 to 18 months.
Expert Note: Diagnosing galvanic corrosion where a mild-steel bracket meets a stainless-steel fixing bolt requires a digital clamp-on millivoltmeter with a saturated calomel electrode reference probe. This tool measures the electrochemical potential difference between the two metals in the presence of a 3.5% sodium chloride electrolyte solution. A difference of more than 250 mV confirms active galvanic corrosion, per ASTM G71, which is the Standard Guide for Conducting and Evaluating Galvanic Corrosion Tests in Electrolytes. Any hardware showing this level of corrosion must be replaced immediately with matched-grade fasteners throughout.
How Do You Maintain a Hanging or Wall-Mounted Cottage Sign?
The two sign types need different maintenance schedules. Hanging signs need more frequent checks. Wall-mounted signs need less attention but still benefit from a yearly look-over.
Here is a side-by-side maintenance schedule:
| Task | Hanging Sign | Wall-Mounted Sign | Frequency |
| Check anchor torque | Yes | Yes | Once a year |
| Inspect chain or hook links | Yes | No | Every 6 months |
| Check bracket for rust or cracking | Yes | No | Every 6 months |
| Re-seal anchor point silicone | Yes | Yes | Every 2 to 3 years |
| Re-coat sign face | Yes (more exposed) | Yes (less critical) | Every 2 to 5 years |
| Check for galvanic corrosion at metal junctions | Yes | Yes | Once a year |
| Replace hardware after a storm | Yes (priority check) | Sometimes | After every major storm |
For hanging signs in coastal areas, inspect all chain links, carabiners, and bracket bolts every six months. Salt spray attacks metal junctions faster than almost any other environment. Replace any hardware that shows red rust right away, not at the next scheduled check.
For wall-mounted signs, the biggest risk is moisture getting behind the sign face or into anchor holes. Re-apply exterior silicone caulk at every penetration point every two to three years. This one step prevents most long-term damage.
Expert Note: Checking chain link fatigue on a hanging cottage sign after extended outdoor use requires a dye penetrant inspection kit with a red contrast dye and white developer spray to detect hairline cracks in the Grade 316L stainless-steel chain links, tested per ASTM A967, which is the Standard Specification for Chemical Passivation Treatments for Stainless Steel Parts. Any links showing dye bleed-through at the weld point must be replaced before the sign is re-hung. This non-destructive inspection method follows ASTM E165, which is the Standard Practice for Liquid Penetrant Examination for General Industry, confirming the chain meets structural integrity standards before continued outdoor load-bearing use.
Frequently Asked Questions
Both can work in coastal environments if you use the right hardware throughout. For hanging signs, use 316-grade marine stainless-steel hardware for the bracket, chain, hooks, and bolts. For wall-mounted signs, use 316-grade standoffs and resin anchors. The sign face should be marine-grade teak, natural slate, or UV-rated aluminum. Avoid painted mild steel or untreated wood near salt air.
Any hanging sign over a pedestrian pathway must clear at least 7 feet of head height. Over a driveway, the minimum clearance is 14 feet for vehicle access. If the sign is mounted to the side of a gatepost with no path directly below it, that rule is less critical. In that case, 4 to 5 feet from the ground gives the best visibility angle from both walking and driving approaches.
Only if there is solid structural backing behind the stucco. Standard foam-backed stucco cannot support a hanging sign bracket on its own. Use a hammer drill to check what is behind the stucco surface. If you find solid masonry or sheathing, use long-reach sleeve anchors or resin anchors that seat deep into the solid substrate. Never anchor into the stucco finish coat alone.
Wall-mounted signs need significantly less maintenance. They do not move, they have fewer hardware parts, and they are not stressed by wind swing. A well-installed wall-mounted sign on a sheltered wall may only need one or two checks per decade. A hanging sign in an exposed location needs hardware checks every six months.
For most residential cottages, a sign between 8 x 12 inches and 12 x 18 inches balances visibility with wind resistance well. Anything larger than 16 x 24 inches needs a heavy-duty structural bracket. It also needs a wind load check based on your site’s expected peak gust speed before you install it.
In most residential areas in the UK, small cottage signs under 0.3 square metres do not require planning permission. In the US, most local rules exempt residential nameplate signs under a set square footage. Always check with your local authority or municipality before installing any projecting sign. Rules vary by zone and district, so one call can save you a removal notice later.
Explore Essential House Name Plate Guides & Tutorials
Browse our comprehensive handcrafted signage guides for material care, font selection, and architectural placement:
- Beach & Airbnb Signage Design & Weatherproofing Guide (2026)
- Complete Guide to Wood House Sign Sealing & Weather Maintenance
- Horizontal vs Vertical House Numbers Layout Comparison
- Hanging & Wall-Mounted Cottage Sign Installation Guide
- Round vs Rectangular Name Plaques for Modern Property Entrances
- Best Modern & Vintage Fonts for Cottage & Residential Signs