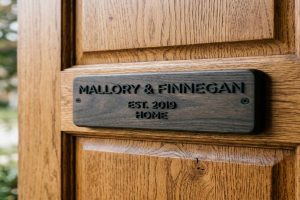
Installing a main door name plate sounds simple. But many homeowners crack their UPVC door, split a timber siding board, or accidentally drill through an electrical cable. These mistakes are easy to make and can be expensive to fix.
The good news is that with the right method, tools, and a few minutes of planning, you can install a name plate on almost any surface without leaving a single mark. This applies whether your door is UPVC, painted timber, glass, metal, or whether your name plate goes on a brick wall, a rendered surface, or wooden cladding.
This guide covers every surface type, every weight category, and both drill and no-drill methods. By the end, you will know exactly what to do for your specific door and name plate combination.
📥 Download Free: Print our Name Plate Installation Checklist PDF and follow it step by step before you start.
Can You Install a Main Door Name Plate Without Making Any Holes?
Yes, in many cases you can. Whether you should drill or use adhesive depends on three factors: the weight of the name plate, the type of surface, and how permanent you want the installation to be.
When adhesive alone is enough:
- Name plates under 500g on smooth surfaces (UPVC, painted metal, glass, powder-coated steel)
- Name plates in sheltered positions where they do not face heavy rain or wind loading
- Temporary or rental property installations where you want zero permanent marks
When you must drill and use mechanical fixings:
- Name plates over 500g in exposed outdoor positions
- All LED name plates with heavy acrylic or metal facings (typically 800g to 2kg)
- Name plates on porous or textured surfaces (rough brick, rough render) where adhesive tape does not bond reliably
- Standoff-mounted name plates (the standoff bolts must be screwed into the wall)
The two-method approach: Many professional installers use both methods together. They fix the plate with screws for load-bearing security, and also apply a thin bead of silicone sealant around the back edge of the plate to prevent water entering behind it and to add a secondary hold. This combination gives the security of mechanical fixing with the water-sealing benefit of adhesive.
Expert Note: When determining whether an existing painted brick wall surface next to a main door will provide sufficient pull-out resistance for M6 stainless steel wall plugs and screws needed to hang a 1.2kg brass name plate, a hydraulic anchor pull-out tester with 25kN maximum capacity, hardened steel reaction frame, 10mm/min displacement rate, and digital load cell with 1N resolution is used to test three representative M6 nylon wall plugs installed in pre-drilled 6mm holes in the brick mortar joint adjacent to the door. Each plug must achieve a minimum pull-out load of 1,000N (3x the static load from a 1.2kg plate) before the fixing system is accepted for use. Plugs that fail below 500N indicate the mortar is too soft or degraded for screw fixings and an alternative chemical resin anchor system must be used instead. Anchor pull-out testing follows ASTM E488/E488M-15 (Standard Test Methods for Strength of Anchors in Concrete and Masonry).
What Tools Do You Need to Install a Name Plate on a Main Door?
Having the right tools before you start saves time, prevents mistakes, and protects your door and wall surfaces. Here is the full tool list by category.
Safety and scanning tools (check these before anything else):
- Non-contact voltage detector (for detecting live cables behind walls)
- Digital stud and pipe finder (for locating pipes and studs)
- Wall cavity inspection camera (for blind spots inside wall panels)
Measurement and marking tools:
- Laser line level or spirit level (for perfect horizontal alignment)
- Steel tape measure (for height and position marking)
- Pencil and masking tape (for marking drilling positions cleanly)
- Digital vernier depth gauge (for checking hole depth matches plug length)
Drilling tools:
- Variable speed drill driver (low speed for UPVC, medium for timber, high for masonry)
- Correct drill bits for each surface (HSS for UPVC/timber, carbide masonry for brick/concrete)
- Masking tape (to wrap around the drill bit as a depth marker)
Fixing materials:
- 3M VHB tape (for no-drill adhesive fixing on smooth surfaces)
- Grade 316 stainless steel screws (never use zinc-plated screws outdoors)
- Correct wall plugs for the substrate (nylon expanding for masonry, toggle anchors for hollow walls)
- Neutral-cure silicone sealant (to seal around edges after installation)
- Isopropyl alcohol (for cleaning surfaces before adhesive application)
Finishing tools:
- Soft cloth (for cleaning surfaces)
- Cover caps in matching colour (to conceal screw heads if exposed)
- Touch-up paint pen (to cover any pencil marks after installation)
Expert Note: When checking whether the surface of a new powder-coated steel gate pillar has sufficient surface energy to bond reliably with 3M VHB 5952 double-sided foam tape before applying a 350g name plate, a surface energy dyne test pen kit containing felt-tip pens filled with dyne test fluids at 30, 32, 34, 36, 38, 40, 44, 48, 52, and 56 dynes/cm in 2 dynes/cm increments is used to determine the critical wetting tension of the powder-coated gate pillar surface. The test pen with the highest dyne value that forms a continuous film (rather than beading) on the surface gives the surface energy value. For 3M VHB tape to bond reliably, the surface energy must be above 36 dynes/cm. Surfaces measuring below 30 dynes/cm need primer treatment. Wetting tension measurement follows ISO 8296:2003 (Plastics: Films and Sheeting: Determination of Wetting Tension), applied here to powder-coated metal and polymer-coated surfaces.
How Do You Find the Right Spot to Drill Without Hitting Pipes or Wires?
This is the most important safety step before any drilling. Hitting a live electrical cable or a water pipe causes serious damage. In the worst cases, it causes electric shock, flooding, or both.
Follow these three steps before drilling any hole in any wall.
Step 1: Use a non-contact voltage detector. This is a small handheld tool that detects the electric field around live cables through the wall surface without touching the cable. Slowly move it in a grid pattern across the area where you plan to drill. If it beeps or lights up, there is a live cable in that zone. Do not drill there. Move the name plate position until you find a clear zone.
Step 2: Use a stud and pipe finder. A digital stud finder with a metal pipe alarm detects both the timber studs inside the wall and any metallic pipes running through the wall cavity. Slowly scan the wall in horizontal lines. Mark any detected studs or pipes with masking tape before drilling.
Also, remember that electrical cables and water pipes typically run vertically (up and down) or horizontally (left and right) inside walls. They rarely run diagonally. This means that once you find a cable or pipe at one point, check directly above, below, and to each side before drilling anywhere nearby.
Step 3: Use a wall cavity inspection camera if you are unsure. If the two scanning steps leave any doubt, drill one small 8mm exploratory hole at the position you want to use. Feed a flexible inspection camera into this hole. Look at the live image on the camera screen. You will be able to see immediately whether there are cables, pipes, or other obstructions inside the wall cavity.
If the cavity is clear, proceed with drilling the full-size fixing holes. If there is an obstruction, seal the exploratory hole with a matching filler and choose a different position.
Expert Note: When conducting a pre-installation survey of a brick and render wall section next to a main door to determine whether the render is hollow or solidly bonded to the brick substrate (hollow render cannot support screw fixings reliably), a ultrasonic pulse velocity (UPV) meter with 54kHz exponential piezoelectric transducer pair, 0.1 microsecond timing resolution, and digital waveform display is used to perform indirect surface UPV scanning across the rendered wall face in a 150mm grid pattern. Solid render bonded to brick shows consistent UPV readings of 2,000 to 3,000 m/s. Hollow render (delaminated from brick) shows a significantly lower reading below 1,500 m/s and an attenuated waveform amplitude, indicating an air void between the render and brick. Hollow zones are marked and drilling must avoid these positions. Ultrasonic pulse velocity testing follows ASTM C597-16 (Standard Test Method for Pulse Velocity Through Concrete), applicable to all cementitious render and plaster materials.
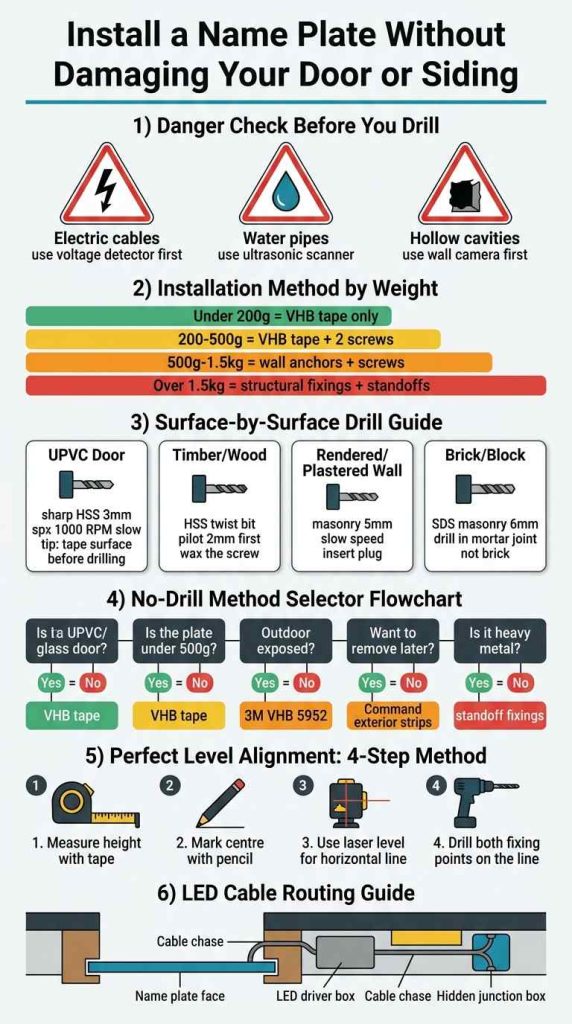
How Do You Drill Into Different Types of Doors and Walls Without Causing Damage?
Every surface needs a different drill bit type, speed, and pressure. Using the wrong bit or too much force is the main cause of cracking and surface damage.
UPVC doors and window frames: UPVC is a rigid plastic that cracks if you drill too fast or apply side pressure. Use a sharp HSS (high-speed steel) drill bit, not a masonry bit. Set your drill to its lowest speed (under 500 RPM if possible). Let the bit do the work. Do not push hard. Apply masking tape to the surface at the drill point before starting. The tape prevents the bit from wandering across the smooth surface and reduces the risk of cracking at the drill entry point.
Also, use a drill bit only 0.5mm larger than your screw shank. Oversized holes in UPVC provide no grip and may cause the UPVC to crack under the screw head.
Painted timber doors and wooden siding: Use a sharp HSS twist drill bit. Always drill a pilot hole first using a bit 1mm smaller than the screw shank. The pilot hole prevents the wood from splitting as the screw enters. Also, waxing the screw thread with a candle or beeswax before driving it in reduces the torque required, which further reduces the risk of splitting.
For hardwood siding (teak, oak, ipe), always drill the pilot hole. Hardwood is dense enough to split even softwood screws if there is no pilot hole.
Rendered or plastered walls: Use a carbide-tipped masonry bit. Set the drill to hammer mode for dense sand-cement render, but use rotation-only mode for soft lime plaster. Hammer mode in soft plaster can cause blowout around the hole. Keep the drill perpendicular to the wall surface. Any angle causes the bit to wander and enlarge the hole in an oval shape that will not grip the wall plug correctly.
Brick and block walls: Always drill into the mortar joint between bricks, not into the face of the brick itself. Mortar is softer and more predictable to drill through. Also, if a fixing later needs to be removed, mortar is easier to repair invisibly than a brick face. Use a carbide SDS-plus masonry bit in hammer mode. Do not apply sideways pressure. Let the hammer mechanism do the work.
| Surface Type | Drill Bit | Mode | Speed | First Step |
| UPVC door or frame | HSS twist bit | Rotation only | Low (300-500 RPM) | Apply masking tape first |
| Painted timber door | HSS twist bit | Rotation only | Medium (800-1200 RPM) | Drill 1mm pilot hole first |
| Hardwood siding | HSS cobalt twist | Rotation only | Medium | Drill pilot + wax screw |
| Rendered wall (sand-cement) | Carbide masonry | Hammer mode | Medium | Keep drill perpendicular |
| Rendered wall (lime plaster) | Carbide masonry | Rotation only | Low | No hammer mode |
| Brick wall (in mortar joint) | SDS carbide masonry | Hammer mode | Medium | Drill mortar joint not brick face |
| Concrete block or poured concrete | SDS carbide masonry | Hammer mode | High | Use dust mask |
Expert Note: When verifying the exact wall plug hole depth in a brick mortar joint before inserting a 50mm nylon wall plug for a screw-fixed name plate bracket, to confirm the hole is exactly 2mm deeper than the plug length (standard plug installation depth to avoid plug sitting proud), a digital vernier depth gauge with 0.01mm resolution, hardened steel depth rod of 8mm diameter, and reference surface plate for zeroing is used to measure the depth of the pre-drilled 6mm hole in the mortar joint surface before plug insertion. A hole that is too shallow (less than plug length) causes the plug to protrude and prevents the name plate from sitting flat against the wall. A hole too deep (more than plug length plus 5mm) may allow the plug to disappear into the cavity. Depth measurement follows the calibration and use procedure in ISO 13225:2012 (Geometrical Product Specifications: Depth Gauges for Coordinate Measuring Machines), adapted here for construction anchor hole depth verification.
What Is the Best No-Drill Way to Fix a Name Plate to a Door or Wall?
If you want zero holes in your door or wall, there are four main no-drill methods. Each one has a different weight limit and surface requirement.
Method 1: 3M VHB double-sided foam tape (best for smooth surfaces) VHB stands for Very High Bond. This industrial-grade double-sided tape consists of a closed-cell acrylic foam core coated on both sides with a permanent pressure-sensitive acrylic adhesive. It bonds without primers to most smooth surfaces: painted steel, UPVC, powder-coated metal, glass, and painted wood.
VHB tape holds up to 500g per 100cm2 of tape applied on smooth surfaces. For a 200mm by 100mm name plate, one full perimeter strip plus an X-pattern across the back is enough to hold a 400g plate permanently.
The critical preparation step: clean both surfaces with isopropyl alcohol (IPA) and let them dry for 2 full minutes before applying the tape. Any oil, dust, or moisture under the tape reduces the bond strength by up to 80 percent.
Method 2: Command exterior mounting strips (best for rental properties) Command strips use a stretch-release adhesive that bonds strongly during use and releases cleanly when the tab is pulled at a specific angle. This means you can remove the name plate later without leaving marks. They work on painted surfaces, UPVC, and smooth brick.
However, Command strips have a lower weight limit than VHB tape. The heaviest outdoor Command strip set is rated for 1.8kg. This covers most acrylic name plates but may not cover heavy metal or stone plates. Always check the weight rating on the specific product pack before purchasing.
Method 3: Brick clips (best for brick walls without drilling) Brick clips are spring-steel clips that slide over the top edge of a brick course and grip the brick below it. They can hold 1 to 4kg depending on the clip size. They require no holes, no adhesive, and no tools. They can be removed and reused with zero marks on the brick.
The limitation of brick clips is that they work only on standard-sized exposed brick courses. They do not work on rendered walls, concrete block, or stone-faced walls.
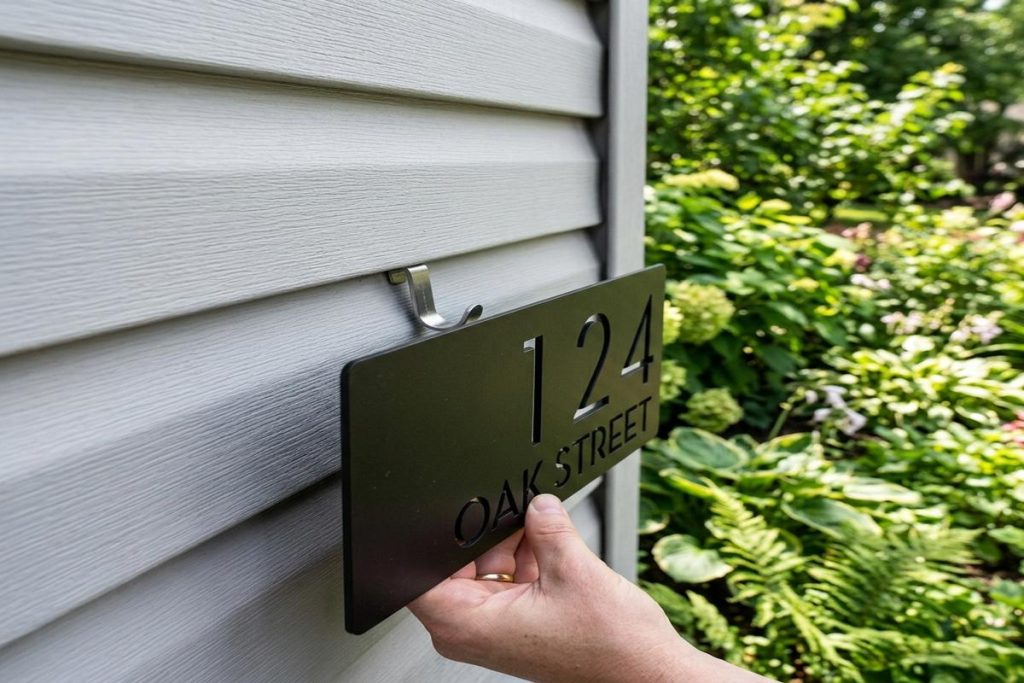
Method 4: Siding clips (best for vinyl or timber horizontal siding) Siding clips hook over the bottom lip of a horizontal siding board. They work on vinyl, PVC, fibre cement, and timber lap siding. Like brick clips, they leave no marks and can be repositioned.
Expert Note: When evaluating whether a 3M VHB 5952 double-sided foam tape bond will hold a 450g stainless steel name plate on a UPVC door under a sustained load for at least 10 years without creep failure (progressive slow deformation of the adhesive foam under constant load), a digital load cell shackle with 200kg capacity, Bluetooth wireless data transmission at 10Hz sample rate, and 30-day continuous logging via paired smartphone app is used to apply a sustained dead weight load equal to 3 times the static plate weight (1.35kg) to the bonded assembly hanging at room temperature for 30 days. Zero displacement over 30 days under 3x load confirms the VHB bond will not creep under the single plate weight over its service life. Adhesive creep resistance testing follows the sustained load method described in EN 13411-5:2003 (Terminations for Steel Wire Ropes: Safety: Requirements and Acceptance Criteria), adapted here for sustained load assessment of structural adhesive tape systems.
How Do You Fix a Name Plate to a UPVC Door Without Cracking It?
UPVC is the most common door material in the UK and increasingly common in India and Australia. It is durable and weather-resistant but it can crack around drill entry points if you are not careful.
The three rules for UPVC:
Rule 1: Use adhesive if at all possible. UPVC is the surface most suited to 3M VHB tape. Its smooth, non-porous surface gives VHB tape its best possible grip. A name plate under 500g on a UPVC door should always be fixed with VHB tape rather than drilling.
Rule 2: If you must drill, use masking tape at the entry point. Place a double layer of masking tape over the drill position before starting. The tape supports the surface around the hole and prevents surface cracking as the bit breaks through. Also, make sure the drill bit is sharp. A blunt bit generates heat and side pressure that cracks UPVC.
Rule 3: Never overtighten screws in UPVC. UPVC is a thermoplastic and will deform permanently if a screw is overtightened. Use a screwdriver (not a drill driver) for the final tightening. Turn until the screw head is just touching the plate surface, then stop. One extra quarter-turn is enough. Any more and you risk cracking.
Also, avoid drilling near the edge or corner of a UPVC panel. The material is under the most stress in these areas. Keep all fixings at least 20mm from any edge.
Expert Note: When measuring the thickness of a UPVC door panel at the proposed drill position to confirm the panel is thick enough to accept a 20mm screw without breaking through the internal hollow chamber of the door, a handheld ultrasonic thickness gauge with 5MHz piezoelectric contact transducer, internal calibration block for UPVC velocity (2,360 m/s), and 0.01mm wall thickness resolution is used to measure the UPVC panel outer skin thickness from the door face without drilling. UPVC door panels typically have an outer skin of 2 to 3mm. Drilling deeper than 20mm total in a typical 40mm thick UPVC door risks breaking through the inner chamber wall. This measurement confirms the maximum safe drill depth before any hole is made. Ultrasonic wall thickness measurement follows ASTM E797/E797M-15 (Standard Practice for Measuring Thickness by Manual Ultrasonic Pulse-Echo Contact Method), applied here to polymer door panel thickness measurement.
How Do You Fix a Name Plate to Timber or Wooden Siding Without Splitting the Wood?
Wood splits most often at two moments: when the drill bit breaks through the back face of the board, and when the screw thread engages too aggressively without a pilot hole. Both are completely preventable.
Step-by-step for timber siding:
First, check the moisture content of the wood. Do not install a name plate on wet or recently rained-on timber siding. When timber is wet, it is softer and the screw thread compresses the fibres rather than cutting through them cleanly. This weakens the grip and increases the chance of splitting when the wood dries out and contracts around the screw.
Next, mark your drill positions and apply masking tape over each mark. The tape prevents the bit from skating across the grain before it bites.
Also, always pre-drill a pilot hole. For a 4mm screw, the pilot hole should be 2.5mm. For a 5mm screw, the pilot hole should be 3.5mm. The pilot hole removes the wood material from the centre of the screw path, leaving only the thread engagement zone intact.
Then, wax the screw thread before driving it in. Run the screw thread across a wax candle or a block of beeswax several times. Wax reduces the friction dramatically. This means you need far less torque to drive the screw, and far less torque means far less risk of splitting.
Finally, for horizontal lap siding, always drill through the thicker lower section of the board, not the thin upper section that overlaps with the board above it. The lower section is the structural part of the siding board.
Expert Note: When assessing the moisture content of a timber door frame before installation of a recessed name plate bracket to confirm the timber is below 19 percent moisture content (the threshold above which timber swelling and screw grip loss become significant risks), a radio frequency (RF) pinless moisture scanner with 40mm depth penetration, 1 percent moisture content resolution, and species correction table for softwood and hardwood is used to measure the subsurface moisture content of the timber door frame at 5 points across the fixing zone without inserting any pins or probes that would leave marks. A reading above 19 percent indicates the timber is too wet for reliable screw installation and the installation should be delayed until the timber has dried. Moisture content measurement in building timber follows ASTM E2119-12 (Standard Practice for Use of Moisture Indicators in the Field to Verify Moisture Content of Building Materials).
How Do You Fix a Name Plate to a Rendered or Plastered Wall Without Cracking the Surface?
Rendered and plastered walls are common installation surfaces for door name plates in Indian, Mediterranean, and European homes. The surface can range from a thin 3mm gypsum skim coat to a dense 15mm sand-cement render. Each behaves differently under drilling.
Identify the render type first. Tap the wall gently with your knuckle. A solid, dense knock means hard sand-cement render. A hollow sound means either soft lime plaster, a thin skim coat over brick, or a hollow render that has delaminated from the substrate. A hollow-sounding area must not be drilled for fixing purposes. Find a solid-sounding zone instead.
For hard sand-cement render: Use a carbide masonry bit in hammer mode. Drill at a consistent slow speed. Do not push hard sideways. The key rule for render is: go straight in, come straight out. Any sideways movement enlarges the hole and weakens the grip around the wall plug.
For soft lime plaster or skim coat: Switch the drill to rotation-only mode. The hammer action will shatter soft plaster. Use a smaller pilot hole first (4mm), then enlarge to 6mm for the plug. This two-stage approach gives the soft plaster more time to adjust to the hole before the larger bit passes through.
Preventing cracking at the drill entry: Apply a cross of masking tape over the drill point before starting. This supports the surface layer and prevents the first 2mm of material from cracking radially outward as the bit enters. Remove the masking tape slowly after drilling, pulling it parallel to the wall surface (not outward).
Expert Note: When assessing the moisture condition of a rendered exterior wall surface before applying 3M VHB tape to fix a lightweight acrylic name plate, to confirm the render surface moisture is below the threshold for reliable tape bonding, a 4-electrode Wenner resistance damp survey meter with surface probe array, percentage moisture equivalent display, and 0 to 100 percent saturation scale is used to measure the surface moisture content of the render at the proposed adhesive application zone. A surface moisture reading above 5 percent indicates the render surface is too damp for VHB tape adhesion and the installation must wait until the surface has dried, or a mechanical fixing system must be used instead. Surface moisture measurement in building materials follows the procedure described in BS 5250:2011 (Code of Practice for the Management of Moisture in Buildings), specifically the section on surface moisture assessment for adhesive applications.
How Do You Fix a Name Plate to Brick or Concrete Without the Drill Bit Slipping?
Brick and concrete are hard, dense materials. The main installation challenge is not cracking the material but preventing the drill bit from sliding across the hard surface before it bites.
Preventing bit slipping:
Always start with a centre punch mark. Press a sharp centre punch into the drill point and give it one sharp tap with a hammer. This creates a small indent in the mortar or brick that gives the drill bit something to sit in at the start. Without this indent, the spinning bit will skate across the hard surface and end up in the wrong position.
Also, start the drill at low speed for the first 5mm of depth. Only switch to full speed and hammer mode once the bit has established its path. This prevents the bit from wandering during the initial entry.
Also, use a masonry bit with a correctly sharpened carbide tip. A worn or blunt masonry bit generates heat from friction rather than cutting cleanly. The heat can cause spalling (small chips of material breaking away from the surface) around the hole. Always use a sharp bit. If in doubt, use a new bit.
Choosing which part of the brick wall to drill: Always drill into the mortar joint between bricks rather than into the brick face itself. There are three reasons for this.
First, mortar is softer than fired brick and much easier to drill through cleanly. Second, if the hole is ever filled when you remove the name plate, grey mortar filler in a mortar joint is invisible. A filled hole in the centre of a brick face always shows. Third, the pulling force on a wall plug seated in mortar distributes more evenly into the surrounding brickwork on all sides.
| Brick/Concrete Type | Best Drill Bit | Mode | Hole Depth for 50mm Plug |
| Soft brick (handmade) | 6mm SDS carbide | Rotation only or light hammer | 55mm (plug length + 5mm) |
| Standard engineering brick | 6mm SDS carbide | Hammer mode | 55mm |
| Dense concrete block | 8mm SDS carbide | Hammer mode + pause every 10mm | 58mm (drill in stages) |
| Poured reinforced concrete | 8mm SDS carbide | Full SDS hammer | Check for rebar first |
Expert Note: When preparing to install a heavy brass name plate on a reinforced concrete pillar next to an apartment main door and needing to confirm there are no steel reinforcement bars (rebar) directly behind the proposed drill positions before drilling, a digital stud and reinforcement scanner with deep scan mode to 100mm depth, 40mm rebar detection range, signal strength display, and audible bar proximity alert is used to scan the concrete pillar surface in a grid pattern at 50mm intervals across the full fixing zone. Any rebar detection within 20mm of the proposed drill position requires the fixing point to be relocated by at least 50mm to maintain adequate concrete cover. Drilling into rebar damages both the drill bit and the structural integrity of the concrete element. Reinforcement location in concrete follows the inspection procedure referenced in UL 916 (Standard for Energy Management Equipment) for scanner device performance, with rebar avoidance distances specified in ACI 318-19 (Building Code Requirements for Structural Concrete).
How Do You Make Sure the Name Plate Is Perfectly Level Before You Fix It?
A name plate that is even 1 degree off level is clearly visible to the human eye. Getting it level before drilling or applying adhesive takes 3 minutes and saves a lasting impression of poor craftsmanship.
4-step levelling method:
Step 1: Mark your centre height. Measure the correct height from the floor (1,300 to 1,600mm as described in the placement guide). Mark a pencil dot at this height on the door frame or wall.
Step 2: Position the plate and mark the fixing points. Hold the name plate in the correct position by hand. Have a helper hold a spirit level against the top edge of the plate while you mark the two fixing point positions lightly with a pencil.
Step 3: Use a laser line level for greater precision. For the most accurate levelling, set up a self-levelling laser line level on a tripod or shelf to one side of the door. The laser projects a perfectly horizontal line across the wall. Position your name plate so the top edge aligns with the laser line. Then mark your fixing points. This method is precise to within 0.5mm across a 1-metre span.
Step 4: Double-check before drilling. Before drilling any holes, hold the name plate in position one more time and look at it from 3 to 4 metres away. Step back and view it fresh. Small errors in level that are not visible up close become obvious when you step back. Adjust the pencil marks if needed before drilling.
Expert Note: When marking two screw fixing positions for a 400mm-wide name plate on a 10-metre-long rendered garden wall adjacent to the main gate, where a short spirit level is not accurate enough over the full plate width, a 3-plane laser line level with 360-degree self-levelling horizontal beam, independent vertical cross-line, 30-metre operating range, and IEC Class 2 visible laser (635nm, less than 1mW output) is used to project a horizontal laser line across the entire gate wall face at the target height. Both screw fixing positions (separated by 380mm on the 400mm plate) are then marked exactly on the laser line, guaranteeing they are on a common horizontal plane to within plus or minus 0.3mm over the 380mm span. This is significantly more accurate than a 400mm bubble spirit level (typical accuracy: plus or minus 1mm per 400mm). Laser level safety classification follows IEC 60825-1:2014 (Safety of Laser Products: Equipment Classification and Requirements), which specifies Class 2 visible lasers as safe for normal use without protective eyewear.
How Do You Install a Name Plate for an LED or Wired Sign Without Exposed Cables?
LED name plates need a power cable running from the plate to a driver (power supply), and from the driver to a 240V power socket or junction box. A tidy, concealed cable installation looks professional and is safer than an exposed cable running across the wall.
Planning the cable route before drilling: Always plan your cable route completely before making the first hole. Sketch the route on paper: from the name plate position, to the driver location, to the power source. The best routes use existing architectural features as cover: behind door architraves, inside the door frame reveal, behind fascia boards, inside cable conduit on the wall.
The three hidden cable methods:
Method 1: Behind the architrave (door frame moulding). This is the cleanest option for doors with a painted timber architrave. Feed the cable behind the architrave by gently prising the bottom of the moulding away from the door frame with a putty knife. Feed the cable up behind the gap and refix the architrave with panel adhesive and small finish nails. No channelling required.
Method 2: Surface cable conduit. For walls where architrave concealment is not possible, use a flat, narrow surface conduit (also called trunking). This is a plastic channel that sticks to the wall surface with adhesive. The cable runs inside the channel, which is then painted to match the wall. Conduit is available in 10mm by 7mm size for LED driver cables, which is slim enough to be almost invisible when painted.
Method 3: Chased cable channel. For a fully flush installation, chase a narrow groove (typically 15mm wide and 15mm deep) into the wall render using an oscillating multi-tool with a carbide tile blade. Feed the cable in a conduit tube inside the groove. Fill the groove with patching plaster and sand smooth. Paint to match. This gives a fully concealed installation with zero visible fittings.
The LED driver box: Never mount the LED driver in an unventilated enclosed space. LED drivers generate heat during operation. Always mount the driver in a position where it has some airflow. Inside a ventilated electrical wall box, behind a decorative fascia panel with ventilation slots, or in a sheltered but open position under a canopy are all acceptable positions.
Expert Note: When routing the LED power cable for a backlit acrylic name plate through a 15mm deep chase cut into a sand-cement rendered wall to create a fully concealed cable installation, an oscillating multi-tool with 85mm carbide tile and grout cutting blade, depth stop collar adjustable in 0.5mm increments, and vibration-dampening grip handle is used to cut the cable chase groove into the render surface at a controlled depth of 15mm without cracking the surrounding render or breaking through to the underlying brick. The oscillating (back-and-forth) cutting action exerts less lateral force on the surrounding render than a grinder or circular saw, greatly reducing the risk of chase-edge cracking. After routing, the cable in its conduit is placed in the chase and the groove is filled with patching compound. Oscillating multi-tool construction classification follows IEC 60745-1:2006 (Safety of Hand-Held Motor-Operated Electric Tools: General Requirements), the safety standard for all oscillating power tools used in construction and renovation.
What Are the Most Common Installation Mistakes and How Do You Avoid Them?
Here are the seven most common name plate installation errors and the simple fixes for each.
Mistake 1: Drilling without scanning the wall first Hitting a live cable or water pipe is the most dangerous and most common serious error. Fix: always use a voltage detector and stud/pipe finder before the first hole. This takes 3 minutes and could prevent a very expensive repair.
Mistake 2: Using the wrong drill bit for the surface Using a masonry bit on UPVC cracks the plastic. Using a wood bit on brick grinds to a stop and generates heat that ruins the bit. Fix: match the bit to the surface as shown in the table above.
Mistake 3: Drilling holes that are too close together Two holes too close together in render, plaster, or brick weaken the material between them and can cause the wall surface to crack or spall. Fix: keep holes at least 50mm apart for 6mm anchors and 80mm apart for 8mm anchors in any masonry material.
Mistake 4: Not cleaning surfaces before applying adhesive Adhesive tape and silicone sealant fail much faster on dirty surfaces. Even fingerprints contain enough oil to reduce adhesion by 30 to 50 percent. Fix: always clean the surface with isopropyl alcohol and let it dry for 2 minutes before applying any adhesive.
Mistake 5: Skipping the pilot hole in timber Splitting the wood is almost always caused by driving a screw directly without a pilot hole. Fix: always pre-drill a pilot hole 1mm smaller than the screw shank diameter in all timber surfaces.
Mistake 6: Using zinc-plated or standard screws outdoors Zinc-plated screws rust within 2 to 3 years outdoors, leaving orange stain trails down the door or wall. Fix: only use Grade 316 stainless steel screws and anchors for any outdoor name plate installation.
Mistake 7: Over-tightening screws on UPVC or thin acrylic Over-tight screws crack UPVC and crack acrylic. They also cause the plate to bow inward, creating a gap at the edges that lets water enter. Fix: tighten screws until just snug. Never use a power drill driver for the final tightening on UPVC or acrylic. Use a hand screwdriver only.
Expert Note: When checking whether a completed screw-fixed brass name plate installation is truly perpendicular to the door frame surface (not tilted outward at the top due to a slightly shallow bottom screw anchor), a 600mm digital spirit level with high-contrast bubble vial, anodised aluminium body, rare earth magnets for hands-free attachment to metallic surfaces, and 0.5mm/m sensitivity is used to check the flatness of the installed name plate face in both horizontal and vertical planes simultaneously after the fixing screws are tightened. Any rocking of the spirit level indicates the plate is not sitting flat against the wall and one anchor is proud. This is corrected by loosening the proud screw 90 degrees and adding a thin stainless steel washer to bring the plate face back to flat. Spirit level sensitivity and calibration follows ISO 4795:2009 (Geometrical Product Specifications: Spirit Levels – Construction and Methods of Test), the international standard for spirit level accuracy classification.
How Do You Remove or Replace a Name Plate Later Without Leaving Marks?
Removing a name plate cleanly is just as important as installing it correctly. Moving home, changing your surname, or upgrading to a new design are all common reasons to remove and replace a door name plate.
Removing adhesive-fixed name plates:
For 3M VHB tape, the easiest removal method is dental floss or fishing line. Slide a length of floss behind one corner of the plate and work it back and forth in a sawing motion across the adhesive tape. This cuts through the foam tape without pulling on the door surface. Once the plate is off, any remaining tape residue can be removed with a product called Goo Gone or isopropyl alcohol on a soft cloth.
For Command strips, always use the pull-tab removal method. Pull the tab slowly at a 180-degree angle (back along the wall surface, not outward). The stretch-release adhesive releases cleanly when pulled in this direction. Pulling the tab outward (away from the wall) causes the adhesive to tear and leaves residue.
Removing screw-fixed name plates: Unscrew all fixing screws. Fill the holes with matching filler. For UPVC doors, use a UPVC filler that matches the door colour. For painted walls, use a fine surface filler, sand smooth when dry, and touch up with matching paint.
Cleaning up adhesive residue: Use isopropyl alcohol (IPA) on a soft microfibre cloth to dissolve most pressure-sensitive adhesive residues. Rub gently in circular motions. Never use acetone or solvent-based cleaners on UPVC or acrylic surfaces as these cause permanent crazing.
Expert Note: When planning the removal of a 3-year-old screw-fixed stainless steel name plate from a painted wooden door frame and needing to determine the paint layer thickness to select the correct filler depth for patching the screw holes invisibly, a handheld digital ultrasonic thickness gauge with 5MHz broadband pulse transducer, echograph display, A-scan waveform output, and 0.01mm thickness resolution calibrated for paint on wood (acoustic velocity: 3,300 m/s) is used to measure the total dried paint film thickness on the door frame surface at three points adjacent to each screw hole before filling. Knowing the exact paint thickness (typically 80 to 200 microns for a well-painted door) allows the correct depth of filler to be applied, bringing the patched surface exactly flush with the surrounding paint layer. This ensures the filler does not stand proud or sit recessed after sanding. Ultrasonic paint film thickness measurement follows ASTM E797/E797M-15 (Standard Test Method for Measuring Thickness by Manual Ultrasonic Pulse-Echo Contact Method), applied here to paint film characterisation on architectural timber substrates.
🛍️ Shop Installation Accessories: Browse our Grade 316 Stainless Steel Fixings, 3M VHB Outdoor Tape, and Name Plate Standoff Kits. All orders include a free paper drilling template matched to your name plate size.
Frequently Asked Questions About Installing a Name Plate Without Damage
Can I use command strips to hang a heavy metal name plate on my door?
Command exterior strips have a maximum weight rating of 1.8kg for the heaviest product in the range. If your metal name plate is under 1.8kg and has a smooth back surface, Command strips can work on smooth, non-textured surfaces. However, for any plate over 1kg, it is safer to use 3M VHB 5952 tape combined with two small screw fixings as a backup system. Heavy metal plates (over 1kg) on exterior surfaces are best fixed with mechanical screws as the primary fixing and adhesive as a secondary sealant.
How do I know if my wall plug will hold the weight of my name plate?
A standard 6mm nylon wall plug in solid brick or dense concrete holds a safe working load of 30 to 50kg when fitted with an appropriate 4mm or 5mm screw. This is far more than any name plate will ever need. The risk is not in the anchor rating but in the quality of the substrate. If the brick is soft, the mortar is degraded, or the render is hollow, the anchor will pull out at a much lower load. Always tap the wall first, listen for a solid sound, and drill in the most solid-sounding zone you can find.
What should I do if I accidentally crack the UPVC when drilling?
Stop drilling immediately. Assess the size and position of the crack. If it is a hairline crack less than 10mm long, apply clear UPVC repair adhesive from both sides and allow it to cure for 24 hours before continuing. If the crack is larger, or is near the edge of the panel, the drilling location is not suitable. Fill the crack, allow to cure, and choose a different installation method (adhesive tape) or a different position.
Is it safe to drill near the bottom of a door panel?
No. The bottom section of most doors contains the bottom rail, which is under the most structural stress. Also, water pooling at the door base is the most common source of moisture damage. Drilling the bottom rail of a UPVC door can compromise its structural integrity and its weatherproofing. Always keep fixings in the middle third of the door height. Never drill within 150mm of the bottom or top of the door.
What is the best way to find the exact centre of my door for positioning the name plate?
Measure the full width of the door and divide by two. Mark this centre point with a pencil at the correct height. This gives you the horizontal centre. Then step back and visually check the mark looks centred. Also, consider the visual centre rather than the mathematical centre: if there is a door knocker, knocker plate, or other hardware on the door, the name plate position should be visually balanced with those elements, which may not be exactly at the mathematical centre.
Can I install an LED name plate on a rented property without permanent damage?
An LED name plate requires a power cable, which typically needs to be concealed and may need a hole for cable entry. If you cannot drill, you have two options. First, use a surface-mounted cable conduit painted to match the wall, which can be removed cleanly. Second, use a battery-powered LED name plate (some LED designs run on rechargeable batteries for 6 to 12 months on a single charge). This eliminates the need for any cable routing at all. Battery-powered LED name plates are the best solution for rental properties where drilling is not permitted.
How long will 3M VHB tape hold a name plate outdoors?
3M VHB 5952 (the grade designed for outdoor, rough-surface, and high-UV applications) is rated by 3M for 10 or more years on exterior applications. In practice, on smooth, clean surfaces in sheltered positions, VHB tape installations last 15 to 20 years. The most common cause of early VHB failure is inadequate surface preparation (dirty or oily surfaces) at installation. If the surface was cleaned thoroughly with isopropyl alcohol before application, and if the plate is not too heavy for the tape area applied, the bond should outlast the name plate itself.
What type of silicone sealant should I use around the edge of the name plate?
Always use neutral-cure silicone sealant for name plate edges. Neutral-cure silicone does not release acetic acid (vinegar smell) as it cures. Acetic acid (from standard acetoxy-cure silicone) causes corrosion on metals and surface crazing on acrylic. For outdoor name plates, use a neutral-cure silicone rated for exterior use: look for ISO 11600 Type F classification on the packaging. Clear silicone is the most versatile as it suits any name plate colour and any door or wall colour.
Should I use a spirit level or a laser level for alignment?
Both work. A spirit level (400mm to 600mm length) is sufficient for most name plates up to 500mm wide. For wider plates, or for installations where you need to align two or more name plates across a large wall, a laser line level is significantly more accurate and much easier to use alone without a helper. A self-levelling laser level can be set up in under 30 seconds and projects a perfectly horizontal line across the entire wall that you can use for multiple marking positions simultaneously.
What is the best way to remove adhesive tape residue from a painted door?
Apply isopropyl alcohol (70% or higher purity) to the residue and let it soak for 30 seconds. Then rub gently with a soft microfibre cloth in circular motions. The IPA breaks down the adhesive polymer chains without softening or dissolving the paint surface. For stubborn residue, a product called Goo Gone or De-Solv-it is safe on most painted surfaces. Never use acetone, nail polish remover, or petrol-based solvents on painted surfaces. These strip the paint along with the adhesive residue.
Explore Essential House Name Plate Guides & Tutorials
Browse our comprehensive handcrafted signage guides for material care, font selection, and architectural placement:
- Beach & Airbnb Signage Design & Weatherproofing Guide (2026)
- Complete Guide to Wood House Sign Sealing & Weather Maintenance
- Horizontal vs Vertical House Numbers Layout Comparison
- Hanging & Wall-Mounted Cottage Sign Installation Guide
- Round vs Rectangular Name Plaques for Modern Property Entrances
- Best Modern & Vintage Fonts for Cottage & Residential Signs