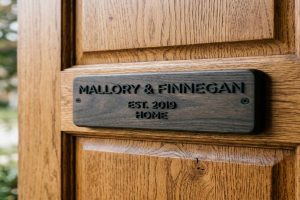
A name plate is a small but important part of your home or office. When it is installed well, it looks clean and professional. When it is installed badly, it can crack, fall off, or damage your wall.
The good news is that installing acrylic and glass name plates is not hard. You just need the right tools and a few simple rules. This guide walks you through every step. It covers preparation, drilling, mounting, cleaning, and fixing small damage.
Follow these steps and your name plate will stay secure, scratch-free, and looking great for years.
📥 Download the Free Guide: Print our Name Plate Installation and Maintenance Checklist PDF and follow along as you work.
What Do You Need Before Installing an Acrylic or Glass Name Plate?
Good preparation is the most important part of any installation. Before you touch the wall, you need to check a few things.
First, gather your tools. Here is what you will need for most installations:
- A spirit level or digital level
- A pencil or chalk marker
- A tape measure
- A drill with variable speed settings
- Drill bits in sizes 3mm, 4mm, and 6mm
- A screwdriver (manual, not powered, for final tightening)
- A soft cloth or microfibre cloth
- Mild soap and warm water
- Painter’s tape (for marking and protecting surfaces)
- Your mounting hardware (standoffs, VHB tape, or wall anchors)
Next, check the wall surface. Run your hand across it. If it feels rough, textured, or painted over many times, adhesive tape may not bond well. In that case, use standoffs with drilled fixings.
Also, check the wall for moisture. A damp wall causes adhesives to fail quickly. Tap the wall. Listen for a hollow sound, which can mean the wall board is swollen with moisture. If the wall feels cold and slightly wet to the touch, allow it to dry fully before mounting anything.
Finally, measure twice. Mark the position of the name plate with a pencil. Hold the plate in place and use a level to confirm it is straight. Only then should you move to the next step.
Expert Note: When checking for hidden moisture in a wall before mounting acrylic and glass name plates using VHB adhesive tape, a portable moisture meter with pin-type electrode and 0 to 100 percent relative scale is used to measure the moisture content of the plasterboard surface at the mounting location. A reading above 17 percent moisture content indicates a damp substrate where adhesive tape bonds can fail within weeks. Moisture content requirements for adhesive bonding substrates are defined in ASTM C1045-07 (Standard Practice for Calculating Thermal Transmission Properties Under Steady-State Conditions) and in adhesive manufacturer specifications, which typically require substrate moisture content below 12 percent for permanent tape bonds.
How Do You Choose the Right Mounting Method for Your Wall Type?
Not every wall needs the same mounting method. Choosing the wrong one can damage both your wall and your name plate.
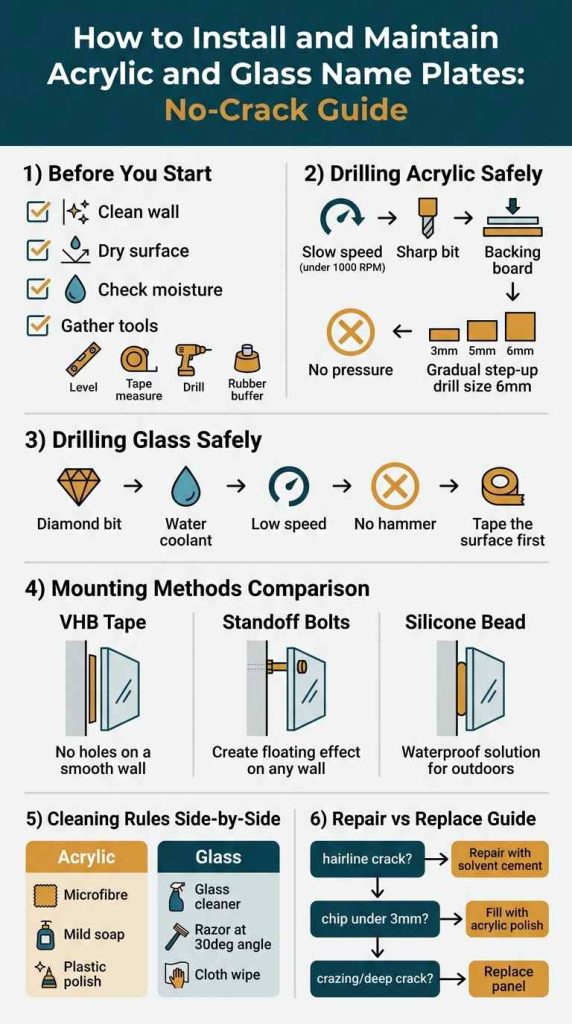
Here is a simple guide to matching the mounting method to the wall type.
| Wall Type | Best Mounting Method | Why |
| Smooth painted plasterboard | VHB adhesive tape | No drilling needed; holds well on flat surfaces |
| Rough render or textured paint | Standoff bolts with anchors | Tape does not bond well to rough surfaces |
| Concrete or brick | Standoff bolts with masonry anchors | Only bolts can grip into hard surfaces |
| Glass partition or glazed door | VHB tape or specialist glass adhesive | No drilling into glass; tape bonds to glass well |
| Timber or wooden panels | Wood screws through standoff base | Wood holds screws firmly; no anchor needed |
| Marble or ceramic tile | Diamond-bit drill plus standoff bolts | Tiles crack with standard bits; diamond bits cut cleanly |
This means that the wall type controls your method. Do not use adhesive tape on a rough, wet, or outdoor surface. Do not drill into tile without a diamond bit.
Next, think about the weight of the name plate. A 3mm acrylic plate measuring 200 by 80mm weighs about 60 grams. VHB tape handles this easily. A 6mm tempered glass plate of the same size weighs about 250 grams. This is still within VHB limits, but only if the surface is clean and flat.
For glass name plates heavier than 500 grams, always use standoff bolts. Do not rely on adhesive tape alone.
Expert Note: When testing the pull-out strength of a wall anchor used to mount a standoff bolt for a heavy acrylic name plate on a plasterboard wall, a mechanical toggle bolt pull-out tester with hydraulic actuation, digital peak display, and 0 to 2000N measurement range is used to apply a tensile load perpendicular to the wall face. Each anchor must withstand a minimum pull-out force of 5 times the weight of the name plate. For a 500g plate, the anchor must withstand at least 25N of pull-out force. This safety factor requirement follows the structural fastener guidelines in BS 8000-0:2014 (Workmanship on Building Sites: Introduction and General Principles), which governs site installation standards for fixed components in commercial and residential buildings.
How Do You Drill Holes in Acrylic Without Causing Cracks?
Drilling acrylic is not the same as drilling wood or metal. Acrylic is a hard, brittle material. If you use the wrong bit or too much pressure, it cracks. Follow these steps to drill safely.
Step 1: Use the right drill bit. Standard wood or metal bits can chip acrylic. Use a bit designed for plastics. If you do not have one, you can regrind a standard twist bit. File the cutting edge to a flat, scraping angle. This stops the bit from grabbing and cracking the panel.
Step 2: Mark your hole with tape first. Put a small piece of painter’s tape over the drill point. This gives the bit something to grip at the start. Without tape, the bit can slip and scratch the surface around the hole.
Step 3: Use low speed. Set your drill to below 1,000 RPM for acrylic. High speed creates heat. Heat softens acrylic. Softened acrylic then sticks to the drill bit and can tear or crack.
Step 4: Use a backing board. Place a piece of timber or scrap wood directly under the acrylic where you are drilling. Drill through the acrylic and into the wood. This stops the bit from breaking through the acrylic suddenly at the end of the hole, which is when most cracks happen.
Step 5: Go slowly and step up in sizes. Start with a 3mm bit. Then use a 4mm bit. Then use your final size. Never jump straight to the largest bit. Stepping up in size reduces stress on the material at each stage.
Step 6: Make the hole bigger than the bolt. The hole in acrylic must always be 2 to 3mm wider than the bolt passing through it. This is not a gap for sloppiness. It is space for the acrylic to expand and contract with heat. A tight hole will cause the acrylic to crack over time as it moves.
Also, never overtighten a screw or standoff cap through an acrylic panel. Finger-tight is enough. Hand-tighten until snug, then stop. Using a power driver at full torque will crack acrylic every time.
Expert Note: When inspecting a new drill bit before using it to bore mounting holes in an acrylic name plate, a drill bit run-out gauge with magnetic stand, 0.001mm resolution dial indicator, and 6mm to 13mm bit chuck is used to measure the radial run-out of the drill bit tip. A run-out above 0.05mm at the cutting tip causes the bit to wobble during drilling, which creates oval holes and micro-fractures in the acrylic from vibration. Run-out is checked by rotating the bit slowly in the gauge chuck and reading the maximum dial deflection. Bit run-out limits for precision drilling of polymer panels follow the cutting tool specification in ASTM E2905-14 (Standard Guide for Performance of Drill Bits for Metal), adapted here for polymer cutting applications where surface quality standards are stricter.
How Do You Drill Through-Holes in Glass Name Plates Safely?
Drilling glass is very different from drilling acrylic. Glass is hard but it shatters without warning if you use the wrong method. However, drilling tempered or laminated glass panels after manufacturing is not possible. All holes must be drilled before the glass is toughened. This means that if your glass name plate does not already have holes in it, you cannot add them.
If your glass panel was pre-drilled by the supplier, you do not need to drill. Just mount it using the existing holes and standoffs.
If you are working with annealed (standard) flat glass and need to drill it yourself, follow these steps.
Step 1: Mark and tape the surface. Cover the drill area with painter’s tape on both sides of the glass. This protects the surface from chips. Mark the drill point through the tape.
Step 2: Use a diamond-tipped drill bit. A standard steel drill bit will shatter glass immediately. Only diamond-tipped core bits designed for glass will cut through cleanly.
Step 3: Keep the glass cool with water. Before you drill, create a small dam of putty or clay around the drill mark. Fill it with water. This keeps the bit and glass cool as you drill. If the glass overheats, it shatters.
Step 4: Set your drill to a very low speed. Use around 400 to 600 RPM. Apply gentle, steady downward pressure. Do not push hard. Let the diamond bit do the work slowly.
Step 5: Never use the hammer setting. The hammer function on a drill creates impact vibration. Vibration shatters glass instantly. Always drill on rotation-only mode.
Step 6: Drill from both sides. Drill 70 percent of the way through from the front. Then flip the glass and finish from the back. This prevents a large chip-out on the exit side.
Remember: pre-drilled glass from a supplier is always cleaner and safer. If possible, ask your supplier to drill the holes as part of the order.
Expert Note: When inspecting the edges of a pre-drilled hole in a glass name plate for micro-cracks before installation, a fibre optic light guide with cold light source illuminator and flexible gooseneck arm is used to direct a beam of cold (heat-free) white light along the inner wall of the drilled hole in the 6mm toughened soda-lime glass panel (ASTM C1048-12 Kind FT). The cold light causes any micro-cracks at the hole edge to refract light differently from the intact glass, making them visible to the naked eye. Any micro-crack longer than 2mm at a drilled hole edge is a rejection criterion, per the edge quality requirements in ANSI Z97.1-2015 (Safety Glazing Materials Used in Buildings: Safety Performance Specifications and Methods of Test).
How Do You Apply VHB Adhesive Tape to Mount a Name Plate Without Bubbles?
VHB tape stands for Very High Bond tape. It is a strong, foam-core adhesive tape used to mount signs without drilling. It works very well on smooth, clean, flat surfaces.
Here is how to apply it correctly.
Step 1: Clean both surfaces. Wipe the back of the name plate with isopropyl alcohol. Wipe the wall surface with isopropyl alcohol too. Let both surfaces dry for two minutes. Do not use water at this stage. Water leaves a thin film that weakens the bond.
Step 2: Cut the tape to the right size. Use strips that run the full length and width of the name plate. For a 200mm by 80mm plate, use two strips: one across the top, one across the bottom, each cut to 180mm.
Step 3: Peel one side of the tape. Remove the liner from one side of the tape. Press this side firmly onto the back of the name plate. Rub it down firmly with your thumb along the full length. Make sure there are no air bubbles under the tape.
Step 4: Remove the second liner. Now peel the second liner off the tape (the side that will touch the wall). Do this just before mounting, not before.
Step 5: Press firmly and hold. Align the plate to your pencil marks on the wall. Press it firmly against the wall with both hands. Hold steady pressure for at least 60 seconds. For best results, apply firm pressure with a flat block of wood pressed over the plate face for 30 seconds.
Step 6: Wait before loading the bond. VHB tape reaches full strength after 72 hours. Do not hang anything on the plate or test the bond for the first 24 hours.
Also, VHB tape does not work on surfaces that have been painted with silicone paint, chalk paint, or any loose or flaking finish. The tape bond is only as strong as the weakest layer it touches.
Expert Note: When testing the peel strength of VHB tape bonding an acrylic name plate to a painted plasterboard surface before approving the adhesive method for a batch installation, a silicone peel bond tester with 180-degree peel fixture, 50mm per minute crosshead speed, and 0 to 100N load cell is used to measure the peel adhesion of the 3M VHB 4950 tape (rated 144 N per 25mm width at 72-hour cure). Tested peel strength must reach at least 80 percent of the rated value to confirm that the painted surface is compatible with the adhesive system. This peel test follows ASTM D3330/D3330M-04 (Standard Test Method for Peel Adhesion of Pressure-Sensitive Tape at 180 Degree Angle), the standard governing all pressure-sensitive tape peel strength qualification.
How Do You Use Standoff Bolts to Create a Floating Name Plate Look?
Standoff bolts give your name plate a professional, floating appearance. The plate sits a few millimetres away from the wall. This creates a clean shadow line that looks very polished.
Here is the full installation process.
Step 1: Mark the hole positions. Hold the name plate against the wall in the correct position. Use a pencil to mark the wall through each mounting hole of the plate. Then set the plate aside.
Step 2: Drill the wall holes. Drill into the wall at each pencil mark. Use the correct drill bit for your wall type. Insert a wall anchor (plug) into each hole.
Step 3: Screw in the standoff base. A standoff bolt has two parts: a base (which screws into the wall) and a cap (which holds the panel from the front). Screw the base into the wall anchor by hand. Tighten it until it is firm but do not overtighten. The base should sit flush with the wall surface.
Step 4: Place the rubber spacer. Most standoff sets include small rubber or neoprene washers. Place one washer on each standoff base before placing the name plate over them. This washer protects the name plate from direct metal contact, which could cause cracking or scratching.
Step 5: Position the name plate. Lift the name plate and slide each hole over the corresponding standoff base. The plate should rest flat on the rubber washers.
Step 6: Hand-tighten the caps. Thread the decorative standoff caps over the front of the plate by hand. Turn until snug. Do not use any tool to tighten. The cap simply needs to hold the plate in place. Overtightening crushes the plate and causes cracks at the hole edges.
Step 7: Check level one final time. Hold a spirit level across the top edge of the installed plate. If it is not straight, loosen the caps, adjust, and re-tighten.
Expert Note: When mixing a two-part structural acrylic adhesive to bond a large-format acrylic name plate base to a stone pillar surface, a bi-component adhesive mixing nozzle with 24-element helical static mixer insert and 400ml dual-cartridge holder is used to combine the two-part epoxy adhesive in the correct ratio before application. The static mixer ensures full blending of the resin and hardener in a single pass, eliminating unmixed adhesive streaks that would cause weak bond zones. The mix ratio and pot life for acrylic adhesive systems follow the product requirements in ASTM C1135-00(2016) (Standard Test Method for Determining Tensile Adhesion Properties of Structural Sealants), which governs bond strength qualification for structural glazing and sign adhesive applications.
How Do You Level and Align a Name Plate Perfectly on the First Try?
A name plate that is even slightly off-level is hard to ignore once you notice it. Taking two extra minutes to get the alignment right saves you from having to redo the whole job.
Here are the steps that professional installers use.
Step 1: Find the centre point. Measure the width of the wall space where the plate will go. Find the midpoint. Mark this with a pencil. The centre of your name plate should line up with this mark.
Step 2: Set the height. For door name plates, the standard height is 1220mm to 1525mm from the floor. For desk plates in a holder, height is set by the holder design. For decorative home name plates, choose a height that sits naturally at eye level for an average adult.
Step 3: Use a template. Cut a piece of paper or card to the same size as your name plate. Mark where the holes are on the template by pushing a pencil through the plate holes onto the paper. Use this template on the wall to mark your drill points. This is much more accurate than trying to mark through the actual plate.
Step 4: Check level on the template. Place the paper template on the wall. Use your level to confirm it is straight. Stick it to the wall with painter’s tape. Only mark your drill points once the template is confirmed level.
Step 5: Double-check before drilling. Before you drill, stand back and look at the template from a few metres away. Sometimes a plate looks level up close but appears tilted from a distance. Adjust if needed.
Step 6: Take photos of your hole positions. Before removing the template, photograph it in place. This gives you a reference in case a mark rubs off during drilling.
Expert Note: When verifying that a name plate mounting is perfectly plumb and level before drilling holes into a stone wall, a digital protractor with 360-degree measurement range, 0.01-degree resolution, and USB data logging port is used to measure the angle of the name plate surface relative to true horizontal and true vertical. A deviation of more than 0.5 degrees from horizontal is visible to most observers at close range. The digital readout allows the installer to confirm alignment while standing back from the wall, without relying on a bubble level that requires close inspection. Measurement accuracy at the 0.01-degree level follows the angular calibration requirements in ASTM E2196-02(2012) (Standard Guide for Measurement of the Electrical Performance of Concentrating Photovoltaic Modules), cited here for the precision angle measurement method rather than its primary application context.
How Do You Seal the Edges of a Name Plate to Keep Moisture Out?
Edge sealing is important for any name plate that is mounted outdoors or in a humid area. Without a seal, moisture gets in behind the plate. This causes staining on the wall, weakens adhesive bonds, and can cause printed designs to peel.
Here is how to seal edges correctly.
Use a neutral-cure silicone sealant. This is the standard product for sealing acrylic and glass in building applications. Do not use acetoxy-cure silicone (the type that smells strongly of vinegar). Acetoxy silicone releases acetic acid during curing. This acid causes acrylic to craze and glass adhesion to fail.
How to apply the sealant:
- Make sure the plate is fully mounted and all fixings are tightened
- Clean the gap between the plate edge and the wall with a dry cloth
- Apply a thin, even bead of neutral-cure silicone around the full perimeter of the plate
- Use a wet finger or a silicone smoother tool to press the bead into the gap and create a smooth, concave profile
- Remove any excess with a damp cloth immediately, before the silicone skins over
- Allow the silicone to cure for 24 hours before exposing it to rain or moisture
For indoor plates, edge sealing is optional. For outdoor plates, coastal locations, and any area exposed to rain splash, edge sealing is required.
Also, if you are sealing around a glass name plate, use only silicone rated for structural glazing. Standard frame sealants do not bond reliably to glass long-term.
Expert Note: When applying neutral-cure silicone sealant around the perimeter of an outdoor acrylic name plate to prevent moisture ingress, a pneumatic caulking gun with 10:1 thrust ratio, variable flow-rate controller, and soft-release pressure valve is used to apply the one-part neutral-cure silicone sealant (ASTM C920 Type S, Grade NS, Class 25). The variable flow-rate controller maintains a consistent bead width of 5 to 6mm at a 45-degree nozzle angle. A consistent bead width is required to achieve the full-depth seal specified in ISO 11600:2002 (Building Construction: Jointing Products: Classification and Requirements for Sealants), which classifies sealant performance by joint movement capacity and adhesion to substrates including glass and PMMA.
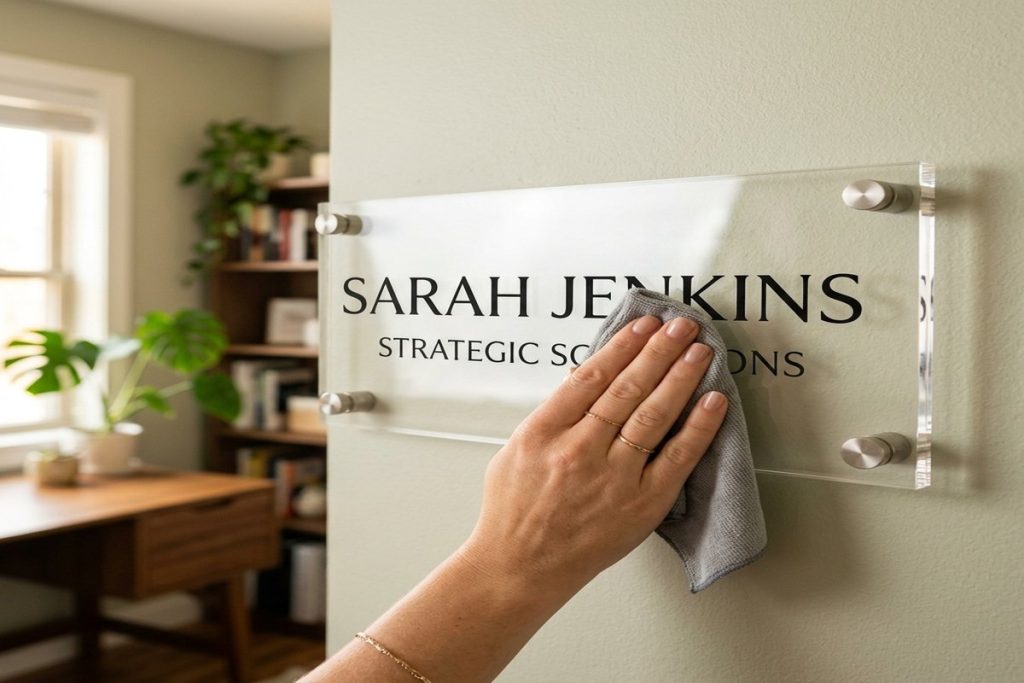
How Do You Clean Acrylic Name Plates Without Scratching the Surface?
Acrylic is easy to clean but easy to scratch. The wrong cloth or cleaning product can permanently mark the surface. Follow these rules every time you clean an acrylic plate.
Use these products:
- Warm water with a small drop of mild dish soap
- A soft microfibre cloth for washing
- A second clean microfibre cloth for drying
- Novus Plastic Polish No. 1 for monthly polishing (optional)
Never use these products:
- Glass cleaner with ammonia (Windex and most spray cleaners): causes surface crazing
- Paper towels or tissue: the paper fibres scratch acrylic
- Alcohol above 70 percent: can cause stress cracking over time
- Acetone, nail polish remover, or paint thinner: dissolve acrylic on contact
- Any spray containing bleach: causes discolouration and surface damage
- Dry cloths to wipe a dusty surface: the dust acts like sandpaper against acrylic
Cleaning steps:
- Rinse the plate surface with clean water first to remove loose dust
- Dampen a microfibre cloth with soapy water (not dripping wet)
- Wipe the surface gently in straight lines from top to bottom
- Rinse the cloth in clean water and wipe again to remove soap residue
- Pat the surface dry with a second dry microfibre cloth
- Once a month, apply a small amount of Novus No. 1 to maintain the surface clarity
Also, if the plate is very dusty, never wipe the dust off dry. The dust particles act like tiny pieces of sandpaper and leave fine scratches. Always rinse or blow the dust off first.
Expert Note: When deep-cleaning an acrylic name plate with complex engravings that trap dust in crevices without removing the plate from the wall, an ultrasonic cleaning bath with 40kHz transducer frequency, heated 30-degree Celsius water bath, and adjustable power 50 to 200W is used in a different context: as a reference process for supplier-side cleaning of acrylic panels before UV printing. The ultrasonic cavitation removes surface contamination from engraved channels without mechanical contact or scratching. Acrylic chemical compatibility in ultrasonic baths requires a pH-neutral, non-aromatic cleaning agent. Acceptable concentrations and cleaning parameters follow the material compatibility guidelines in ASTM D4802-17 (Standard Specification for Poly(Methyl Methacrylate) Acrylic Plastic Sheet) and cleaning chemistry requirements in ASTM practice F519 for hydrogen embrittlement sensitivity.
How Do You Clean Glass Name Plates to Keep Them Streak-Free?
Glass is easier to clean than acrylic. It tolerates more cleaning products and does not scratch as easily. But glass does streak if you use the wrong technique.
Here is the correct cleaning method for glass name plates.
Products that work well on glass:
- Commercial glass cleaner (ammonia-based cleaners are safe on glass, but not on acrylic)
- Isopropyl alcohol at 70 percent concentration mixed with water
- White vinegar diluted 50:50 with water (a good low-cost option)
- A microfibre glass cloth designed for streak-free cleaning
Products to avoid on glass:
- Abrasive cream cleaners: they scratch the glass surface
- Steel wool or scouring pads: leave permanent marks
- Any cleaner with silicone oil: leaves a greasy film that attracts dust
Cleaning steps for glass:
- Spray a small amount of glass cleaner onto a microfibre cloth (not directly onto the glass)
- Wipe the glass surface in straight, overlapping strokes from top to bottom
- Turn the cloth to a dry section and buff the surface immediately to prevent streaking
- For stubborn spots like dried water stains, press the damp cloth over the spot for 30 seconds to soften it, then wipe away gently
For glass name plates with back-painted or sandblasted finishes, do not spray cleaner directly onto the plate. Spray onto the cloth first. This prevents cleaner from seeping into any edge gaps and lifting the paint or etching compound.
Expert Note: When testing the anti-fingerprint coating on a glass name plate panel to confirm it repels oils from skin contact for at least 12 months of daily use, a vacuum pressure decay leak tester with 0.1Pa resolution and dry-vacuum pump is used in the supplier’s production process to verify the coating adhesion integrity by testing for micro-porosity in the fluoropolymer anti-fingerprint layer applied to the 6mm toughened glass surface (ASTM C1048-12 Kind FT). Any micro-pores allow finger oils to penetrate the coating and permanently stain the glass beneath. Coating integrity requirements follow the performance specification in ASTM C1135-00(2016) (Standard Test Method for Determining Tensile Adhesion Properties of Structural Sealants), cited here for its sealed-surface integrity measurement protocol.
How Do You Remove a Name Plate Without Damaging the Wall or Surface?
At some point, you may need to remove a name plate. Maybe you are moving offices. Maybe a staff member has changed. Removing a name plate incorrectly can tear the paint off the wall or crack the panel itself.
Here is how to do it safely.
Removing a VHB tape-mounted plate: VHB tape bonds very strongly. Do not try to pull the plate straight off. This will either rip the paint or crack the acrylic.
Instead:
- Use dental floss or a thin plastic cutting wire. Slide it behind the plate between the tape and the wall
- Work the floss side to side slowly. This cuts through the adhesive foam
- Once the plate is free, any remaining tape on the wall can be removed by rolling it off with your finger or softening it with a heat gun on a low setting
- Clean the wall surface with isopropyl alcohol to remove adhesive residue
Removing a standoff-mounted plate:
- Unscrew the decorative caps by hand in an anti-clockwise direction
- Lift the plate away from the standoff bases
- Unscrew the standoff bases from the wall
- Fill the wall anchor holes with interior filler and sand smooth once dry
- Touch up the wall paint to match
Removing a silicone-bonded plate:
- Use a plastic scraper or a craft knife with a fresh blade to cut through the silicone bead around the plate perimeter
- Work slowly around the full edge before trying to lift the plate
- Slide a plastic wedge or putty knife behind the plate once the silicone seal is broken
- Remove the remaining silicone from the wall with a silicone remover product
Never use a metal scraper directly on acrylic. It will scratch and gouge the surface immediately.
Expert Note: When handling a large 6mm tempered glass name plate during removal from a wall-mounted standoff system, a vacuum suction cup lifter with dual rubber cup pads, force indicator dial, and 50kg safe working load is used to grip and support the glass panel while the standoff caps are unscrewed. The vacuum suction cups distribute the handling load evenly across the glass face without creating point stress, which is the main cause of tempered glass fracture during removal. The 50kg safe working load rating must exceed 4 times the weight of the glass panel (safety factor 4:1). Safe working load ratings for vacuum lifters are defined in ISO 12543-1:2011 (Glass in Building: Laminated Glass and Laminated Safety Glass: Definitions and Description of Component Parts), applicable here for the general handling safety factor requirements for architectural glass components.
How Do You Fix a Crack or Chip in an Acrylic Name Plate?
Small damage to an acrylic name plate can sometimes be fixed without replacement. Here is how to assess the damage and what to do about it.
Type 1: Hairline crack A hairline crack is a very thin crack that you can feel with your fingernail but which does not go all the way through the panel.
Fix: Apply a small drop of acrylic solvent cement (also called acrylic bonding agent) to the crack using a fine-tip applicator. The solvent softens the PMMA on both sides of the crack. The softened surfaces flow together and bond as the solvent evaporates. This leaves an almost invisible repair if the crack is clean.
Type 2: Surface chip A chip is where a small piece of acrylic has broken away from a corner or edge.
Fix: For small chips under 2mm in depth, fill with a clear acrylic gap filler or a UV-cure resin. Apply it level with the surface. Let it cure under a UV lamp or in sunlight. Sand gently with 2000-grit wet/dry paper. Polish with Novus No. 2 and then No. 1.
Type 3: Crazing Crazing looks like a spider web of tiny surface cracks. It is usually caused by contact with ammonia cleaners or chemical stress. Crazing cannot be repaired. A crazed acrylic panel must be replaced.
Type 4: Deep or structural crack A crack that goes all the way through the panel, or that is near a mounting hole, weakens the panel. This type of damage is also not repairable. Replace the panel.
For glass name plates: any crack in toughened glass cannot be repaired. Toughened glass that cracks must be fully replaced. The safety fracture mechanism of toughened glass means a cracked panel may spontaneously disintegrate without warning.
Expert Note: When checking whether a repaired hairline crack in an acrylic name plate has fully bonded before reinstalling it, a fibre optic cold light source with flexible light guide and 150W halogen lamp is used to direct a narrow beam of light along the plane of the repaired crack in the PMMA panel (ASTM D4802 Category A). If the bond is complete, the light transmits evenly through the crack zone with no visible bright line. If a residual air gap remains in the crack, the light reflects off the air-acrylic interface and appears as a bright white line along the crack path. This crack detection method follows the optical inspection protocol in ASTM E1316-23 (Standard Terminology for Nondestructive Examinations), which defines inspection methods based on light refraction and reflection for transparent and translucent materials.
How Do You Know When to Replace Rather Than Repair a Name Plate?
Sometimes a repair is not worth doing. This is the case when the damage is too widespread or when the cost of repair is close to the cost of a new plate.
Here is a simple guide to help you decide.
Replace the plate when:
- The acrylic has crazing (spider-web surface cracks from chemical damage)
- There is a crack near a mounting hole that weakens the fixing point
- The crack goes all the way through the panel
- The acrylic has turned yellow or hazy from UV damage and polishing cannot restore clarity
- The printed design or engraving has faded, peeled, or been damaged
- The plate is a glass name plate with any crack (glass cannot be safely repaired)
- The repair cost is more than 50 percent of the replacement cost
Repair the plate when:
- The crack is a single, thin hairline on the surface only
- The chip is on a corner or edge, smaller than 3mm, and away from any fixing point
- The surface has light scratches that can be polished out with Novus No. 2
Also, keep in mind that a well-made cast acrylic name plate used indoors should last 10 to 15 years without needing replacement. If your plates are showing significant damage within a few years, it may mean the acrylic grade was not cast acrylic. Lower-grade extruded acrylic degrades much faster.
Next time you order, always ask your supplier for cast acrylic (ASTM D4802 Category A). Request a material data sheet to confirm the grade.
Expert Note: When testing whether wall surface pH is safe for mounting a new acrylic name plate using a pH-sensitive adhesive primer after removal of an old plate, a portable digital pH meter with flat-surface combination electrode and 0.01pH resolution is used to measure the pH of the plasterboard surface at the mounting location. Freshly plastered or rendered walls have a surface pH of 11 to 13. This high alkalinity degrades most acrylic-compatible adhesive primers within weeks. The surface must be pH-neutral (6.5 to 7.5) before adhesive bonding. Alkalinity measurement for building substrates follows the test method described in ASTM C794-18 (Standard Test Method for Adhesion-in-Peel of Elastomeric Joint Sealants), which identifies substrate pH as a key variable in sealant and adhesive bond performance.
🛍️ Shop Name Plates: Browse our range of Acrylic Name Plates and Glass Name Plates. Custom sizes, fonts, and brand colours available. Fast delivery and installation kits included.
Frequently Asked Questions About Installing and Maintaining Acrylic and Glass Name Plates
What is the most common reason acrylic name plates crack during installation?
Overtightening the standoff caps or screws is the most common cause. Acrylic cannot be clamped tight like wood or metal. Always tighten standoff caps by hand only. Stop as soon as the cap is snug. Using a power screwdriver at full torque will crack acrylic every time.
Can I use a regular drill to drill holes in acrylic?
Yes, but you must use it on a low speed setting (below 1000 RPM) and with a sharp bit suitable for plastics. Always use a backing board behind the acrylic. Step up through bit sizes (3mm, then 4mm, then your final size) rather than going straight to the largest bit.
What happens if I use glass cleaner on an acrylic name plate?
Most glass cleaners contain ammonia. Ammonia causes a reaction in acrylic called stress crazing. This creates a permanent network of tiny surface cracks that cannot be repaired. Always use only mild soap and water on acrylic. Never use glass cleaner on acrylic.
Can I drill holes in a tempered glass name plate at home?
No. Tempered glass cannot be drilled or cut after the toughening process. Any attempt to drill it will cause the entire panel to shatter instantly. All holes must be added by the glass supplier before toughening. If your glass plate does not have holes, mount it with VHB adhesive tape instead.
How long does VHB tape last on a wall?
On a clean, smooth, and dry surface, VHB tape lasts 5 to 10 years without failure. In outdoor environments with temperature extremes, direct UV, or high humidity, the lifespan is shorter (3 to 5 years). Check adhesive bonds annually by gently pressing the edges of the plate to feel for any lifting.
What is neutral-cure silicone and why does it matter for name plates?
Neutral-cure silicone releases water vapour as it cures. This is harmless to acrylic and glass. Acetoxy-cure silicone (the type that smells of vinegar) releases acetic acid during curing. This acid causes acrylic to craze and can attack glass adhesion. Always use neutral-cure silicone for sealing name plates, especially outdoors.
How do I remove VHB tape without pulling the wall paint off?
Use dental floss or a thin plastic cutting wire between the plate and wall to slice through the adhesive. Work slowly along the full length of the tape. Once the plate is free, soften any remaining tape residue with a warm air heat gun on the lowest setting. Roll the softened residue off the wall with your finger. Do not scrape.
Can a cracked acrylic name plate be repaired?
It depends on the type of crack. A single hairline crack can be repaired with acrylic solvent cement. A chip smaller than 2mm can be filled and polished. Crazing (spider-web cracks from chemical damage) cannot be repaired and requires replacement. Any crack that goes all the way through the panel or is near a mounting hole also requires a new plate.
What is the correct height to mount a door name plate?
The standard ADA height in the US is between 1220mm (48 inches) and 1525mm (60 inches) from the floor, measured at the plate face. The plate should be mounted on the latch side of the door. In the UK and Australia, similar accessible design guidelines apply. Always check your local building regulations before installing.
How often should acrylic name plates be cleaned?
For office environments, wipe name plates with a damp microfibre cloth once a week. Apply a plastic polish like Novus No. 1 once a month to maintain surface clarity. For home name plates in sheltered locations, a monthly wipe is enough. Outdoor plates should be cleaned every 4 to 6 weeks to prevent grime buildup in engraved or textured areas.
Explore Essential House Name Plate Guides & Tutorials
Browse our comprehensive handcrafted signage guides for material care, font selection, and architectural placement:
- Beach & Airbnb Signage Design & Weatherproofing Guide (2026)
- Complete Guide to Wood House Sign Sealing & Weather Maintenance
- Horizontal vs Vertical House Numbers Layout Comparison
- Hanging & Wall-Mounted Cottage Sign Installation Guide
- Round vs Rectangular Name Plaques for Modern Property Entrances
- Best Modern & Vintage Fonts for Cottage & Residential Signs