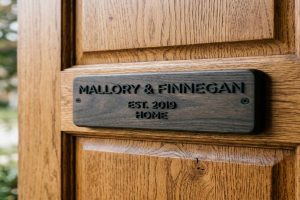
Making your own treehouse sign sounds like a brilliant Saturday project. A few planks of wood, some paint, a router, and a good weekend. How hard can it be?
The honest answer is: harder than it looks, and more expensive than most people expect when you add up everything properly. That does not mean DIY is always the wrong choice. For a personal family treehouse, handcrafted name plates have genuine charm. But for a glamping rental property, a professional custom sign usually wins on every practical measure that matters.
This guide gives you a straight comparison. We cover cost, quality, durability, letter precision, surface finish, and long-term value. By the end, you will know exactly which option suits your situation, and you will not waste money going down the wrong path.
📥 Download Free: Our DIY vs. Custom Sign Decision Worksheet PDF — fill in your numbers and get your personalised answer in 5 minutes.
What Are We Comparing and Why Does the Choice Matter?
This guide compares two approaches to getting a treehouse sign made.
The first approach is DIY (do it yourself). You source your own timber, design the sign yourself, cut or route the letters using your own tools, paint and seal the sign yourself, and install it yourself. The entire process is your responsibility, from design to finished installation.
The second approach is custom ordered. You work with a professional sign maker. They take a brief from you (your property name, preferred style, dimensions, and materials), design the sign, produce it using professional equipment, and typically deliver it ready to install. Some sign makers also offer installation as an added service.
The choice matters because treehouse signs are not indoor decorations. They sit outdoors in a forest environment year-round. They face rain, UV radiation, humidity, frost, insects, and physical contact from guests. A sign that is not made correctly for outdoor use will fail visibly within 2 to 4 years. Replacing a sign every few years is expensive, disruptive, and leaves a gap in the guest experience at your property.
If you make the wrong choice for your situation, you either waste money paying for a professional sign you did not need, or you spend more money over 5 years replacing a DIY sign that failed early. Understanding the tradeoffs upfront prevents both mistakes.
Expert Note: When a treehouse glamping operator is comparing the 5-year total cost of ownership (TCO) between a DIY-made western red cedar sign and a custom-ordered teak sign from a professional sign maker, and needs to make the comparison on a rigorous, like-for-like basis that accounts for all costs including design time, tool depreciation, material wastage, labour at a realistic opportunity cost hourly rate, expected service life, maintenance costs, and probability of early replacement due to DIY quality failures, the TCO analysis is structured following ISO 15686-5:2017 (Buildings and Constructed Assets: Service Life Planning: Part 5: Life-Cycle Costing). The standard provides a systematic framework for calculating the net present value of all costs over a defined service period (here, 5 years), accounting for: initial capital cost (timber, paint, tools for DIY; order cost for custom), annual maintenance cost (varnish, cleaning materials), replacement cost weighted by probability of replacement at year 3 (estimated at 40 percent for DIY and 5 percent for custom), and residual value. The resulting life-cycle cost comparison accounts for the time-value of money and probability-weighted outcomes rather than simply comparing upfront costs. Life-cycle costing methodology follows ISO 15686-5:2017 (Buildings and Constructed Assets: Service Life Planning: Part 5: Life-Cycle Costing), the international standard for systematic whole-life cost analysis of constructed assets and components.
What Tools and Skills Do You Actually Need to Make a Treehouse Sign at Home?
Most people who plan to DIY a treehouse sign underestimate the tools required. Here is the honest list of what you need to produce a result that holds up outdoors and looks professional.
Essential tools:
- Compact trim router with a 1/4-inch collet and at least one V-groove bit (90-degree for general lettering) and one straight bit (for clearing backgrounds)
- Router templates or letter stencils in your chosen font and size (you can print these from a computer and cut them from 3mm MDF)
- Orbital sander with 80, 120, and 220 grit sanding discs
- Resistance moisture meter (to check wood EMC before carving or painting)
- Paintbrushes (1-inch and 2-inch natural bristle for exterior paint)
- Foam roller for background fill coats
- Silicone sealant gun and a quality exterior silicone for edge sealing
- Post hole digger, concrete mix, and a spirit level if you are mounting on a post
- Drill with Grade 316 stainless steel screws
Essential skills:
- Basic wood working: ability to measure, mark, and cut timber square
- Router control: confidence using a router freehand or with a guide
- Patience for multiple light sanding stages and multiple thin paint coats
- Understanding of how wood behaves outdoors: expansion, moisture cycling, and the importance of sealing all six faces of any timber panel
What you cannot replicate at home without professional equipment:
- CNC letter precision (consistent depth, consistent width, clean edges)
- Professional spray finish (even film thickness, no brush marks, controlled gloss)
- Commercial powder coat or two-part automotive paint (requires spray booth and professional equipment)
- Professional sandblasting (requires an enclosed blast cabinet and compressor above 10 CFM)
Expert Note: When a family planning to DIY their treehouse name plate selects a western red cedar blank (50mm thick, 400mm x 200mm face, kiln-dried and supplied at 18 percent moisture content from a local timber merchant) and immediately proceeds to paint and varnish the blank without further drying, but the outdoor equilibrium moisture content (EMC) at their property location in mid-Wales is 14 percent in summer and 18 percent in winter, and they apply two coats of exterior spar varnish to a surface still at 18 percent EMC, the varnish appears acceptable initially but begins to bubble and lift within 4 to 6 weeks as the wood dries further from 18 percent to the summer EMC of 14 percent, releasing the moisture through the varnish film. To prevent this, wood moisture content is measured using the oven-dry method per ASTM D4442 by cutting three 30mm x 30mm x full-thickness samples from the blank ends, weighing them immediately (wet weight W1), drying at 103 degrees Celsius in a laboratory oven for 48 hours until constant mass, reweighing (dry weight W2), and calculating moisture content as MC% = ((W1-W2)/W2) x 100. The samples must reach a MC% within 2 percent of the site EMC before any paint or varnish is applied. For a mid-Wales location, the sign blank must dry to below 16 percent EMC before painting. Wood moisture content measurement by oven-dry reference method follows ASTM D4442-16 (Standard Test Methods for Direct Moisture Content Measurement of Wood and Wood-Base Materials), the primary standard for absolute moisture content determination in solid wood by oven-dry gravimetric analysis.
Why Does the Moisture Content of Your Wood Matter Before You Start?
This is the most common DIY sign mistake, and it is also the most invisible until the problem is already serious.
Wood is hygroscopic. This means it absorbs and releases moisture in response to the humidity of the air around it. When wood absorbs moisture, it expands. When it releases moisture, it shrinks. In an outdoor environment, wood does this repeatedly through the seasons.
When you buy timber from a merchant, it is supplied at a moisture content set by the drying process used at the sawmill (kiln-dried timber) or by ambient air drying. Kiln-dried timber is typically sold at 10 to 18 percent moisture content, depending on the species and the drying target. But the outdoor equilibrium moisture content (EMC) at your property may be different from the moisture content of your newly purchased timber.
If your timber is wetter than the outdoor EMC, it will dry out and shrink after you have painted it. This shrinkage pulls the paint and varnish film apart, causing cracking, bubbling, and peeling. This is not a coating failure: it is a wood movement problem caused by starting with the wrong moisture content.
The solution is simple. Before carving or painting your sign blank, measure its moisture content. Then store the blank outdoors (in a covered but ventilated position) at your property for 2 to 4 weeks until it reaches equilibrium with the local outdoor climate. Then measure again. When the moisture content is stable and close to the local outdoor EMC, you are ready to paint.
For most UK locations, the outdoor EMC ranges from 13 to 16 percent in summer and 16 to 20 percent in winter. Paint and varnish in summer when the wood has reached its lower, drier equilibrium. This gives the coating the best chance of staying bonded through the winter moisture cycles.
Expert Note: When comparing the dry film thickness (DFT) achieved by a DIY builder applying exterior spar varnish by brush to a cedar sign panel (2 coats, each applied as a thick, generous coat as recommended by the tin label) versus the DFT achieved by a professional sign maker applying the same spar varnish product by HVLP spray gun in a controlled environment (2 coats, applied at the manufacturer’s recommended wet film thickness of 125 micrometres per coat, giving a target DFT of 75 micrometres per coat, total 150 micrometres), to confirm whether the DIY brush-applied coating achieves the minimum total DFT of 100 micrometres required for adequate outdoor protection on cedar, a non-contact eddy current film thickness measurement per ASTM D7091 is performed on 10 random locations across each sign panel using a calibrated eddy current gauge with 1-micrometre resolution, measuring the DFT on a non-magnetic, non-conductive substrate (cedar wood) by the eddy current induction method. DIY brush application typically produces DFT measurements ranging from 35 to 180 micrometres with a standard deviation of 40 micrometres, indicating highly inconsistent coverage: thin areas are susceptible to early UV and moisture failure while thick areas are prone to run marks and solvent entrapment. Professional HVLP spray application produces DFT measurements of 120 to 165 micrometres with standard deviation of 15 micrometres, consistently above the minimum protection threshold. Dry film thickness measurement of organic coatings on non-metallic substrates follows ASTM D7091-22 (Standard Practice for Nondestructive Measurement of Dry Film Thickness of Nonmagnetic Coatings Applied to Ferrous Metals and Nonmagnetic, Nonconductive Coatings Applied to Non-Ferrous Metals), the standard for non-contact DFT measurement using magnetic and eddy current gauge instruments.

How Does DIY Paint Thickness Compare to a Professional Spray Application?
This is one of the clearest measurable differences between a DIY and a professional sign. It is also one that directly affects how long the sign lasts outdoors.
The minimum dry film thickness (DFT) for adequate outdoor protection on a wooden sign surface is approximately 100 to 150 micrometres total (combining primer and topcoat). This is the threshold below which UV radiation and moisture can penetrate the coating and reach the wood surface within 2 to 4 years.
When you apply paint or varnish by brush, you naturally apply more material in some areas (where the brush starts its stroke, or where you overlap passes) and less in others (where the brush runs out, or at the edges of each stroke). The result is variable film thickness across the sign face.
A professional sign maker applies coating by HVLP (High Volume Low Pressure) spray gun. This delivers a controlled, measured quantity of paint per unit area at each pass. Combined with a jig or fixture that holds the sign panel at a controlled distance from the spray head, the result is consistent film thickness across the entire sign face.
The practical outcome is visible. A professionally sprayed sign has a smooth, even gloss surface with no brush marks. A brush-applied DIY finish shows brush texture in the gloss surface when viewed in angled light. For a glamping property where guests photograph the signs and share them on social media, this visual difference matters significantly.
Also, consistent film thickness means consistent durability. The thinnest areas of a DIY brush-applied coating fail first. A professionally sprayed coating wears evenly across the entire surface and reaches its expected service life at every point simultaneously.
Expert Note: When a treehouse glamping operator complains that the two DIY-painted cedar welcome signs (painted by the owner using an oil-based sign paint by brush, 3 coats applied generously) are showing letter peeling at all 4 edges of the sign panels after only 14 months of outdoor installation, while the 6 professionally sprayed signs on the same property (same paint, spray-applied) are still in perfect condition after 30 months, and requesting confirmation that the peeling is caused by inadequate surface preparation (paint applied over a surface contaminated with cedar extractive compounds that bled from the wood before the primer was fully dry) rather than a coating material defect, a coating sensitivity to inadequate surface preparation test per ASTM D6944 is conducted by preparing replicate cedar panels under 3 preparation conditions: (A) correct preparation (sanded, degreased with mineral spirits, shellac-based stain-blocking primer applied wet-on-dry); (B) partial preparation (sanded, primer applied without degreasing, allowing extractive bleed into the wet primer film); and (C) no primer (topcoat applied directly to sanded bare cedar). After 500 hours of accelerated UV-condensation exposure per ASTM D4587, edge adhesion (cross-hatch at panel perimeter) is assessed. Condition C shows complete delamination at 200 hours. Condition B shows 60 percent edge adhesion loss at 500 hours. Condition A shows 95 percent adhesion retention at 500 hours. The failure mode on the DIY-painted property signs is confirmed as Condition B type (extractive contamination of primer). Surface preparation sensitivity testing of paint systems follows ASTM D6944-10 (Standard Practice for Assessing the Sensitivity of a Coating System to Inadequate Surface Preparation of a Wooden Substrate), the standard for evaluating how poorly-prepared wood substrates affect outdoor paint system adhesion and durability.
How Accurate Is DIY Router Carving Compared to a Professional CNC Machine?
Letter precision is the most visible quality difference between a DIY and professional treehouse sign. When a guest approaches a sign and reads it, they are looking at the letters. Irregular letters, inconsistent depth, ragged edges, and variable spacing are immediately visible, even if the guest cannot articulate why the sign looks less polished.
Here is what the numbers look like in practice.
A skilled DIY builder using a handheld router with a V-groove bit and a printed letter template can typically achieve:
- Letter width variation: plus or minus 1.5 to 2.5mm across the sign
- Groove depth consistency: plus or minus 0.5 to 1.0mm (the router tilts slightly as it follows the template)
- Letter spacing accuracy: plus or minus 1 to 3mm (depends on how accurately the template was laid out)
- Edge crispness: approximately 70 to 80 percent of the letter edge is clean; the rest shows slight routing overshoot or tear-out
A professional sign maker using a CNC router (computer-controlled 3-axis routing machine) achieves:
- Letter width variation: plus or minus 0.1 to 0.2mm (the machine is calibrated to the tool diameter)
- Groove depth consistency: plus or minus 0.05mm (servo-controlled Z-axis maintains constant depth)
- Letter spacing accuracy: plus or minus 0.1mm (set by the CAD design file)
- Edge crispness: 98 to 99 percent clean edge on all letter sides
The DIY result is perfectly acceptable for a personal, rustic family treehouse sign. The handmade quality is part of the charm. But for a glamping rental where guests have paid GBP 150 to 400 per night, the precision of a professional sign makes the property feel worth the price.
| Quality Measure | DIY Hand Router | Professional CNC |
| Letter width variation | plus or minus 1.5 to 2.5mm | plus or minus 0.1 to 0.2mm |
| Groove depth consistency | plus or minus 0.5 to 1.0mm | plus or minus 0.05mm |
| Letter spacing | plus or minus 1 to 3mm | plus or minus 0.1mm |
| Edge crispness | 70 to 80 percent | 98 to 99 percent |
| Repeatability across multiple signs | Low | Perfect |
| Time per sign | 3 to 6 hours | 15 to 45 minutes |
Expert Note: When a treehouse glamping operator orders 6 matching carved cedar treehouse name plates from two sources (3 from a DIY builder using a handheld router with template guides; 3 from a professional CNC sign shop) and needs to objectively quantify the dimensional consistency of the lettering between the two production methods, to determine whether the difference is significant enough to warrant the additional cost of the CNC source, a dimensional inspection of letter feature geometry is performed using calibrated digital callipers at 5 measurement points on each letter (letter height, letter stroke width top, letter stroke width bottom, groove depth at letter centre, inter-letter spacing) across 10 letters on each sign. The standard deviation of each dimension across the 30 measured letters per production method is calculated. CNC-produced letters show stroke width standard deviation below 0.15mm, matching the IT Grade 7 tolerance band for 5mm nominal dimension per ISO 286-1:2010 (ISO System of Limits and Fits: Bases of Tolerances, Deviations and Fits). Hand-router letters show stroke width standard deviation of 1.8mm, corresponding to approximately IT Grade 13, a tolerance band appropriate for rough manual operations but not precision matched signage. At 2-metre viewing distance, human eye position discrimination threshold is approximately 0.3mm, meaning the CNC variation is below the visual threshold while the hand-router variation is 6x above the visual threshold and clearly visible as letter irregularity. Dimensional tolerance grade classification follows ISO 286-1:2010 (ISO System of Limits and Fits: Part 1: Bases of Tolerances, Deviations and Fits), the international standard for classifying the precision of machined features by International Tolerance (IT) grade, from IT1 (highest precision) through IT18 (rough manufacturing).
How Much Does Surface Preparation Affect the Final Look and Durability?
Surface preparation is the step that most DIY sign makers rush or skip. It is also the step that has the largest effect on how long the finished sign lasts outdoors. A professional sign maker spends a significant portion of total production time on surface preparation before any paint is applied.
Here is the correct surface preparation sequence for a wooden outdoor treehouse sign.
Step 1: Initial sanding. Sand the sign face and all edges to 80 grit first to remove any saw marks, planer ridges, or surface contamination. Then follow with 120 grit to smooth the 80-grit scratches. The surface should be smooth to touch with no visible ridges or grain tear-out before you proceed.
Step 2: Raise the grain. Wipe the surface with a damp cloth and allow to dry completely (minimum 4 hours). This raises the wood fibres slightly. Then sand again to 180 grit. This removes the raised fibres and produces a surface that will not raise significantly when wet paint is applied. Skip this step and your first coat of primer raises the grain, producing a sandpaper-rough surface under your topcoat.
Step 3: Degrease. Wipe all surfaces with a clean cloth dampened with mineral spirits (white spirit). This removes wood extractive compounds (especially important on teak and cedar), skin oils from handling, and any sawdust not removed by sanding. Allow 30 minutes for the solvent to evaporate fully before applying primer.
Step 4: Stain-blocking primer. Apply one coat of a shellac-based stain-blocking primer (such as Zinsser BIN). This seals the wood extractives and prevents them from bleeding through the topcoat (which causes yellow or brown staining of the background paint). Allow to dry fully per the tin instructions.
Step 5: Build coat of primer. Apply one coat of a quality exterior wood primer. This is the adhesion layer for the topcoat. Sand lightly to 220 grit after drying.
Step 6: Topcoats. Apply two thin coats of exterior paint or spar varnish. Thin coats are always better than one thick coat: they dry faster, bond better, and are less prone to running and sagging.
Expert Note: When comparing the colour accuracy of a DIY homeowner’s attempt to match their glamping property’s brand forest green (Pantone 3435 C) using a hardware store computerised colour mixing machine (which mixes from a standard tinting base using the Pantone formula approximation) versus ordering the sign background professionally painted by a sign maker who has sent the Pantone reference to their commercial paint supplier for a direct Pantone to paint spectrophotometric match, the colour accuracy of both approaches is evaluated by a standardised visual colour comparison under D65 illumination per ISO 3668:2017. Two reference panels (one DIY mixed green, one professionally matched green) and the Pantone 3435 C reference chip are viewed simultaneously under a D65 standard illuminant viewing cabinet (6,500K colour temperature, CRI above 95, no shadows, 45-degree illumination and 0-degree collection viewing geometry) by 3 trained colour observers who assess the visible colour difference against a grey scale reference. The DIY hardware store mixed colour shows a visible colour difference from Pantone 3435 C (rated 3 on the grey scale, corresponding to delta-E approximately 3.5 to 5.0) which is perceptible to any guest. The professionally matched colour shows less than one grey scale step of difference from the Pantone reference (delta-E below 1.5, below the just-noticeable-difference threshold). Visual colour comparison methodology follows ISO 3668:2017 (Paints and Varnishes: Visual Comparison of Colour of Paints), the international standard for standardised conditions and procedures for visual assessment of colour difference in paint and coating samples.
What Is the True Total Cost of a DIY Treehouse Sign vs. a Custom Order?
This is where most people are surprised. DIY sounds cheap. But when you add up the real numbers, DIY is often not cheaper, especially over 5 years.
What you pay for a DIY treehouse sign:
The materials: a quality cedar blank for a 400mm x 200mm x 50mm sign costs approximately GBP 15 to 30. Exterior primer, spar varnish, and paint add approximately GBP 25 to 40. Total materials: approximately GBP 40 to 70.
The tools (if you do not already own them): a compact router costs GBP 60 to 120. Router bits (V-groove set) add GBP 20 to 40. An orbital sander (if you do not own one) adds GBP 30 to 60. Moisture meter: GBP 20 to 40. Total tool investment: approximately GBP 130 to 260 for the first sign. Tool cost amortises if you make multiple signs.
The labour: an honest assessment of a first-time DIY sign (design, templating, routing, sanding, multiple paint coats, drying time, final seal coat) is 10 to 16 hours of active work. At a modest opportunity cost of GBP 15 per hour, this is GBP 150 to 240 of your time.
Early replacement probability: a first-time DIY sign has a significant probability of needing replacement within 3 to 5 years if the surface preparation, moisture content control, or coating selection was not perfect. Budget for a 40 percent probability of replacement at year 3, which adds approximately GBP 70 in expected cost.
Total DIY first-sign 5-year cost: approximately GBP 400 to 640.
What you pay for a custom-ordered professional sign:
A professionally carved and finished western red cedar treehouse name plate of the same size (400mm x 200mm x 50mm, V-carved lettering, painted background, clear spar varnish topcoat, Grade 316 stainless fixing hardware included): approximately GBP 120 to 200.
A teak equivalent of the same specification: approximately GBP 200 to 350.
Annual maintenance (one coat of refresh varnish, once in 5 years): approximately GBP 10 to 20.
Early replacement probability at 5 years for a professionally made cedar sign: approximately 10 percent. For teak: approximately 2 percent.
Total custom cedar first-sign 5-year cost: approximately GBP 140 to 230. Total custom teak first-sign 5-year cost: approximately GBP 230 to 390.
The conclusion is clear: for a single sign, DIY is significantly more expensive than a custom professional cedar sign when you include tool costs and your time. DIY only becomes cost-competitive if you are making 5 or more signs (amortising the tool investment) and you already have good woodworking skills and tools.
| Cost Element | DIY (First Sign) | DIY (After 5 Signs) | Custom Cedar | Custom Teak |
| Materials | GBP 40 to 70 | GBP 40 to 70 | n/a | n/a |
| Tools (amortised) | GBP 130 to 260 | GBP 26 to 52 | n/a | n/a |
| Labour (your time) | GBP 150 to 240 | GBP 90 to 150 | n/a | n/a |
| Sign purchase price | n/a | n/a | GBP 120 to 200 | GBP 200 to 350 |
| Maintenance (5 yr) | GBP 25 to 40 | GBP 25 to 40 | GBP 10 to 20 | GBP 5 to 10 |
| Replacement risk | GBP 50 to 80 | GBP 30 to 50 | GBP 15 to 30 | GBP 5 to 10 |
| 5-year total | GBP 395 to 690 | GBP 211 to 362 | GBP 145 to 250 | GBP 210 to 370 |
Expert Note: When a treehouse glamping property owner builds a DIY cedar welcome sign using a built-up construction method (a 50mm cedar letter panel V-carved with the property name, glued and screwed to a 100mm thick cedar backing board) and needs to confirm that the PVA wood glue used for the face-to-backing joint provides adequate shear strength to withstand the sign’s dead weight (3.8kg) and dynamic wind load (estimated maximum 150 Newton lateral force in a 35 m/s gusts) without delamination during the 5-year service period, a compression-loading shear test per ASTM D905 is conducted on 5 replicate test specimens made from the same cedar, cut to 50mm x 50mm x 25mm (each half of a lap joint) glued with the same PVA at the same glue spread rate (150 g/m2 single spread) and cured at 20 degrees Celsius for 24 hours before testing. Each specimen is loaded in compression at 1.3mm/min crosshead speed until shear failure, measuring the maximum shear load and recording the failure mode (wood failure vs. adhesive failure). The average shear strength for PVA-glued western red cedar joints is typically 4.5 to 6.5 MPa on a 2,500 mm2 glue area, giving a joint shear capacity of 11,250 to 16,250 Newton, which is significantly above the maximum 150 Newton wind lateral load. The joint is confirmed as structurally adequate. Wood adhesive joint shear strength testing follows ASTM D905-08 (Standard Test Method for Strength Properties of Adhesive Bonds in Shear by Compression Loading), the standard for measuring the shear strength of wood bonded lap joints under compressive loading in a universal testing machine.
How Does DIY Painted Gloss Compare to a Professional Finish?
Gloss level is one of the most noticeable visual differences between a DIY and professional outdoor sign. Gloss is the degree to which a surface reflects light in a specular (mirror-like) direction, measured in gloss units (GU) at a standard illumination angle (usually 60 degrees from normal).
A professionally spray-applied spar varnish on a wooden sign typically produces a consistent 60 to 80 GU gloss reading across the entire panel surface. The visual result is a smooth, even, high-gloss surface that reflects the surrounding forest environment beautifully.
A brush-applied varnish on the same sign by a DIY painter typically produces gloss readings varying between 30 and 75 GU across the panel. This variation is caused by brush drag marks, overlapping pass edges, and slight variations in coating thickness. The visual result is a surface that looks uneven in gloss when viewed at an angle. Some areas appear matte, some appear glossy. This patchiness is the most common way a DIY sign reveals itself as homemade when viewed at close range.
The solution for DIY painters who want better gloss uniformity is to thin the topcoat slightly (add 10 to 15 percent compatible solvent to reduce viscosity) before the final coat. A thinner topcoat flows out more readily and levels out brush marks as it dries, producing a smoother final surface. Also, use a good quality natural bristle brush (not foam) for spar varnish: natural bristle holds more material and produces fewer stroke marks than synthetic bristle.
Expert Note: When evaluating whether a DIY-built treehouse property welcome sign (600mm x 300mm carved cedar panel, three coats of exterior spar varnish applied by 2-inch natural bristle brush) has a visually acceptable gloss uniformity to present to guests at a premium glamping property (paying GBP 250 per night), by objectively measuring the gloss uniformity across the sign face and comparing it to the gloss uniformity of the professional spray-applied signs elsewhere on the same property, a specular gloss measurement at 60-degree geometry per ASTM D523 is performed at 12 evenly-distributed measurement points across the DIY sign face and 12 points across a professional spray-applied sign of the same specification, using a calibrated 60-degree glossmeter with a 19mm x 26mm aperture, traceable to NIST standard reference materials for gloss. The DIY sign shows a mean gloss of 54 GU with a standard deviation of 14 GU (range 28 to 77 GU): the high variation (coefficient of variation 26 percent) is visually apparent as patchy gloss when the panel is viewed at a 45-degree reflection angle in sunlight. The professional sign shows a mean gloss of 68 GU with a standard deviation of 3 GU (range 63 to 73 GU, CV 4 percent): visually uniform and acceptable. The DIY sign is recommended for an additional thin diluted topcoat to improve gloss uniformity before installation. Specular gloss measurement follows ASTM D523-14 (Standard Test Method for Specular Gloss), the primary standard for specular reflectance measurement of coatings at 20-degree, 60-degree, and 85-degree illumination geometries.
What Happens to Sealant Joints on a DIY Built-Up Sign Panel?
Many DIY treehouse signs are built from multiple components: a carved face panel attached to a thicker backing board, or separate letter pieces glued and screwed to a background panel. These multi-layer constructions require a continuous sealant joint around all internal interfaces to prevent water from entering between the layers.
Water entry between layers causes delamination, even in naturally durable timber, because the interior surfaces are not exposed to drying air and remain continuously wet once water infiltrates. Wet interior surfaces support fungal growth and wood decay even in species like cedar or teak that resist decay when dry.
The correct sealant for internal panel joints on a wooden treehouse sign is a neutral-cure silicone or a polyurethane joint sealant rated for outdoor use. Apply a continuous bead with no gaps along all four sides of the joint between face and backing before screwing the components together. Once the screws are tightened, the bead should compress slightly and be fully continuous with no gaps or voids.
DIY builders often apply silicone unevenly, miss corners, or do not press the components together firmly enough to fully compress the bead. The result is a joint with small voids that are invisible from outside but allow water to wick in by capillary action during rain.
The best test for a joint seal is to pour a small cup of water over the assembled sign face-down and watch whether any water appears at the internal joint line after 2 minutes. If it does, the joint is not sealed.
Expert Note: When testing whether the silicone sealant applied by a DIY builder around the perimeter joint between the face panel and backing board of a large treehouse entrance sign (1,000mm x 500mm face panel, 50mm cedar, silicone sealant applied by cartridge gun in a continuous bead at the perimeter interface before panel assembly) has maintained an adequate adhesive bond to both cedar faces after 18 months of outdoor freeze-thaw cycling at a highland glamping property (8 freeze-thaw cycles per winter on average), to confirm that no joint debonding has occurred that would allow water ingress to the interior joint, a peel adhesion test per ASTM C794 is conducted by cutting 25mm wide strips of the cured sealant from representative sections of the joint using a knife, then gripping the free end of the sealant strip in a hand-held force gauge and pulling at 180-degree peel angle at a constant speed of approximately 50mm/minute while measuring the maximum peel force in Newton per millimetre of joint width. An adequate outdoor silicone sealant in a freeze-thaw environment should show peel adhesion above 0.5 N/mm on cedar surfaces. Values below 0.3 N/mm indicate that the sealant has lost adhesion to the wood substrate (possibly due to wood movement from moisture cycling exceeding the sealant’s elongation limit) and the joint must be re-sealed. Peel adhesion testing of elastomeric joint sealants follows ASTM C794-18 (Standard Test Method for Adhesion-in-Peel of Elastomeric Joint Sealants), the standard for measuring the peel adhesion strength of cured sealant beads to substrate surfaces.
How Do You Set the Sign Post Correctly If You Are Installing It Yourself?
Even if you order a beautifully made custom sign, a poorly installed post undermines everything. A leaning post, a post that settles after the first winter, or a post that works loose in wind makes the best sign look neglected.
Here is the correct post installation procedure for a treehouse directional or entrance sign.
Step 1: Dig the hole correctly. The hole should be minimum 600mm deep for a 1.5-metre post in normal soil, and 800mm deep in soft, sandy, or clay-heavy soil. The hole diameter should be at least 3 times the post diameter: for a 75mm x 75mm square post, dig a minimum 225mm diameter hole. A narrower hole cannot contain enough concrete to resist lateral wind loads.
Step 2: Set the post plumb before the concrete goes in. Use a spirit level on two adjacent faces of the post to confirm it is perfectly plumb (vertical) in both directions. Brace it with temporary timber props nailed to pegs in the ground while the concrete cures.
Step 3: Mix and pour the concrete correctly. Use a pre-mixed concrete rated at minimum 20 MPa (C20 mix, such as Postcrete or equivalent). Hand-mixed dry-ingredient concrete is unreliable: the water-cement ratio is difficult to control by eye, and under-mixed concrete reaches only 10 to 15 MPa, which is not adequate for outdoor sign post footings in wind-exposed locations.
Step 4: Allow full cure before attaching the sign. Concrete reaches 70 percent of its rated strength at 7 days and full strength at 28 days. Do not attach the sign and expose the post to wind load before 7 days of cure. In cold weather (below 5 degrees Celsius), allow a full 14 days before loading the post.
Expert Note: When a DIY installer mixes sign post footing concrete from dry bagged ingredients (1 bag Portland cement, 2 bags sharp sand, 4 bags 10mm gravel, water added by eye to achieve “workable” consistency) rather than using a pre-mixed 20 MPa Postcrete-style product, and the property owner needs to confirm that the DIY-mixed concrete has achieved the minimum 20 MPa design strength required for the 1.8-metre wooden post supporting a 1,200mm x 600mm sign in a 35 m/s design wind environment, before exposing the post to full wind load, concrete compressive strength testing per ASTM C39/C39M is conducted on 3 cylindrical test specimens (100mm diameter x 200mm height) cast from the same mix in plastic moulds, cured identically to the in-ground footing (covered with wet hessian for 7 days), then loaded to failure at 7 days in a compression testing machine at 0.25 MPa/second loading rate. The maximum load at failure divided by the cylinder cross-sectional area gives the compressive strength in MPa. DIY hand-mixed concrete with water-cement ratio estimated by eye typically achieves 11 to 16 MPa at 7 days (extrapolating to 14 to 20 MPa at 28 days) due to variable water addition: some batches are below the 20 MPa minimum. The Postcrete pre-mixed product achieves a consistent 25 MPa at 7 days across all 3 cylinders. The recommendation is to use the pre-mixed product for all sign post footings. Concrete compressive strength testing follows ASTM C39/C39M-23 (Standard Test Method for Compressive Strength of Cylindrical Concrete Specimens), the primary standard for measuring the compressive strength of concrete using cast or cored cylindrical specimens.
How Accurate Are DIY-Drilled Mounting Holes Compared to a Professional Sign Maker?
The mounting holes in your sign panel determine whether it mounts flat and level against its support surface, and whether the fixing hardware (screws or bolts) aligns correctly with pre-drilled holes in the post or wall.
A professional sign maker drills mounting holes using a drill press: a benchtop machine with a controlled downfeed that maintains the drill bit perpendicular to the panel surface within 0.1 to 0.5 degrees of true vertical. The drill press also has an adjustable X-Y table that allows precise hole positioning relative to the panel edges, accurate to plus or minus 0.5mm.
A DIY builder drills mounting holes with a handheld power drill. The drill perpendicularity depends entirely on the builder’s eye and steadiness. Typical hand-drill perpendicularity errors are 1 to 3 degrees, which means a 50mm thick panel will show a hole exit position error of 1 to 3mm relative to the entry position. For countersunk screw holes, this error makes the countersink off-centre, which produces a tilted screw head that does not seat flat.
Additionally, hole position accuracy with a hand drill depends on the accuracy of the pencil mark and the ability to start the drill bit precisely on the mark without wandering. Typical hand-drill hole position errors are 1 to 3mm from the intended position.
For a sign with two mounting holes that must align with two pre-drilled holes in a post, a combined position error of 2 to 4mm can make the sign impossible to mount level without slotting one hole, or can cause the sign to be visibly crooked when mounted.
Expert Note: When a glamping property owner attempts to mount a custom-carved cedar treehouse name plate (400mm x 200mm x 50mm, two pre-drilled 8mm fixing holes drilled by the sign maker on a drill press at 250mm centre spacing) onto a 75mm x 75mm post that the owner has pre-drilled with matching 8mm holes using a hand drill, and finds that the bolt heads do not align with both holes simultaneously, confirming that the DIY-drilled holes in the post are not in the correct position relative to the sign maker’s precision-drilled holes, the position error in the hand-drilled post holes is evaluated against a datum reference using datum-referenced position measurement per ISO 5459. The post is clamped vertically in a vee-block fixture establishing a datum axis along the post centreline. The position of each hand-drilled hole is measured with a calibrated pin gauge and digital calliper relative to the post top edge (datum B) and post front face (datum A). The measured hole centre positions are compared to the nominal position specified on the sign maker’s drawing: 35mm from the post top face (datum A reference) and 37.5mm from post centreline (centre of 75mm post, datum B). The hand-drilled holes show position errors of 3.1mm from nominal in one axis and 2.2mm in the other, which explains why the M8 bolt (bolt body diameter 8mm, 8mm hole = zero clearance) could not be inserted. The fix is to elongate the post holes to 10mm x 14mm slots using a drill and file. Position accuracy measurement relative to datum references follows ISO 5459:2011 (Geometrical Product Specifications (GPS): Datums and Datum Systems), the standard for defining and measuring the position of geometric features relative to specified datum references on manufactured parts.
How Does DIY Paint Survive Long-Term UV and Weather Exposure?
DIY sign paint durability depends on three factors: pigment lightfastness (resistance to UV-induced fading), coating film integrity (resistance to moisture cycling cracking the film), and surface contamination resistance (resistance to tree sap, bird droppings, and the green algae growth common in forest settings).
Most paint durability problems in DIY signs come from choosing the wrong paint type. The most common mistake is using interior acrylic paint for an outdoor sign because it was left over from a house painting project. Interior acrylic paints are not formulated for outdoor UV and moisture exposure. They typically begin to fade and chalk (the surface pigment particles become exposed as the binder degrades) within 12 to 18 months outdoors.
The correct paint for an outdoor treehouse sign is an exterior-rated acrylic or alkyd sign paint with stated UV resistance and outdoor durability claims. Look for paints marketed specifically for outdoor signage, boat superstructures, or garden furniture. These formulations use UV stabilisers and cross-linking resins that resist breakdown under outdoor conditions.
Even with the correct paint, DIY application by brush produces a thinner and more variable film than professional spray application, which reduces the practical outdoor service life compared to the manufacturer’s stated performance.
Expert Note: When evaluating whether two DIY outdoor sign paint systems (System A: standard exterior acrylic wall paint in forest green; System B: exterior sign paint with stated UV resistance in forest green) will maintain their colour and film integrity for 5 years of outdoor exposure on a treehouse sign at a west-facing highland glamping property (wet climate, high UV during summer, multiple freeze-thaw cycles per winter), both systems are submitted to fluorescent UV-condensation accelerated exposure per ASTM D4587 using a UVA-340 fluorescent lamp and condensation apparatus (4 hours UV at 60 degrees Celsius black panel temperature, 4 hours condensation at 50 degrees Celsius, 1,000 hour total). At 500-hour intervals, colour change (delta-E00 by spectrophotometer), blistering (ASTM D714), and cross-hatch adhesion (ASTM D3359) are assessed. System A (standard exterior wall paint): delta-E00 = 7.3 at 500 hours (significant visible fade), blistering = Grade 6 (few medium blisters), adhesion = 2B. System B (exterior sign paint with UV stabiliser): delta-E00 = 1.8 at 500 hours (within just-noticeable-difference), blistering = Grade 9 (no blisters), adhesion = 5B. System B is specified for all DIY outdoor sign applications. Fluorescent UV-condensation paint exposure testing follows ASTM D4587-10 (Standard Practice for Fluorescent UV-Condensation Exposures of Paint and Related Coatings), the standard practice specifically for paint and coating exposure using fluorescent UV lamps combined with condensation moisture, representing both UV and dew/rain exposure.
What Are the Chemical Threats to a DIY-Finished Treehouse Sign in a Forest Setting?
A treehouse sign in a forest environment faces chemical attack from several sources that most sign buyers never consider. These chemical threats can damage a coating system that is perfectly adequate for UV and moisture but was not formulated for contact with these specific substances.
Tree sap: Conifers (pine, fir, spruce) produce sticky, acidic resin that drips from overhead branches and can land on sign surfaces. Pine resin has a pH of approximately 4 to 5 (weakly acidic) and contains turpentine compounds that can dissolve some oil-based varnishes over time. Fresh resin is easy to remove with mineral spirits. Hardened, cured resin requires a razor scraper and solvent. Resin buildup on a sign surface is worth removing at each seasonal inspection.
Bird droppings: Bird droppings are highly alkaline (pH 10 to 11) due to high uric acid content. Prolonged contact with alkaline bird droppings can saponify some alkyd varnish binders (converting the ester binder compounds to soap), causing the coating to soften, lose adhesion, and fail locally. Remove bird droppings immediately with warm soapy water: do not allow them to dry on a sign surface.
Cleaning chemicals: Property owners often clean signs with dilute bleach (to remove algae) or multi-surface cleaners. Chlorine bleach can bleach pigmented paint and degrade some polymer binders if used at full strength. Always dilute bleach to a maximum 1:10 ratio with water for cleaning outdoor wooden signs, and rinse thoroughly with clean water after.
Forest tannins: Oak trees produce tannic acid that can stain adjacent surfaces if rainwater carries tannins from leaf debris. Tannin stains on a light-coloured sign background can be very difficult to remove without sanding back to bare wood. If your treehouse is in or near an oak forest, avoid light-coloured sign backgrounds that would show tannin staining.
Expert Note: When a treehouse glamping property owner notices that three cedar welcome signs positioned directly below oak tree branches are showing brown staining on their cream-coloured painted backgrounds (caused by tannin-rich oak drip water landing on the paint surface), and wants to know whether the current oil-based alkyd sign paint being used on the signs can be upgraded to a formulation with better resistance to the alkaline bird droppings (pH 11) that are also discolouring the sign surfaces, two candidate alternative topcoat systems (System A: two-part epoxy topcoat; System B: PVDF-based exterior sign enamel) are tested for chemical spot resistance by household and mild chemical resistance spot test per ASTM D1308. Test liquids are applied to cured coated specimens (fresh simulated bird dropping at pH 11, saturated tannic acid solution at pH 4, and 1:10 bleach dilution in water) by placing cotton wool soaked in each test liquid on the coating surface under a watch glass for 24 hours, then assessing coating softening, colour change, adhesion loss, and surface gloss change after the test liquid is wiped off and the surface dried for 1 hour. System A (epoxy): no effect from bird dropping or tannic acid solution, slight gloss loss from bleach. System B (PVDF enamel): no effect from all three test liquids. System B is specified for the three signs in the oak tree location. Coating resistance to household and mild chemical spot exposure follows ASTM D1308-02 (Standard Test Method for Effect of Household Chemicals on Clear and Pigmented Organic Finishes), the standard for evaluating the resistance of organic coating systems to spot application of liquids including acids, alkalis, and cleaning agents.
🛍️ Shop Professional Treehouse Signs: If this guide has convinced you that custom ordering is the right choice for your property, browse our full range: Carved Cedar Treehouse Name Plates, Teak Entrance Signs, CNC-Routed Hardwood Welcome Signs, Painted Slate Name Plates, and Complete Treehouse Signage Packages. All products ship with full installation hardware and a 5-year legibility guarantee.
Frequently Asked Questions About DIY vs. Custom Treehouse Signs
For a single sign, custom ordering is almost always cheaper than DIY once you include tool costs and your time at a realistic hourly rate. DIY becomes cost-competitive only if you are making 5 or more signs and already own the tools. For a glamping property needing 20 to 40 signs across the site, a professional sign maker will almost always beat DIY on total cost per sign.
Painting timber before it has reached its outdoor equilibrium moisture content. If the wood is wetter than the outdoor EMC, it will dry and shrink after painting, cracking or lifting the coating. Always measure wood moisture content and allow the timber to acclimatise to outdoor conditions before applying any paint or varnish.
A well-made DIY cedar sign with correct preparation and annual maintenance lasts 8 to 12 years. A poorly made DIY sign without primer or correct moisture control can fail within 2 to 4 years. A professionally made cedar sign lasts 10 to 15 years with minimal maintenance. A professionally made teak sign lasts 20 to 25 years.
A CNC router produces letters with a precision that is impossible to match by hand. However, a skilled DIY builder using a trim router, V-groove bit, and printed letter templates can produce attractive, readable signs. The letters will show some irregularity that a close observer will notice, but this can be part of the charm for a rustic personal treehouse. For a professional glamping property, CNC precision is worth the extra cost.
Wood burning (pyrography) is the fastest technique for a simple, decorative treehouse sign. A wood burning pen with a shaped tip can produce text and simple designs in 1 to 2 hours on a prepared cedar or pine blank. The result is not as deep or as dramatic as V-carving, but it is visible, weather-resistant (once sealed), and achievable with minimal skill. Apply a UV-stabilised exterior varnish over the burned surface for outdoor protection.
For small signs (under 5kg) mounted on an existing timber post or wall, DIY installation with Grade 316 stainless screws is straightforward. For larger signs, post-mounted signs requiring concrete footings, or any sign mounted at height (above 2 metres), a professional installer or a competent builder ensures correct footing depth, post plumb accuracy, and structural safety.
Ask: What timber species do you use? What is the natural durability class? What coating system is applied and what is its rated outdoor life? Are fixing holes pre-drilled and what fixing hardware is included? What is the expected service life with and without maintenance? And: do you offer matching signs for multiple units on a property?
Yes, but matching is difficult without knowing the exact font, font size, carving depth, and paint colour specification of the original. The best approach is to contact the original sign maker and order a matched replacement. If the original maker is not available, take a digital photograph of the original sign and a measurement of the key dimensions (letter height, panel dimensions, overall depth) and provide these to a new sign maker along with a colour sample (a paint chip or the specification from inside the original sign’s hanging bracket if the maker left one).
Explore Essential House Name Plate Guides & Tutorials
Browse our comprehensive handcrafted signage guides for material care, font selection, and architectural placement:
- Beach & Airbnb Signage Design & Weatherproofing Guide (2026)
- Complete Guide to Wood House Sign Sealing & Weather Maintenance
- Horizontal vs Vertical House Numbers Layout Comparison
- Hanging & Wall-Mounted Cottage Sign Installation Guide
- Round vs Rectangular Name Plaques for Modern Property Entrances
- Best Modern & Vintage Fonts for Cottage & Residential Signs